The twinkling magic of Christmas lights transforming an outdoor tree into a festive beacon is a cherished tradition. It’s a sight that instantly evokes holiday cheer, welcoming guests and neighbors with a warm, inviting glow.
But the thought of tackling this sparkling endeavor can sometimes feel a bit daunting. How do you get those lights to look professionally done, without ending up with a tangled mess or uneven illumination? Fear not! This guide is here to demystify the process, breaking down every step to ensure your outdoor tree shines brilliantly this holiday season.
How to Wrap an Outdoor Tree in Christmas Lights: A Step-by-Step Guide
Transforming your outdoor tree into a dazzling holiday spectacle is more achievable than you might think. With a little planning and the right approach, you can create a breathtaking display that will be the envy of the neighborhood. This guide will walk you through everything from choosing the right lights to the best techniques for wrapping your tree, ensuring a beautiful and safe installation.
1. Planning Your Festive Illumination
Before you even think about plugging anything in, thoughtful planning is your secret weapon for a successful Christmas light installation. Rushing this stage can lead to frustration, wasted time, and potentially a less-than-stellar result.
Choosing the Right Lights
The type of lights you select will significantly impact the overall look and feel of your display. Consider these factors:
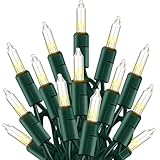
- LED vs. Incandescent: LEDs are the clear winner for outdoor use. They are significantly more energy-efficient, meaning lower electricity bills. They are also much more durable, resistant to breakage, and generate less heat, making them safer. While they might have a higher upfront cost, their longevity and energy savings make them the economical choice in the long run.
- Bulb Size and Shape: From tiny micro-LEDs to larger C7 or C9 bulbs, the size and shape of the bulbs create different aesthetics. For a classic, nostalgic look, larger bulbs work well. For a more delicate, shimmering effect, smaller bulbs are ideal.
- Color Options: White lights offer a timeless elegance, available in warm white (yellowish hue) or cool white (bluish hue). Multicolor lights bring a playful, traditional Christmas vibe. You can also opt for single colors to match a specific theme or your home’s exterior.
- String Length and Bulb Count: Consider the height and circumference of your tree. You’ll need enough string length to cover the entire tree without excessive gaps or overlapping. A general rule of thumb is to use about 100 lights per vertical foot of tree, but this can vary depending on your desired density.
- Outdoor Rating: Crucially, ensure your lights are specifically rated for outdoor use. Look for packaging that indicates “outdoor use,” “weather-resistant,” or “durable for all seasons.” Indoor lights are not designed to withstand the elements and can be a fire hazard.
Calculating the Number of Lights Needed
This is where your planning pays off. Accurately estimating the number of lights prevents last-minute runs to the store or insufficient coverage.
- Measure Tree Circumference: At the base of the tree, measure the circumference. Then, measure the circumference at various points up the tree (e.g., every 5-10 feet).
- Estimate Vertical Feet: Determine the total height of the tree you intend to light.
- Determine Desired Density: Do you want a sparse, elegant glow or a dense, dazzling cascade? This will influence how many lights you need per foot. For a standard, full look, aim for 100-150 lights per vertical foot. For a more dramatic effect, increase this number.
- Calculate Total String Length: Multiply the total vertical feet by your desired lights-per-foot density. Then, divide by the number of lights per string to get an idea of how many strings you’ll need. For example, a 10-foot tree with 100 lights per foot needs 1000 lights. If your strings have 50 lights each, you’ll need 20 strings.
- Consider Trunk and Branches: Don’t forget to factor in wrapping the trunk or thicker branches for added depth.
It’s always better to have a little extra than not enough. You can always return unopened boxes if you overestimate.
Gathering Your Tools and Supplies
Having the right tools makes the job much smoother and safer. Ensure you have:
- Christmas Lights: Your chosen outdoor-rated lights.
- Extension Cords: Heavy-duty, outdoor-rated extension cords. Ensure they are long enough to reach an outdoor outlet without being stretched taut.
- Light Clips or Zip Ties: These are essential for securing the light strings to the tree branches without damaging them. There are specialized Christmas light clips available, or sturdy zip ties can work.
- Ladder: A sturdy, stable ladder is crucial for reaching higher branches. Ensure it’s placed on level ground and used safely.
- Gloves: To protect your hands from sap and rough bark.
- Duct Tape or Electrical Tape: For securing connections or temporarily fixing loose wires.
- Timer: An outdoor-rated timer to automatically turn your lights on and off, saving energy and adding convenience.
2. Preparing Your Tree for Illumination
A well-prepared tree makes the lighting process significantly easier and more effective. (See Also: How Much Is a Noble Fir Christmas Tree? Your Guide)
Trimming and Shaping
Before you start wrapping, take a moment to trim any dead or unruly branches. This not only makes the tree look tidier but also provides a cleaner canvas for your lights. Ensure the branches are accessible and relatively uniform in their outward reach. Remove any low-hanging branches that might obstruct pathways or be a tripping hazard.
Checking for Power Sources
Identify your outdoor power outlets. Ensure they are GFCI (Ground Fault Circuit Interrupter) protected, which is a safety requirement for outdoor electrical connections. If you don’t have readily accessible outlets, consider hiring an electrician to install one safely. Plan the route for your extension cords, ensuring they are not a tripping hazard and are protected from moisture.
3. The Art of Wrapping: Techniques for a Stunning Display
This is where your planning and preparation come to life. There are several effective methods for wrapping an outdoor tree, each offering a slightly different aesthetic.
Method 1: The Vertical Wrap (the “icicle” Effect)
This technique creates a beautiful, cascading effect, reminiscent of icicles. It’s particularly effective on trees with a more conical shape.
- Start at the Top: Begin by securing the end of your light string to the very top of the tree, near the leader branch. Use a clip or zip tie to hold it firmly.
- Drape Downwards: Gently drape the light string straight down along a branch, letting it hang naturally. Secure it to the branch at intervals with clips or zip ties.
- Work Around the Tree: Continue this process, working your way around the tree. Imagine vertical lines of lights descending from the top. Space these vertical runs evenly to create a balanced look.
- Connect Strings: As you reach the bottom of a string, connect the next one. Ensure connections are snug and weather-resistant.
- Repeat: Continue until the entire tree is covered with these vertical drapes.
Method 2: The Horizontal Wrap (the “spiral” Effect)
This is the most common and straightforward method, creating a classic, layered look.
- Start at the Base: Begin by securing the end of your light string near the base of the tree trunk.
- Wrap Around the Trunk: Tightly wrap the first few feet of lights around the trunk itself, securing them as you go. This provides a solid anchor point.
- Spiral Upwards: Begin spiraling the light string upwards around the tree. As you move up, extend the string outwards to encompass the branches.
- Secure to Branches: Use clips or zip ties to attach the light string to individual branches. This helps distribute the weight and keeps the lights from sagging. Aim to wrap each major branch.
- Maintain Even Tension: Try to keep the tension on the light string consistent. Avoid pulling too tight, which can damage the wires or branches, and avoid letting it sag too loosely.
- Overlap Slightly: Overlap each layer of lights slightly with the previous one to ensure no gaps.
- Connect Strings: Connect subsequent strings as you work your way up the tree.
Method 3: Branch by Branch (the “detailed” Effect)
This method is more time-consuming but offers the most control and a very intricate, full appearance.
- Start at the Trunk: Begin by securing the end of your light string at the trunk.
- Work Outwards: Take a section of lights and wrap them around a single branch, working your way from the trunk to the tip.
- Secure Each Branch: Use clips or zip ties to secure the lights to the branch.
- Move to the Next Branch: Once a branch is fully lit, move to the next adjacent branch, continuing the process.
- Layering is Key: As you move up the tree, layer the branches so that the lights on lower branches are slightly visible beneath the lights on higher ones. This creates depth.
- Connect Strings: Connect new strings as needed.
4. Securing Your Lights Safely and Effectively
Properly securing your lights is paramount for both aesthetics and safety. Damaged wires or falling lights can be dangerous.
Using Light Clips and Zip Ties
Light Clips: These are designed to grip branches without causing damage. They come in various shapes and sizes, some designed for specific light bulb types. They allow for easy adjustment and removal. (See Also: How to Burn a Large Tree Stump Safely and Effectively)
Zip Ties: For a more permanent or secure hold, zip ties are effective. However, be careful not to overtighten them, as this can cut into the bark or branches. Use them judiciously, especially on younger trees.
Key Principle: Secure the wire, not the bulb. Always aim to clip or tie the wire to the branch to avoid putting stress on the bulb socket.
Managing Cords and Connections
Extension Cords: Ensure your extension cords are rated for outdoor use and are heavy-duty. Keep them as dry as possible and avoid running them through high-traffic areas where they could be stepped on or tripped over. Use cord covers if necessary.
Connections: All connections between light strings and extension cords should be snug and protected from moisture. Many outdoor lights have weather-resistant connectors. If you’re unsure, use electrical tape to further seal the connection. Never leave connections exposed to the elements.
5. Testing and Troubleshooting
Before you officially deem your tree complete, a thorough test is essential.
The Initial Power-Up
Once you’ve finished wrapping, plug in your lights using the outdoor timer. Observe the entire tree to ensure all sections are lit and that there are no dark spots. Look for any flickering or dim bulbs, which could indicate a loose connection or a faulty bulb.
Troubleshooting Common Issues
- A Section Doesn’t Light Up: Check the connection between that section and the previous one. If it’s a string of incandescent bulbs, one blown bulb can cause the entire string to go out. Carefully inspect each bulb, looking for a broken filament, and replace it. For LEDs, a single faulty bulb usually won’t affect the rest of the string, but a loose connection is still the first thing to check.
- Flickering Lights: This often points to a loose connection somewhere in the string or at the power source. Gently jiggle connections to see if the flickering stops.
- Uneven Lighting: This is usually a spacing issue from the initial wrapping. You may need to adjust the placement of some light strings or add more lights to fill in gaps.
6. Safety First: Essential Precautions
Christmas light installations, especially outdoors, require a strong emphasis on safety.
Electrical Safety
- GFCI Protection: Always use GFCI-protected outlets for outdoor lighting. This is a critical safety feature that can prevent electrical shock.
- Inspect Cords: Before using any extension cords or light strings, inspect them for frayed wires, cracked insulation, or damaged plugs. Discard any damaged cords immediately.
- Avoid Overloading Circuits: Don’t overload electrical circuits. Be mindful of how many lights and other electrical devices are running on the same circuit.
- Keep Away from Water: While outdoor lights are designed to be weather-resistant, avoid submerging them in water or exposing connections to standing water.
Ladder Safety
- Stable Ground: Ensure your ladder is placed on firm, level ground.
- Proper Angle: Maintain the correct angle for stability (typically a 4:1 ratio of base distance to working height).
- Three Points of Contact: Always maintain three points of contact with the ladder (two feet and one hand, or two hands and one foot).
- Don’t Overreach: Move the ladder rather than overreaching.
- Seek Assistance: If possible, have someone hold the base of the ladder for added stability.
Consider Professional Installation
For very large trees, complex designs, or if you have any concerns about electrical safety or heights, consider hiring a professional Christmas light installation service. They have the equipment, experience, and insurance to handle the job safely and efficiently. (See Also: How to Draw Santa and a Christmas Tree: A Festive Guide)
7. Maintaining Your Festive Display
Once your tree is beautifully lit, a little ongoing maintenance ensures it stays that way throughout the season.
Regular Checks
Periodically walk around your tree and check for any loose lights or cords, especially after strong winds or heavy rain. Address any issues promptly to prevent further damage or safety hazards.
Weather Considerations
While outdoor lights are designed to withstand the elements, extreme weather can still pose a challenge. If you anticipate severe storms, you might consider temporarily unplugging your lights or even removing some of the more delicate sections, though this is rarely necessary with quality outdoor-rated products.
Removal and Storage
When the holiday season concludes, careful removal is key to preserving your lights for next year. Gently unwind the lights, avoiding pulling or yanking. Store them in their original boxes or in dedicated light storage containers to prevent tangling and damage. Ensure they are completely dry before storing.
Final Verdict
Wrapping an outdoor tree in Christmas lights can be a truly rewarding holiday activity. By carefully planning your light choices, understanding the best wrapping techniques, and prioritizing safety at every step, you can achieve a stunning and festive display. Remember to measure your tree, choose appropriate outdoor-rated lights, and secure them properly to ensure longevity and beauty. A little effort now will bring immense holiday cheer for years to come, making your home a beacon of Christmas spirit.
Recommended Products