The holiday season is upon us, and the centerpiece of any festive celebration is often the Christmas tree. While traditional ornaments and lights are a must, have you ever considered the elegant simplicity and charm of using ribbons to adorn your evergreen?
Ribbons can transform your tree into a breathtaking spectacle, adding texture, depth, and a touch of personalized flair. Forget the tangle of wires and the usual baubles for a moment, and let’s explore a delightful way to ‘trim’ your tree that’s both visually stunning and surprisingly easy to achieve.
This guide will walk you through everything you need to know about how to trim a tree with ribbon, from selecting the perfect materials to mastering various decorative techniques. Get ready to elevate your holiday decorating game!
Understanding the Art of Ribbon Tree Trimming
When we talk about ‘trimming a tree with ribbon,’ it’s not about pruning branches in the horticultural sense. Instead, it refers to the art of decorating a Christmas tree using various types of ribbons. This method offers a unique and sophisticated alternative or complement to traditional ornaments. Ribbons can be draped, woven, or tied, creating a dynamic and visually appealing effect that can range from subtly elegant to boldly festive.
Why Choose Ribbons for Your Tree?
Ribbons bring a distinct set of advantages to your holiday decorating palette:
- Versatility: Ribbons come in an astonishing array of colors, patterns, textures, and widths, allowing for endless creative possibilities. You can match your existing decor, go monochromatic, or embrace a riot of festive hues.
- Texture and Depth: Unlike flat ornaments, ribbons add a tactile and dimensional quality to your tree. They create flowing lines and interesting visual layers that catch the light and draw the eye.
- Elegance and Sophistication: A well-decorated ribbon tree can exude an air of refined elegance that is both timeless and chic. It’s a less cluttered, more artistic approach to holiday adornment.
- Customization: Ribbons can be easily cut, tied, and shaped to fit your specific tree and design vision. You’re not limited by pre-made ornament shapes.
- Cost-Effectiveness: While high-end ribbons can be an investment, many affordable options are available, and a little ribbon can go a long way in creating a significant impact.
- Durability: Ribbons are generally more forgiving than delicate glass ornaments, making them a practical choice, especially if you have children or pets.
Selecting the Right Ribbons
The foundation of a beautiful ribbon-trimmed tree lies in choosing the right materials. Consider these factors: (See Also: How to Stop Tree Sprouts From Stump: A Complete Guide)
Types of Ribbons
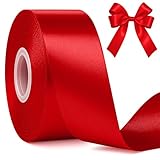
- Satin: Offers a smooth, lustrous finish that reflects light beautifully. Available in a wide range of colors, it’s a classic choice for elegance.
- Velvet: Provides a rich, plush texture that adds a luxurious feel. Deep jewel tones and classic Christmas colors work exceptionally well in velvet.
- Burlap/Jute: For a rustic, natural, or farmhouse aesthetic. It adds a wonderful organic texture and pairs well with woodland or country-themed decorations.
- Grosgrain: Features parallel ribs, offering a slightly more structured look and a matte finish. It’s durable and comes in many patterns.
- Organza/Sheer: Adds a delicate, ethereal quality. Layering sheer ribbons over solid colors can create stunning depth and shimmer.
- Metallic: Gold, silver, or iridescent ribbons add sparkle and a festive sheen, perfect for catching the Christmas lights.
- Patterned: Tartan, plaid, polka dots, snowflakes, or festive holiday motifs can inject personality and theme into your tree.
Width Matters
Ribbon width significantly impacts the visual scale and style of your tree:
- Narrow Ribbons (1/2 inch to 1 inch): Ideal for creating delicate bows, intricate weaving, or adding subtle accents. They can be used to outline branches or intertwine with other decorations.
- Medium Ribbons (1.5 inches to 2.5 inches): A versatile choice for draping garlands, creating fuller bows, or weaving through the branches. This is often the go-to width for a balanced look.
- Wide Ribbons (3 inches to 4 inches or more): Best for making a bold statement. These are excellent for creating dramatic loops and draping effects, especially on larger trees. They can become a primary decorative element.
Color Palette Considerations
Your color choices will set the tone for your entire tree:
- Traditional Christmas Colors: Red, green, gold, and silver are timeless and evoke a classic holiday spirit.
- Monochromatic: Using various shades of a single color (e.g., all shades of blue, or all whites and silvers) can create a sophisticated and modern look.
- Contrasting Colors: Pairing complementary colors (like red and green, or gold and deep purple) can make your tree pop.
- Theme-Based Colors: If you have a specific theme (e.g., winter wonderland, rustic lodge), choose ribbons that align with that color scheme.
Essential Tools and Supplies
Before you begin, gather these helpful items:
- Sharp Scissors: Essential for clean cuts that won’t fray excessively.
- Floral Wire or Pipe Cleaners: For securing bows, attaching ribbons to branches, and creating structure.
- Hot Glue Gun (optional): Can be useful for securing ends or attaching embellishments, but use with caution on delicate ribbons.
- Measuring Tape: To estimate ribbon lengths needed for draping or creating uniform bows.
- Wire Cutters (if using floral wire): To trim excess wire.
- Ribbon Holder or Dispenser (optional): Keeps your ribbons organized and easily accessible.
Popular Techniques for Trimming a Tree with Ribbon
There are several effective ways to incorporate ribbons into your tree decorating. Experiment with these popular techniques:
1. Ribbon Garlands (draping)
This is perhaps the most straightforward and impactful method. It involves draping ribbons from the top of the tree down to the base, creating flowing lines. (See Also: How to Put Cluster Lights on a Christmas Tree)
- Preparation: Cut lengths of ribbon. The length will depend on your tree’s height and the desired effect. A good starting point is to cut a length that is roughly twice the height of the section of the tree you intend to cover.
- Placement: Start at the top of the tree. Gently tuck one end of the ribbon into the branches near the very top.
- Draping: Allow the ribbon to naturally cascade down the side of the tree. Create a gentle loop or swag, then tuck the ribbon into the branches about halfway down the section you’re covering.
- Securing: Ensure the ribbon is securely tucked into the branches so it doesn’t slip. You can use a small piece of floral wire for extra security if needed.
- Repeat: Continue this process, spacing out your draped ribbons evenly around the tree. You can use one type of ribbon or mix and match different widths and colors for a more dynamic look.
- Varying the Drape: For added visual interest, vary the depth of your loops. Some can be tighter, others looser. You can also drape ribbons horizontally around the tree, creating a layered effect.
2. Woven Ribbon Technique
This method involves weaving ribbons horizontally around the tree, creating a textured band effect.
- Preparation: Cut long lengths of ribbon. The length will depend on the circumference of your tree at the point you’re weaving.
- Starting Point: Begin at the base of the tree or at a desired height. Secure the end of the ribbon to an inner branch using floral wire or by tucking it securely.
- Weaving: Gently wrap the ribbon around the tree, bringing it forward and then back. As you wrap, weave the ribbon in and out of the branches, creating a sense of integration rather than just draping.
- Securing: At the end of a full circle, secure the ribbon to an inner branch.
- Layering: Continue weaving additional ribbons, either directly over the first or slightly above or below it, to create bands of color and texture. You can use different ribbon widths and patterns for each layer.
- Tip: Make sure to pull the ribbon taut enough to stay in place but not so tight that it damages the branches.
3. Ribbon Bows
Bows are a classic embellishment and can be used on their own or in conjunction with other ribbon techniques.
- Making a Simple Bow:
- Cut a length of ribbon (e.g., 18-24 inches).
- Fold the ribbon in half to find the center.
- Create two loops by bringing the ends towards the center, forming a figure-eight shape.
- Pinch the center where the loops meet.
- Wrap a smaller piece of ribbon or floral wire around the pinched center to secure the bow.
- Trim the tails to your desired length and shape (e.g., angled or V-cut).
4. Ribbon Loops and Spirals
This technique involves creating decorative loops or spiral shapes with ribbons and attaching them to branches.
- Creating Loops: Take a length of ribbon and form it into a U-shape or a gentle curve. Secure both ends to a branch or to the tree’s structure.
- Creating Spirals: Twist a ribbon around a branch to create a spiral effect, securing the ends discreetly.
- Combination: You can combine loops and spirals with other elements, like small ornaments nestled within the loops.
5. Ribbon as an Ornament Hanger
For a cohesive look, consider using ribbons to hang your ornaments instead of traditional hooks or string.
- Preparation: Cut small lengths of ribbon (e.g., 6-8 inches).
- Attaching to Ornament: Tie one end of the ribbon securely through the loop of your ornament.
- Attaching to Tree: Tie the other end of the ribbon to a branch. You can adjust the length to vary the hanging height of your ornaments.
Tips for a Stunning Ribbon-Trimmed Tree
Elevate your ribbon decorating with these expert tips: (See Also: How to Decorate a Tree with Lights Outside: A Complete…)
- Start with the Lights: Always put your tree lights on first. Ribbons can be added around the light strands to enhance their glow.
- Work from Inside Out: Begin by placing ribbons and decorations on the inner branches to add depth and fullness. Then, work your way outwards.
- Balance is Key: Distribute ribbons evenly around the tree. Step back frequently to assess the balance and adjust as needed.
- Consider the Scale: The width of your ribbons and the size of your bows should be proportionate to the size of your tree. A large tree can handle wider ribbons and more dramatic loops.
- Don’t Overdo It: While ribbons are beautiful, too much can make the tree look busy. Aim for a harmonious blend of ribbons, lights, and any other ornaments you might use.
- Mix Textures: Combining different ribbon textures (e.g., satin with velvet, or burlap with metallic) adds visual interest and a luxurious feel.
- Secure Everything: Ensure all ribbons are well-tucked or secured with wire to prevent them from falling.
- The Tree Topper: A large, elaborate ribbon bow or a cascade of ribbons can make a stunning tree topper.
- Coordinate with Your Room: Think about the overall color scheme and style of the room where your tree will be displayed.
- Embrace Imperfection: A slightly imperfect, hand-tied bow can add to the charm and character of your tree.
Common Mistakes to Avoid
- Ribbons that are too thin or flimsy: They can get lost on the tree and won’t hold their shape well.
- Tightly wrapping ribbons: This can crush branches and make the tree look unnatural.
- Uneven distribution: Having too much ribbon on one side and not enough on the other.
- Ignoring the tree’s natural shape: Work with the branches, not against them.
- Using only one type of ribbon: Mixing widths and textures creates a more dynamic look.
Beyond the Christmas Tree: Other Festive Uses for Ribbons
Once you’ve mastered trimming your tree, you can extend the ribbon magic throughout your home:
- Gift Wrapping: Elevate your presents with luxurious ribbon bows and accents.
- Wreaths: Create stunning ribbon wreaths for your doors and walls.
- Garlands: Make your own festive garlands for mantels, staircases, and doorways.
- Table Centerpieces: Incorporate ribbons into your holiday table settings.
- Decorating Banisters: Drape ribbons elegantly along stair banisters.
- Chair Backs: Tie large bows on the backs of dining chairs for a festive touch.
Conclusion
Transforming your Christmas tree with ribbons offers a beautiful and personal way to embrace the holiday spirit. By carefully selecting your materials – considering texture, width, and color – and employing techniques like draping, weaving, or elegant bow-making, you can create a truly unique and breathtaking centerpiece. Remember to work with your tree’s natural shape, ensure secure placement, and balance your design for maximum impact. This method not only adds visual appeal but also brings a sophisticated charm to your festive décor, making your holiday season even more magical.
Recommended Products