Ah, the Eastern Redbud! With its stunning spring display of vibrant pinkish-purple flowers, it’s a true showstopper in any landscape. But like all trees, redbuds benefit immensely from thoughtful pruning. Knowing when and how to trim your redbud isn’t just about aesthetics; it’s crucial for its health, longevity, and continued spectacular blooms.
Whether you’re a seasoned gardener or just starting out, this guide will equip you with the knowledge to confidently prune your redbud tree. We’ll cover everything from understanding the tree’s natural growth habits to selecting the right tools and techniques for a successful trim. Get ready to unlock your redbud’s full potential and ensure it thrives for years to come.
Understanding Redbud Tree Growth and Pruning Needs
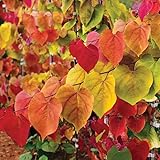
Eastern Redbuds (Cercis canadensis) are unique trees with a beautiful, often multi-trunked growth habit. They are known for their distinctive heart-shaped leaves and their habit of blooming directly on branches and even the trunk – a phenomenon called cauliflory. This natural growth pattern is key to understanding why and how we prune them.
Why Prune Your Redbud Tree?
Pruning isn’t about forcing your tree into an unnatural shape; it’s about working with its natural tendencies to:
- Promote Health: Removing dead, diseased, or damaged branches prevents the spread of pathogens and pests, and allows the tree to direct energy to healthy growth.
- Improve Structure: Strategic pruning can prevent crossing branches, weak attachments, and improve overall structural integrity, making the tree more resilient to wind and snow.
- Enhance Aesthetics: While redbuds are naturally beautiful, pruning can refine their form, open up the canopy for better light penetration, and highlight their unique branching structure.
- Encourage Flowering: Redbuds bloom on old wood – meaning the flowers you see in spring develop on branches that grew the previous year. Pruning at the wrong time can reduce your bloom.
When Is the Best Time to Trim a Redbud?
Timing is everything when it comes to pruning your redbud tree. The general rule of thumb for most flowering trees that bloom on old wood is to prune them *after* they finish flowering. For redbuds, this means late spring or early summer is your prime pruning window.
- Late Spring/Early Summer (After Flowering): This is the ideal time. The tree has already put on its spectacular floral display, and you can clearly see the structure of the branches. Pruning now allows the tree to heal quickly and direct its energy into new growth and the development of flower buds for the *next* year.
- Dormant Season (Late Winter/Early Spring): While generally not recommended for flowering trees that bloom on old wood, a light pruning to remove only dead, damaged, or diseased branches can be done during dormancy. However, avoid any significant structural pruning at this time, as you risk removing potential flower buds.
- Avoid Mid-Summer and Fall: Pruning during these times can stimulate new growth that may not have time to harden off before winter, making it susceptible to frost damage. It also doesn’t allow for proper healing before the colder months.
Essential Tools for Redbud Pruning
Having the right tools makes the job easier, safer, and results in cleaner cuts that heal better. Always ensure your tools are sharp and clean to prevent disease transmission. (See Also: How to Fell a Tree Safely: Your Expert Guide)
- Hand Pruners (Secateurs): For small branches, up to about 1/2 inch in diameter. Bypass pruners (which have a scissor-like action) are generally preferred over anvil pruners (which crush the stem) for cleaner cuts.
- Loppers: With longer handles, loppers provide more leverage and are suitable for branches up to about 1.5 inches in diameter.
- Pruning Saw: For branches larger than 1.5 inches. A curved pruning saw is excellent for getting into tight spaces and making efficient cuts. Pole saws can be helpful for reaching higher branches, but use them with caution.
- Safety Gear: Always wear sturdy gloves to protect your hands and safety glasses to protect your eyes from flying debris.
The Art of Pruning: Techniques for a Healthy Redbud
Pruning a redbud isn’t just about hacking away branches. It’s a thoughtful process that involves understanding what to remove and how to make the cuts. The goal is to encourage a strong, well-shaped tree that produces abundant flowers.
Identifying Branches to Remove
Before you make a single cut, take a step back and assess your tree. Look for the following types of branches:
- Dead, Diseased, or Damaged Branches: These are the highest priority. Dead branches are brittle and often lack leaves. Diseased branches might show discoloration, wilting, or unusual growths. Damaged branches could be broken by storms or mechanical injury.
- Crossing or Rubbing Branches: Branches that grow into each other can create wounds as they rub, providing entry points for diseases. Remove one of the offending branches to prevent this.
- Water Sprouts: These are fast-growing, vertical shoots that often emerge from the trunk or main branches. They are usually weak and detract from the tree’s natural shape.
- Suckers: These grow from the base of the tree or from the roots. They can compete with the main tree for resources and often have a different growth habit.
- Inward-Growing Branches: Branches that grow towards the center of the tree can create a crowded canopy, reducing light penetration and air circulation.
- Weakly Attached Branches: Look for branches with narrow crotch angles (V-shaped unions) rather than wider, U-shaped unions. Narrow angles are more prone to splitting as the tree grows.
Making the Cut: Proper Pruning Techniques
The way you make a cut significantly impacts how the tree heals. Always aim for clean cuts that facilitate quick recovery.
1. The Three-Cut Method for Larger Branches
This method is essential for branches thicker than an inch to prevent tearing the bark down the trunk, which can cause significant damage.
- Undercut: About 6-12 inches away from the trunk, make a cut on the underside of the branch, going about one-third to one-half of the way through. This cut acts as a safety net.
- Top Cut (Removal Cut): A few inches further out from the undercut, make your primary cut from the top, all the way through the branch. The weight of the branch will cause it to break off at the undercut, preventing a large strip of bark from tearing away.
- Final Cut: Once the branch is removed, make a clean cut just outside the branch collar. The branch collar is the slightly swollen area where the branch meets the trunk. Do not cut flush with the trunk, as this removes the collar and can hinder healing. Do not leave a long stub, as this will likely die back and can invite rot.
2. Pruning Smaller Branches
For smaller branches (under an inch), you can typically use hand pruners or loppers. (See Also: How Tall Is the Average Redwood Tree? Giants Revealed!)
- Cutting Back to a Bud: When shortening a branch, make your cut about 1/4 inch above an outward-facing bud. Angle the cut away from the bud so that water runs off. This encourages new growth to go in the desired direction.
- Removing a Branch at its Origin: If you’re removing a smaller branch entirely, cut it back to where it originates from a larger branch or the trunk, just outside the branch collar.
Addressing Specific Redbud Pruning Challenges
Redbuds have a few common issues that pruning can help manage.
Structural Pruning for Young Trees
When your redbud is young, structural pruning is crucial for establishing a strong framework. Focus on selecting 1-3 main leaders (if you desire a more upright form) and ensuring branches have wide crotch angles.
- Remove competing leaders.
- Remove branches that are growing too low and will eventually interfere with mowing or pathways.
- Thin out branches with narrow crotch angles.
Managing the Multi-Trunked Habit
Many redbuds naturally develop multiple trunks. This can be beautiful, but it requires attention.
- Ensure the trunks are not growing too close together and rubbing.
- If one trunk is significantly weaker or growing in an undesirable direction, consider removing it.
- Aim for a balanced spread of branches among the trunks.
Pruning for Bloom Enhancement
Since redbuds bloom on old wood, pruning too much in the dormant season will reduce your flowers. The best way to encourage blooms is to maintain a healthy tree and prune after flowering.
- Avoid heavy pruning in late winter.
- Remove only dead or problematic branches after flowering.
- Thinning out a crowded canopy can allow more light to reach existing branches, potentially leading to more robust flower bud development.
Common Mistakes to Avoid When Pruning Redbuds
Even with the best intentions, some pruning mistakes can harm your redbud tree. Be mindful of these: (See Also: How to Decorate a Hall Tree: Stylish Entryway Ideas)
- Pruning at the Wrong Time: As discussed, avoid late winter pruning for flowering.
- Over-Pruning: Removing too much of the canopy at once stresses the tree. A general guideline is to remove no more than 25% of the live canopy in a single year.
- Leaving Stubs: Stubs don’t heal and are entry points for pests and diseases.
- Flush Cutting: Cutting into the branch collar damages the tree’s ability to compartmentalize and heal wounds.
- Using Dull or Dirty Tools: This leads to ragged cuts and can spread diseases.
- Topping the Tree: This is a destructive practice where the main leader is cut off indiscriminately. It results in weak, fast-growing shoots and ruins the tree’s natural form.
The Myth of Sealing Pruning Cuts
For many years, it was common practice to seal pruning cuts with tar or paint. However, modern arboricultural research suggests that this is often unnecessary and can even be detrimental. Tree wounds are best left to heal naturally. The tree produces callus tissue that covers the wound. Sealants can trap moisture, potentially promoting fungal growth or preventing proper healing.
Post-Pruning Care for Your Redbud
Once you’ve finished pruning, a little aftercare can help your redbud thrive.
- Watering: Ensure the tree is adequately watered, especially during dry periods, as it recovers from pruning.
- Mulching: Apply a layer of organic mulch (like wood chips or shredded bark) around the base of the tree, keeping it a few inches away from the trunk. Mulch helps retain moisture, suppress weeds, and regulate soil temperature.
- Observation: Keep an eye on your tree over the next few months. Look for signs of stress, disease, or insect activity. Early detection allows for prompt intervention.
By following these guidelines, you can confidently prune your redbud tree, ensuring it remains a healthy, beautiful, and flowering specimen in your garden for years to come. Remember, a little thoughtful care goes a long way in nurturing this spectacular native tree.
Conclusion
Mastering how to trim a redbud tree involves understanding its unique growth habits and blooming cycle. By pruning after flowering in late spring or early summer, using sharp, clean tools, and employing proper cutting techniques like the three-cut method, you promote tree health, improve structure, and encourage future blooms. Avoid common mistakes like over-pruning or pruning at the wrong time to ensure your redbud thrives and continues to offer its breathtaking spring display.
Recommended Products