Are your plants struggling? Yellowing leaves, stunted growth, and poor yields are frustrating. You suspect something’s wrong, but what? The answer might lie beneath your feet: your soil. Knowing how to test soil for your garden is the first step towards a flourishing landscape. This guide will walk you through everything you need to know, from understanding the importance of soil testing to the practical steps involved.
We’ll explore why soil testing is crucial, the different methods available, and how to interpret the results. Plus, we’ll cover how to amend your soil based on those results, ensuring your plants get the nutrients they need to thrive. Get ready to unlock the secrets of your soil and cultivate a garden that’s the envy of the neighborhood!
Why Test Your Garden Soil?
Soil is the foundation of a healthy garden. It provides plants with essential nutrients, water, and support. Just like we need a balanced diet, plants need the right mix of elements to grow strong and produce well. Testing your soil helps you understand what’s missing or imbalanced, allowing you to make informed decisions about how to improve it.
Here’s why soil testing is so important:
- Nutrient Availability: Soil tests reveal the levels of essential nutrients like nitrogen (N), phosphorus (P), and potassium (K), which are crucial for plant growth.
- pH Level: The pH of your soil affects nutrient availability. Some nutrients are only accessible to plants within a specific pH range.
- Organic Matter Content: Organic matter improves soil structure, water retention, and nutrient holding capacity.
- Identify Deficiencies: Testing can pinpoint specific nutrient deficiencies, allowing you to address them with targeted amendments.
- Prevent Over-Fertilizing: Over-fertilizing can be just as harmful as under-fertilizing. Soil tests help you avoid applying too much fertilizer, which can lead to nutrient imbalances and environmental problems.
- Diagnose Problems: If your plants are struggling, soil testing can help you identify the underlying cause.
What Can Soil Testing Tell You?
A comprehensive soil test typically provides information on the following:
- pH Level: Measures the acidity or alkalinity of the soil (scale of 0-14, 7 is neutral).
- Nutrient Levels: Measures the amounts of essential nutrients like nitrogen (N), phosphorus (P), potassium (K), calcium (Ca), magnesium (Mg), and sometimes micronutrients like iron (Fe), manganese (Mn), zinc (Zn), and copper (Cu).
- Organic Matter Content: Indicates the amount of decomposed plant and animal material in the soil.
- Cation Exchange Capacity (CEC): Measures the soil’s ability to hold and release nutrients.
- Salinity: Measures the salt content in the soil, which can affect plant growth.
Common Soil Problems Detected by Testing
Soil testing can help you identify and address a variety of soil problems, including:
- Nutrient Deficiencies: Lack of essential nutrients like nitrogen, phosphorus, or potassium.
- Nutrient Imbalances: Too much or too little of certain nutrients, leading to deficiencies or toxicities.
- Incorrect pH: Soil that is too acidic or too alkaline, affecting nutrient availability.
- Low Organic Matter: Poor soil structure, water retention, and nutrient holding capacity.
- High Salt Content: Can damage plant roots and hinder water uptake.
Methods for Testing Your Soil
There are several ways to test your soil, each with its own advantages and disadvantages. Here’s a breakdown of the most common methods:
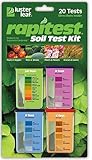
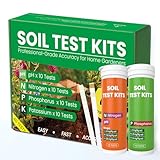
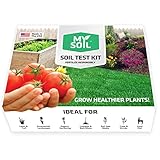
1. Diy Soil Testing Kits
DIY soil testing kits are readily available at garden centers and online. They’re a cost-effective option for basic soil analysis and are easy to use. These kits typically test for pH, nitrogen, phosphorus, and potassium (NPK) levels. The results are usually presented with a color-coded chart or scale, giving you a general idea of your soil’s condition.
Pros:
- Affordable: Relatively inexpensive compared to professional testing.
- Convenient: Easy to use and can be done at home.
- Immediate Results: Provide quick results, allowing you to take action promptly.
Cons:
- Limited Accuracy: Less accurate than professional lab tests.
- Limited Scope: Only tests for a few key nutrients and pH.
- Subjective Interpretation: Results can be somewhat subjective, depending on your interpretation of the color charts.
2. Professional Soil Testing Labs
Professional soil testing labs offer more comprehensive and accurate soil analysis. You collect a soil sample and send it to the lab, where it’s analyzed for a wider range of nutrients, pH, organic matter, and other parameters. The lab will provide you with a detailed report and recommendations for soil amendments.
Pros:
- Highly Accurate: Provides precise and reliable results.
- Comprehensive Analysis: Tests for a wide range of nutrients and other soil properties.
- Detailed Recommendations: Offers specific recommendations for soil amendments based on the results.
Cons: (See Also: How Much Does 1 Cf of Soil Weigh? Your Complete Guide)
- More Expensive: Costs more than DIY kits.
- Requires Time: Results take a few days to a few weeks to receive.
- Requires Sample Collection: You need to collect the soil sample and send it to the lab.
3. Using a Soil Ph Meter
A soil pH meter is a handheld device that measures the pH of your soil. It’s a quick and easy way to determine the acidity or alkalinity of your soil. Simply insert the probe into the soil and read the pH value on the meter. Soil pH meters are a good option for monitoring pH levels over time.
Pros:
- Easy to Use: Simple to operate and provides instant results.
- Relatively Inexpensive: More affordable than professional lab tests.
- Portable: Can be used in any part of your garden.
Cons:
- Limited Scope: Only measures pH.
- Accuracy Can Vary: Can be less accurate than lab tests or some DIY kits.
- Requires Calibration: Needs to be calibrated periodically for accurate readings.
How to Collect a Soil Sample for Testing
Proper soil sample collection is crucial for accurate results. Here’s how to collect a representative soil sample:
- Gather Your Tools: You’ll need a clean bucket, a trowel or soil probe, and a plastic bag or container.
- Choose Your Sampling Areas: Divide your garden into different areas based on plant types, soil conditions, or previous treatments. For example, you might sample your vegetable garden separately from your flower beds or lawn.
- Take Multiple Subsamples: In each area, take several subsamples from different locations. Dig down to the recommended depth, usually 6-8 inches for lawns and gardens, or as recommended by the testing service.
- Mix the Subsamples: Combine the subsamples from each area in your clean bucket.
- Remove Debris: Remove any rocks, roots, or other debris from the mixed sample.
- Dry the Sample: Spread the soil sample on a clean surface and allow it to air dry. Do not use heat to dry the soil.
- Submit the Sample: Follow the instructions provided by the soil testing service to package and submit your sample.
Sampling Depth Guidelines
Different plants have different root depths, so the recommended sampling depth varies. Here are some general guidelines:
- Lawns: 3-4 inches
- Vegetable Gardens: 6-8 inches
- Flower Beds: 6-8 inches
- Trees and Shrubs: 6-8 inches, or as recommended by the testing service.
When to Test Your Soil
The best time to test your soil is before planting or during the early spring or fall. This gives you time to make any necessary amendments before the growing season begins. You can also test your soil if you notice problems with your plants, such as slow growth, yellowing leaves, or poor yields.
Interpreting Soil Test Results
Once you receive your soil test results, you’ll need to interpret them. The report will typically provide information on the pH, nutrient levels, organic matter content, and other parameters. It will also include recommendations for soil amendments based on the results.
Here’s how to interpret some of the key parameters:
Ph Level
The pH scale ranges from 0 to 14. A pH of 7 is neutral. A pH below 7 is acidic, and a pH above 7 is alkaline (also called basic). Most plants prefer a slightly acidic to neutral pH, typically between 6.0 and 7.0. The ideal pH range for most plants is around 6.5. If your soil pH is outside of this range, it can affect the availability of nutrients.
- Acidic Soil (pH < 6.0): May benefit from the addition of lime to raise the pH.
- Alkaline Soil (pH > 7.0): May benefit from the addition of sulfur or other acidifying agents to lower the pH.
Nutrient Levels
Soil test reports will typically provide the levels of essential nutrients, such as nitrogen (N), phosphorus (P), and potassium (K). The report will indicate whether the levels are low, medium, or high. It will also provide recommendations for fertilizer application based on the nutrient levels.
- Nitrogen (N): Essential for leaf growth and green color.
- Phosphorus (P): Important for root development, flowering, and fruiting.
- Potassium (K): Supports overall plant health, disease resistance, and fruit quality.
Organic Matter Content
Organic matter improves soil structure, water retention, and nutrient holding capacity. A higher organic matter content is generally desirable. The report will indicate the organic matter content and provide recommendations for adding organic matter to your soil, such as compost or manure.
Amending Your Soil Based on Test Results
Once you’ve interpreted your soil test results, you can amend your soil to improve its condition. The specific amendments you need will depend on the results of your soil test. (See Also: How Much Soil Do I Need for a 5-Gallon Pot? Your Guide to Growing Success!)
Adjusting Ph
If your soil pH is too high or too low, you’ll need to adjust it. Here are some common methods:
- To Raise pH (Make Soil Less Acidic): Add lime (calcium carbonate or dolomitic lime).
- To Lower pH (Make Soil More Acidic): Add sulfur or other acidifying agents.
Adding Nutrients
If your soil test indicates nutrient deficiencies, you’ll need to add fertilizers. Choose fertilizers based on the specific nutrients your soil is lacking. Consider using organic fertilizers, such as compost, manure, or bone meal.
Increasing Organic Matter
Adding organic matter is beneficial for most soils. Here are some ways to increase organic matter:
- Compost: Add compost to improve soil structure, water retention, and nutrient holding capacity.
- Manure: Well-rotted manure adds nutrients and improves soil health.
- Cover Crops: Plant cover crops, such as clover or rye, to add organic matter and improve soil fertility.
Choosing the Right Amendments
The type and amount of amendments you need will depend on your soil test results. Always follow the recommendations provided by your soil testing service or consult with a local gardening expert.
Frequently Asked Questions About Soil Testing
Here are some frequently asked questions about soil testing:
How Often Should I Test My Soil?
It’s generally recommended to test your soil every 2-3 years, or more frequently if you’re experiencing problems with your plants or if you’re making significant changes to your garden. If you’re using a new area for gardening, you should test the soil before planting.
Can I Test My Soil at Home?
Yes, you can use DIY soil testing kits to test your soil at home. These kits are a cost-effective option for basic soil analysis and are easy to use. However, they are less accurate than professional lab tests.
What’s the Best Time of Year to Test My Soil?
The best time to test your soil is before planting or during the early spring or fall. This gives you time to make any necessary amendments before the growing season begins.
What Do the Numbers on a Fertilizer Bag Mean?
The numbers on a fertilizer bag represent the percentage of nitrogen (N), phosphorus (P), and potassium (K) in the fertilizer. For example, a fertilizer labeled 10-10-10 contains 10% nitrogen, 10% phosphorus, and 10% potassium.
What Is the Ideal Ph for a Garden?
The ideal pH for most garden plants is between 6.0 and 7.0, with 6.5 being the sweet spot. This slightly acidic to neutral range allows for optimal nutrient availability.
Where Can I Get My Soil Tested?
You can get your soil tested at a local garden center, university extension office, or online soil testing lab. Professional soil testing labs offer more comprehensive and accurate soil analysis than DIY kits.
Troubleshooting Common Soil Issues
Even with soil testing and amendments, you may encounter some common soil issues. Here’s how to troubleshoot them: (See Also: How to Prepare Soil for Planting Fruit Trees: A Gardener’s Guide)
Compacted Soil
Problem: Soil that is too dense, preventing water and air from reaching plant roots.
Solution: Improve soil structure by adding organic matter, such as compost or well-rotted manure. You can also use a garden fork or aerator to loosen the soil.
Poor Drainage
Problem: Waterlogged soil that doesn’t drain properly, leading to root rot.
Solution: Improve drainage by adding organic matter, such as compost or sand. You can also create raised beds or improve the slope of your garden.
Weed Infestation
Problem: Unwanted plants competing with your garden plants for nutrients, water, and sunlight.
Solution: Remove weeds manually or use a weed killer. Mulch your garden beds to suppress weed growth.
Pest and Disease Problems
Problem: Insects and diseases attacking your plants.
Solution: Identify the pests or diseases and take appropriate action. This may include using organic pest control methods, removing infected plants, or improving soil health to make plants more resistant to disease.
Final Verdict
Mastering how to test soil for your garden is an investment in your garden’s future. By understanding the importance of soil testing, utilizing appropriate methods, and interpreting results, you’ll be well-equipped to nurture thriving plants. Remember, a healthy garden starts with healthy soil, so take the first step and unlock the secrets beneath your feet.
Regular soil testing and amending are key to a beautiful and bountiful garden. Happy gardening!
Recommended Products