Are your plants struggling? Yellowing leaves, stunted growth, or a general lack of vigor can be frustrating. Often, the culprit isn’t pests or diseases, but the soil itself. Wondering how to test garden soil at home to get to the root of the problem? You’re in the right place!
Testing your soil is a crucial first step for any gardener, from the novice to the seasoned pro. It reveals vital information about your soil’s composition, nutrient levels, and pH – all of which directly impact plant health and productivity. The good news? You don’t need expensive lab equipment to get valuable insights. We’ll explore simple, effective methods you can use right in your backyard.
This guide will walk you through various testing options, from quick DIY tests to more detailed analyses. We’ll cover everything from collecting soil samples to interpreting the results and taking corrective actions. Get ready to unlock the secrets of your soil and cultivate a flourishing garden!
Why Test Your Garden Soil?
Before we dive into the ‘how,’ let’s understand the ‘why.’ Soil testing provides a wealth of information that can transform your gardening experience. It helps you:
- Identify Nutrient Deficiencies: Determine if your soil lacks essential nutrients like nitrogen, phosphorus, and potassium (NPK), which plants need to thrive.
- Assess pH Levels: Measure the acidity or alkalinity of your soil. pH affects nutrient availability; some nutrients are only accessible to plants within a specific pH range.
- Understand Soil Texture: Determine whether your soil is sandy, silty, or clay-based. This affects drainage, aeration, and water retention.
- Optimize Fertilizer Use: Avoid over-fertilizing, which can harm plants and pollute the environment. Soil tests help you apply the right amount of the right fertilizer.
- Improve Plant Health: By addressing soil issues, you can prevent diseases, improve growth, and increase yields.
- Save Money: By avoiding unnecessary fertilizer applications and amendments.
By understanding your soil, you’re essentially providing your plants with the best possible environment to flourish. It’s like a personalized health checkup for your garden.
Methods for Testing Your Soil at Home
There are several ways to test your garden soil at home, ranging from quick and easy DIY methods to more comprehensive kits. Here’s a breakdown of some popular options:
1. Visual and Tactile Inspection
This is the simplest, most basic method. You can learn a lot about your soil just by looking at it, feeling it, and smelling it. It’s a great starting point before you move on to more formal testing.
- Appearance: Observe the color. Dark, rich soil often indicates a high organic matter content. Pale or light-colored soil might suggest nutrient deficiencies or poor drainage.
- Texture: Take a handful of soil and squeeze it. Does it feel gritty (sandy), smooth (silty), or sticky (clay)? Sandy soil drains quickly, while clay soil retains water.
- Drainage: Dig a small hole and fill it with water. Observe how quickly the water drains. Poor drainage can indicate compacted soil.
- Presence of Organic Matter: Look for visible organic matter like compost, decaying leaves, and earthworms. These are indicators of a healthy soil ecosystem.
- Smell: Healthy soil often has an earthy, pleasant aroma. A foul smell could indicate poor drainage or anaerobic conditions.
Limitations: This method provides only a general overview. It won’t tell you specific nutrient levels or pH.
2. The Jar Test (soil Texture Test)
This simple DIY test helps determine the soil texture, which is the proportion of sand, silt, and clay. This is crucial for understanding drainage, aeration, and water retention.
- Collect a Soil Sample: Take soil from the area you want to test. Remove any rocks, roots, or debris.
- Fill a Jar: Place about 1 cup of soil in a clear jar with a lid.
- Add Water: Fill the jar about two-thirds full with water.
- Add Dish Soap: Add a teaspoon of dish soap. This helps the soil particles separate.
- Shake Vigorously: Seal the lid tightly and shake the jar vigorously for 1-2 minutes until the soil is thoroughly mixed.
- Let it Settle: Place the jar on a level surface and let it sit undisturbed for at least 24 hours.
- Observe the Layers: After 24 hours, you’ll see layers form in the jar. The bottom layer is sand (heaviest), the middle layer is silt, and the top layer is clay (lightest).
- Measure the Layers: Estimate the percentage of each layer by eye. For example, if the sand layer is 50% of the total, the silt layer is 30%, and the clay layer is 20%, your soil is primarily sandy loam.
Interpreting the Results:
- Sandy Soil: High sand content, drains quickly, doesn’t hold nutrients well.
- Silty Soil: High silt content, good water retention, but can compact easily.
- Clay Soil: High clay content, excellent water retention, but can be poorly aerated and drain slowly.
- Loam Soil: A balanced mix of sand, silt, and clay – ideal for most plants.
3. Diy Ph Test
The pH of your soil affects the availability of nutrients to plants. Most plants prefer a slightly acidic to neutral pH (around 6.0 to 7.0). You can test your soil’s pH using simple household ingredients. (See Also: How to Dry Out Muddy Soil: Your Ultimate Guide to a Solid Ground)
- Materials: Baking soda, vinegar, distilled water, two small containers, soil sample.
- Prepare Soil Samples: Take two separate soil samples from the area you want to test.
- Baking Soda Test: Place a small amount of soil in one container. Add a half-cup of distilled water and mix until it forms a mud-like consistency. Then, add a half-cup of vinegar. If the soil fizzes, your soil is alkaline (high pH).
- Vinegar Test: Place a small amount of soil in the other container. Add a half-cup of distilled water and mix. Then, add a half-cup of baking soda. If the soil fizzes, your soil is acidic (low pH).
- No Fizzing: If neither test produces fizzing, your soil is likely close to neutral.
Limitations: This test gives a general indication of pH (acidic, alkaline, or neutral) but doesn’t provide a precise pH value. It is best used as a preliminary test.
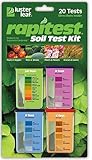
4. Soil Test Kits
Soil test kits are readily available online and at garden centers. These kits offer a more detailed analysis than DIY methods. They typically test for pH and the levels of essential nutrients like nitrogen (N), phosphorus (P), and potassium (K).
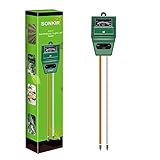
- Types of Kits: There are various types of kits, from basic color-coded tests to more sophisticated digital meters.
- Following Instructions: Always follow the kit’s instructions carefully. These instructions will guide you through collecting the soil sample, preparing the sample, and interpreting the results.
- Color-Coded Results: Most kits use color charts to indicate nutrient levels. Compare the color of the test solution to the chart to determine if your soil has low, medium, or high levels of each nutrient.
- Digital Meters: Some kits use digital meters to provide more precise pH and nutrient readings.
Advantages: Provides more detailed information than DIY tests, relatively easy to use, and widely available. These kits are significantly better than the DIY tests. They give more insight on what is needed for your specific plants.
Disadvantages: Kits vary in accuracy. Some kits can be more expensive than DIY methods. They may not test for all nutrients.
5. Professional Soil Testing
For the most accurate and comprehensive analysis, consider sending your soil sample to a professional soil testing laboratory. This is particularly recommended if you have persistent soil problems or if you’re planning a large-scale gardening project.
- How it Works: You’ll collect a soil sample (following the lab’s instructions), send it to the lab, and they will analyze it for a wide range of parameters, including nutrient levels, pH, organic matter content, and sometimes even the presence of heavy metals.
- Detailed Reports: The lab will provide a detailed report with specific recommendations for amendments and fertilizer applications.
- Finding a Lab: Search online for soil testing labs in your area or contact your local agricultural extension office for recommendations.
- Cost: Professional soil testing is more expensive than DIY methods or kits, but the detailed results can be invaluable.
Advantages: Most accurate and comprehensive results, detailed recommendations, and professional expertise.
Disadvantages: More expensive than other methods, takes longer to get results.
How to Collect a Soil Sample
The accuracy of your soil test depends on how well you collect the soil sample. Here’s a step-by-step guide:
- Choose the Right Time: The best time to collect a soil sample is in the fall or spring, before planting or after harvesting. This gives you time to make any necessary amendments.
- Tools: You’ll need a trowel or shovel, a clean bucket, and a plastic bag or container.
- Sampling Depth: The sampling depth depends on the plants you’re growing. For lawns and shallow-rooted plants, collect samples from the top 4-6 inches. For gardens and deeper-rooted plants, collect samples from 6-8 inches.
- Multiple Samples: Collect several subsamples from different locations within the area you want to test. This provides a more representative sample of your soil.
- Mixing the Samples: Mix the subsamples thoroughly in the bucket to create a composite sample.
- Removing Debris: Remove any rocks, roots, or debris from the sample.
- Labeling: Label the plastic bag or container with the date, location, and any other relevant information.
- Sending to a Lab: If you’re sending the sample to a lab, follow their specific instructions for packaging and shipping.
Important Considerations:
- Avoid Contamination: Use clean tools and containers to avoid contaminating the sample.
- Sample Different Areas: If you have different areas in your garden (e.g., vegetable garden vs. flower bed), collect separate samples for each area.
- Repeat Testing: It’s a good idea to test your soil every 2-3 years, or more frequently if you’re experiencing problems.
Interpreting Soil Test Results
Once you have your soil test results, you’ll need to interpret them to understand what they mean for your garden. Here’s a general guide: (See Also: How Do You Test Ph in Soil? A Gardener’s Guide to Thriving Plants)
1. Understanding Ph
pH Scale: Ranges from 0 to 14. 7 is neutral. Below 7 is acidic, and above 7 is alkaline.
- Acidic Soil (low pH): Can hinder nutrient availability. You might need to add lime to raise the pH.
- Alkaline Soil (high pH): Can also hinder nutrient availability. You might need to add sulfur or other acidifying agents to lower the pH.
- Ideal Range: Most plants prefer a pH between 6.0 and 7.0.
2. Nutrient Levels (n, P, K)
Soil tests will typically report the levels of nitrogen (N), phosphorus (P), and potassium (K). They might also report the levels of other nutrients like calcium, magnesium, and micronutrients.
- Nitrogen (N): Essential for leaf growth and green color. Deficiencies can lead to yellowing leaves.
- Phosphorus (P): Important for root development, flowering, and fruiting. Deficiencies can lead to stunted growth and purplish leaves.
- Potassium (K): Important for overall plant health, disease resistance, and fruit quality. Deficiencies can lead to yellowing leaf margins and weak stems.
- Interpreting Levels: Soil tests typically indicate whether nutrient levels are low, medium, or high. The report will likely provide recommendations for fertilizer application based on the results.
3. Organic Matter
Organic matter is crucial for soil health. It improves water retention, aeration, and nutrient availability. Soil tests often report the percentage of organic matter in your soil.
- Low Organic Matter: Can be improved by adding compost, manure, or other organic amendments.
- High Organic Matter: Generally desirable, but excessive organic matter can sometimes lead to nutrient imbalances.
4. Other Parameters
Professional soil tests may also report other parameters, such as:
- Cation Exchange Capacity (CEC): Measures the soil’s ability to hold nutrients.
- Salinity: Measures the salt content of the soil. High salinity can be harmful to plants.
- Micronutrients: The levels of essential micronutrients like iron, manganese, and zinc.
Taking Action: Amending Your Soil
Once you understand your soil test results, you can take action to improve your soil and create a healthier environment for your plants. Here are some common soil amendments:
- Lime: Used to raise the pH of acidic soil.
- Sulfur: Used to lower the pH of alkaline soil.
- Compost: Adds organic matter, improves water retention, and provides nutrients.
- Manure: Adds organic matter and nutrients.
- Fertilizers: Provide specific nutrients that are lacking in your soil. Choose fertilizers based on your soil test results and the needs of your plants.
- Mulch: Helps retain moisture, suppress weeds, and regulate soil temperature.
Important Considerations:
- Follow Recommendations: Always follow the recommendations provided by your soil test report or the instructions on fertilizer packaging.
- Avoid Over-Amending: Over-amending your soil can be just as harmful as under-amending it.
- Test and Adjust: After amending your soil, retest it periodically to monitor the changes and make any necessary adjustments.
Common Questions About Soil Testing
Here are some frequently asked questions about soil testing:
1. How Often Should I Test My Soil?
It’s generally recommended to test your soil every 2-3 years, or more frequently if you’re experiencing problems or if you’ve made significant changes to your garden.
2. What’s the Best Time of Year to Test My Soil?
The best time to test your soil is in the fall or spring, before planting or after harvesting.
3. What If My Soil Test Results Are Not Ideal?
Don’t worry! Soil problems can usually be corrected with appropriate amendments and fertilizer applications. Follow the recommendations provided by your soil test report. (See Also: How to Get Good Soil for Plants: Your Ultimate Guide to Thriving Gardens)
4. Can I Use the Same Soil Test for All My Plants?
No. Different plants have different nutrient requirements. Consider the specific needs of your plants when interpreting your soil test results and choosing amendments.
5. Where Can I Find a Soil Testing Kit or Send My Soil Sample?
Soil testing kits are available online and at garden centers. You can find professional soil testing labs by searching online or contacting your local agricultural extension office.
6. What Are the Benefits of Using a Professional Soil Test?
Professional soil tests provide the most accurate and comprehensive results, along with detailed recommendations for amendments and fertilizer applications. They also test for a broader range of parameters than DIY kits.
7. Can I Test My Soil for Heavy Metals?
Yes, some professional soil testing labs offer heavy metal testing. This is especially important if you’re growing food crops in an area with a history of industrial activity or contamination.
8. How Do I Know Which Soil Test Kit Is Right for Me?
Consider your needs and budget. Basic kits provide information on pH and NPK levels. More advanced kits may test for additional nutrients. Professional testing provides the most comprehensive analysis.
9. Can I Test My Soil for Diseases?
Soil tests primarily focus on nutrient levels, pH, and other physical properties. While some tests may detect the presence of certain pathogens, they are not designed to diagnose plant diseases. If you suspect a plant disease, consult with a local agricultural extension office or a plant pathologist.
10. Is It Possible to Test Soil for Nematodes?
Yes, some professional soil testing labs offer nematode testing. Nematodes are microscopic worms that can damage plant roots. If you suspect a nematode problem, ask the lab about nematode testing.
Final Verdict
Testing your garden soil is an investment in your plants’ health and your gardening success. By understanding your soil’s unique characteristics, you can make informed decisions about amendments, fertilizer applications, and plant selection. Whether you opt for a simple DIY test or a professional analysis, the knowledge you gain will empower you to create a thriving garden. Don’t let soil issues hold you back – take the first step towards a flourishing landscape today!
Recommended Products