Is your yard looking a little… untidy? Leaves, grass clippings, and debris can quickly make even the most beautiful outdoor space look neglected. You’ve probably eyed that leaf blower in your garage or shed, ready to tackle the mess, but then the question arises: how do you actually get the thing started?
Don’t worry, it’s not rocket science! Whether you’re dealing with a trusty gas-powered model or a newer electric version, getting your leaf blower up and running is a straightforward process once you know the steps. We’re here to walk you through it, ensuring you can transform your yard from cluttered to immaculate with confidence and ease.
Mastering Your Leaf Blower: A Step-by-Step Ignition Guide
Leaf blowers are fantastic tools for maintaining a tidy yard, but their usefulness hinges on your ability to start them. The process can vary slightly depending on whether you have a gas-powered or an electric (corded or battery-powered) model. We’ll break down each type to ensure you’re never left scratching your head.
Getting Started with Gas-Powered Leaf Blowers
Gas leaf blowers offer the most power and freedom, but they also involve a few more steps to get going. Let’s cover the essentials:
1. Safety First: Essential Precautions
Before you even think about pulling a cord or pressing a button, safety is paramount. Always ensure you:
- Wear Protective Gear: This includes safety glasses or goggles to protect your eyes from debris, hearing protection (earplugs or earmuffs) as leaf blowers can be loud, and sturdy gloves for a better grip and protection. Closed-toe shoes are a must.
- Check Your Surroundings: Make sure there are no people, pets, or fragile objects in the immediate vicinity where you plan to operate the blower. Clear away any large obstacles that could be kicked up.
- Inspect the Blower: Give your leaf blower a quick once-over. Check for any loose parts, damaged cords (if applicable), or obvious leaks. Ensure the air intake is clear of debris.
2. Fueling Your Gas Leaf Blower
This is a critical step, and using the wrong fuel can damage your engine. Most gas leaf blowers require a specific fuel-air mixture, typically a blend of gasoline and 2-stroke engine oil.
- Consult Your Manual: This is your bible. It will tell you the exact ratio of gasoline to oil required for your specific model. Common ratios are 40:1 or 50:1.
- Use Fresh Fuel: Old gasoline can gum up the engine. Always use fresh, unleaded gasoline.
- Use the Correct Oil: Always use a high-quality 2-stroke engine oil specifically designed for air-cooled engines. Do NOT use regular motor oil.
- Mixing Fuel: Use a clean, approved fuel container. Pour in the correct amount of gasoline first, then add the oil. Secure the lid and shake the container thoroughly to ensure a proper mix.
- Fill the Tank: Carefully fill the fuel tank of your leaf blower. Avoid overfilling, and wipe up any spills immediately, as spilled fuel can be a fire hazard.
3. The Priming Process: Getting Fuel to the Engine
Many gas leaf blowers have a primer bulb. This small, clear rubber bulb helps draw fuel into the carburetor, making starting easier, especially on a cold engine.
- Locate the Primer Bulb: It’s usually a small, round, rubber button located near the carburetor.
- Press the Bulb: Gently press the primer bulb 3-5 times, or until you see fuel moving into and out of the bulb. You don’t need to empty it; just ensure fuel is being drawn.
4. Engaging the Choke
The choke restricts airflow to the carburetor, creating a richer fuel mixture needed for starting a cold engine. Once the engine starts to fire, you’ll need to gradually disengage it. (See Also: How To Clean Squirrel Cage Blower Fan )
- Cold Start: If the engine is cold, move the choke lever to the ‘Full Choke’ or ‘Start’ position.
- Warm Start: If the engine has recently been running, move the choke to the ‘Half Choke’ or ‘Run’ position. Some models may not require choke for a warm start.
5. Starting the Engine: The Pull-Cord Method
This is where the action happens!
- Secure the Blower: Place the leaf blower on a flat, stable surface. If it’s a backpack model, put it on the ground. If it’s a handheld model, ensure it’s not angled in a way that could cause it to tip.
- Engage the Throttle Lock (if applicable): Some models have a throttle lock. Engage it in the ‘start’ position, which usually means a slightly open throttle.
- Pull the Cord: Grasp the starter rope handle firmly. Give it a sharp, steady pull. Don’t yank it violently.
- Listen for Firing: You’ll likely hear the engine sputter or try to start.
- Adjust Choke: If you heard it sputter, it’s time to adjust the choke. Move it from ‘Full Choke’ to ‘Half Choke’ or ‘Run’.
- Continue Pulling: Pull the cord again. The engine should now start and run.
- Disengage Choke Fully: Once the engine is running smoothly, fully disengage the choke by moving the lever to the ‘Run’ position. If you leave it on choke, the engine will likely stall.
6. Troubleshooting Common Gas Starting Issues
Sometimes, it doesn’t start on the first try. Here are common culprits:
- Out of Fuel: Sounds simple, but it happens!
- Incorrect Fuel Mix: Too much or too little oil can cause issues.
- Old Fuel: Stale gas is a common problem.
- Choke Settings: Incorrect choke position is a frequent offender.
- Clogged Air Filter: A dirty filter restricts airflow.
- Spark Plug Issues: A fouled or loose spark plug won’t ignite the fuel.
- Blocked Fuel Lines: Debris can obstruct fuel flow.
If you’re consistently having trouble, consult your owner’s manual for specific troubleshooting steps or consider taking it to a service center.
Getting Started with Electric Leaf Blowers
Electric leaf blowers are generally simpler to start and operate, making them a popular choice for many homeowners. They come in two main varieties: corded and battery-powered.
Corded Electric Leaf Blowers: The Plug-and-Play Option
These are the most straightforward. No fuel, no choke, just power!
- Safety Check: Ensure the blower’s cord and plug are in good condition. Check the outlet you plan to use.
- Connect the Extension Cord: Use a heavy-duty, outdoor-rated extension cord of the appropriate gauge for the distance. Ensure the connection to the blower is secure.
- Plug it In: Plug the extension cord into the wall outlet.
- Power On: Locate the power switch on the leaf blower. It’s usually a toggle or slide switch. Flip it to the ‘On’ position.
- Start Blowing: Some models have a variable speed trigger, while others have a simple on/off switch. Operate as intended.
Battery-Powered (cordless) Leaf Blowers: Freedom and Simplicity
These offer the convenience of gas without the fumes or mixing, and the freedom of corded without the tether.
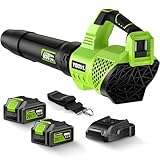
- Charge the Battery: Ensure your battery is fully charged. Most come with a charger and an indicator light to show charging status.
- Insert the Battery: Locate the battery compartment on the leaf blower. Slide the charged battery into the compartment until it clicks securely into place.
- Power On: Find the power switch or button. Some models have a safety lock-off button that must be pressed simultaneously with the power button.
- Start Blowing: Engage the trigger or switch to begin blowing. Variable speed controls are common on these models.
Troubleshooting Electric Leaf Blowers
- Corded: If it doesn’t start, check the power outlet (is it switched on? Is it working?), ensure the cord is securely plugged into both the outlet and the blower, and check for any damage to the cord or plug. A tripped circuit breaker can also be the culprit.
- Battery-Powered: Ensure the battery is properly seated and charged. Check the battery contacts for dirt or corrosion. Make sure any safety lock-off buttons are engaged correctly.
When to Use Your Leaf Blower Effectively
Knowing how to start your leaf blower is only half the battle. Using it effectively ensures you get the job done efficiently and safely. (See Also: How To Clean Air Conditioner Blower )
1. Timing Is Key
Avoid blowing leaves when the ground is wet, as this makes them heavier and harder to move. Also, be mindful of your neighbors. Early mornings or late evenings can be disruptive due to noise.
2. Strategic Blowing Patterns
Don’t just blow randomly. Work from the outer edges of your property inward, or blow debris towards a central collection point (like a tarp or a designated pile). This prevents you from having to re-blow areas.
3. Consider the Surface
Blowing leaves off a hard surface like a driveway or patio is easy. Blowing them out of thick mulch or dense grass can be more challenging and may require a more powerful blower or a different approach, like raking.
4. Power Settings
If your blower has variable speed settings, use the lowest effective setting. This conserves fuel (for gas models) or battery life (for electric models) and reduces noise and the likelihood of blowing away valuable mulch or soil.
5. Maintenance for Longevity
Regular maintenance ensures your leaf blower starts reliably every time.
- Gas Blowers: Clean or replace the air filter regularly, check the spark plug, and store it properly with fuel stabilizer if not using for extended periods.
- Electric Blowers: Keep the vents clear of debris. For battery models, store batteries in a cool, dry place.
Understanding these nuances will not only help you start your leaf blower but also master its operation for a consistently beautiful yard.
Understanding Different Leaf Blower Types
Before diving into starting, it’s helpful to know what kind of leaf blower you’re dealing with: (See Also: Stanley Blower Fan How To Clean )
| Type | Power Source | Pros | Cons |
|---|---|---|---|
| Handheld Gas | Gasoline & 2-Stroke Oil | Powerful, portable, no cords | Noisy, fumes, requires fuel mixing, heavier |
| Backpack Gas | Gasoline & 2-Stroke Oil | Most powerful, comfortable for long use | Heavier, more expensive, requires fuel mixing |
| Corded Electric | AC Power Outlet | Lightweight, quiet, no fumes, no fuel mixing | Limited by cord length, requires extension cord |
| Battery-Powered Electric | Rechargeable Battery | Quiet, no fumes, no fuel mixing, portable, freedom from cords | Battery life limitations, charging time, can be less powerful than gas |
Each type has its own starting procedure, though the principles of safety and basic operation remain the same.
Key Components You’ll Encounter
Familiarizing yourself with the parts of your leaf blower will make the starting process less intimidating:
- Primer Bulb (Gas): Draws fuel into the carburetor.
- Choke Lever (Gas): Controls airflow for starting.
- On/Off Switch: Powers the unit.
- Throttle/Trigger: Controls the speed of the blower.
- Starter Rope/Pull Cord (Gas): Engages the engine to start.
- Spark Plug (Gas): Ignites the fuel-air mixture.
- Air Filter (Gas): Prevents debris from entering the engine.
- Fuel Tank (Gas): Holds the fuel mixture.
- Battery Port (Battery): Where the battery is inserted.
- Power Cord (Corded): Connects to the power source.
Knowing where these are will help you follow the starting instructions accurately.
Advanced Tips for Gas Leaf Blower Starting
For those persistent gas starting challenges, consider these advanced tips:
- Spark Plug Condition: A fouled or worn spark plug is a common reason for a no-start. Inspect it for carbon buildup or damage. If it looks dirty, clean it with a wire brush or replace it. Ensure it’s gapped correctly according to your manual.
- Carburetor Cleaning: Over time, the carburetor can get clogged with fuel residue. If your blower has been sitting for a while, this could be the issue. Carburetor cleaner sprays can sometimes help, but a full cleaning might be necessary.
- Ignition System Check: Ensure the spark plug wire is securely attached to the spark plug. A loose connection will prevent ignition.
- Primer Bulb Functionality: Make sure the primer bulb isn’t cracked or leaking. If it feels mushy or doesn’t draw fuel, it might need replacement.
- Fuel Line Blockage: Use a thin wire or compressed air to gently check if the fuel lines from the tank to the carburetor are clear.
Electric Leaf Blower Maintenance for Optimal Performance
Even simple electric models benefit from basic care:
- Ventilation: Regularly check and clear any debris from the air intake and exhaust vents. This ensures proper cooling and prevents overheating.
- Cord Care: For corded models, inspect the power cord for nicks, cuts, or fraying before each use. Store the cord neatly to prevent damage.
- Battery Health: For battery-powered units, follow the manufacturer’s recommendations for charging and storage. Avoid extreme temperatures, which can degrade battery performance over time.
- Nozzle Attachment: Ensure any detachable nozzles are securely fastened. Loose attachments can reduce airflow and efficiency.
By understanding the different types, their components, and employing these tips, you’ll be well-equipped to start and use your leaf blower effectively, ensuring your yard always looks its best.
Conclusion
Starting your leaf blower, whether gas or electric, is a manageable task with the right knowledge. For gas models, focus on correct fuel mixing, priming, choke settings, and a steady pull of the cord. Electric blowers are simpler, primarily involving plugging in or inserting a charged battery and flipping a switch. Always prioritize safety by wearing protective gear and clearing your surroundings. With these steps, you’ll be efficiently clearing your yard in no time!