Plums, those delightful jewels of late summer and early autumn, are a treat for the senses. Their vibrant colours, juicy flesh, and sweet-tart flavour make them perfect for snacking, baking, or preserving. But what happens when you’ve harvested your plums, and they’re not quite ready to eat? Don’t despair! Many fruits, including plums, have the remarkable ability to continue ripening even after they’ve been picked from the tree. This guide will walk you through the simple yet effective methods of how to ripen plums off the tree, ensuring you can enjoy their full flavour and texture, no matter the harvest timing.
Understanding the science behind fruit ripening is key. Plums, like other climacteric fruits, produce ethylene gas, a natural plant hormone that triggers the ripening process. By controlling the environment and influencing ethylene production, you can coax those firm, slightly tart plums into becoming sweet, tender, and utterly delicious. Whether you’re dealing with a few stray fruits or a whole basket, these techniques will help you maximise your plum enjoyment.
Understanding Plum Ripening
Plums are classified as climacteric fruits. This means they continue to ripen after being harvested. This is thanks to their production of ethylene gas, a plant hormone that accelerates the ripening process. The rate at which a plum ripens off the tree depends on several factors, including its initial stage of maturity when picked, the ambient temperature, and humidity levels. Understanding these factors is the first step in mastering how to ripen plums off the tree.
When to Pick Plums for Ripening
The key to successful off-tree ripening is picking plums at the right stage. You can’t ripen a plum that’s picked too early. Look for these indicators:
- Slight Give: Gently squeeze the plum. It should yield slightly to pressure, but not be mushy. A truly underripe plum will be rock hard.
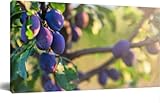
- Colour Change: While colour isn’t the only indicator, look for a shift from a deep green to the characteristic colour of the plum variety (red, purple, yellow, or green). However, some varieties may have a blush of colour even when not fully ripe.
- Freckles/Sugar Spots: Many plum varieties develop small, light-coloured speckles or spots as they mature. These are often a good sign of ripeness.
- Ease of Separation: A ripe plum will often detach from the branch with a gentle twist. If you have to tug hard, it’s likely too early.
If you pick plums that are still quite firm but showing signs of colour development, you’re in a good position to ripen them further indoors. If they are hard and green with no hint of colour, they might be too immature to ripen properly and may end up flavourless.
Methods for Ripening Plums Off the Tree
Once you have your plums, the goal is to create an environment that encourages ethylene gas accumulation and optimal ripening conditions. Here are the most effective methods:
1. The Countertop Method (room Temperature Ripening)
This is the simplest and most common method. It relies on ambient room temperature to facilitate ripening. (See Also: How to Kill a Sycamore Tree Safely and Effectively)
- Inspect and Sort: Lay your plums out on a counter or table. Check for any bruised or damaged fruits, as these can rot and affect the others. Remove any overripe or spoiled plums.
- Single Layer: Arrange the plums in a single layer. Avoid piling them up, as this can lead to bruising and poor air circulation, hindering even ripening.
- Good Airflow: Ensure the area has decent air circulation. Don’t place them in a sealed container or a stuffy corner.
- Monitor Daily: Check the plums daily. Gently squeeze them to gauge their progress. Ripening can take anywhere from a few days to a week or more, depending on how underripe they were initially.
This method is ideal for plums that are already showing some signs of ripeness and colour. The natural ethylene produced will slowly do its work.
2. The Paper Bag Method (accelerated Ripening)
This technique uses a paper bag to trap the ethylene gas that the plums naturally produce, thus speeding up the ripening process. It’s a highly effective way to ripen plums faster.
- Select Your Bag: Choose a standard paper grocery bag or a brown paper lunch bag. Avoid plastic bags, as they can trap moisture and lead to mould.
- Place Plums Inside: Put your plums into the paper bag. Again, avoid overcrowding. If you have a large quantity, use multiple bags.
- Add an Apple or Banana (Optional but Recommended): For an extra boost, add a ripe apple or banana to the bag. These fruits are high ethylene producers and will significantly speed up the ripening of the plums.
- Seal Loosely: Fold or roll the top of the bag closed. Don’t seal it airtight; you want some air exchange to prevent excess moisture buildup.
- Store in a Moderate Location: Place the bag on your countertop, away from direct sunlight. Sunlight can cause the plums to overheat and spoil rather than ripen.
- Check Regularly: Open the bag daily to check the plums’ ripeness and to allow for air circulation. Remove any fruits that have ripened fully or are starting to spoil.
The paper bag method can typically ripen plums in 2-4 days, depending on the fruit and the addition of other ethylene-producing fruits.
3. The Bowl Method (similar to Countertop)
This is a slight variation of the countertop method, using a bowl to group the fruits. It’s less controlled than the paper bag but still effective for plums that are close to ripe.
- Choose a Bowl: Select a shallow bowl or fruit basket.
- Arrange Plums: Place the plums in a single layer in the bowl, ensuring they are not touching too much.
- Find a Suitable Spot: Keep the bowl in a location with a consistent room temperature, away from direct sunlight and drafts.
- Monitor and Rotate: Check the plums daily. Gently rotate them to ensure even exposure to air and to observe ripening.
This method is best suited for plums that are already showing good colour and are just slightly firm. It allows for good air circulation and gentle ripening.
Factors Affecting Ripening Speed
Several factors influence how quickly your plums will ripen off the tree: (See Also: How to Drop a Leaning Tree Safely and Effectively)
Initial Maturity
As mentioned, this is the most crucial factor. A plum picked when it’s already starting to soften and change colour will ripen much faster than one picked when it’s hard and green.
Temperature
Warmer temperatures accelerate ripening. Plums will ripen more quickly at room temperature (around 65-75°F or 18-24°C) than in a cool environment. However, excessively high temperatures can lead to spoilage.
Ethylene Gas
Ethylene is the ripening hormone. Fruits that produce a lot of ethylene (like apples and bananas) can help speed up the ripening of other fruits. Conversely, storing ripening plums near ethylene-sensitive produce (like leafy greens) can cause those items to spoil faster.
Humidity
While not as critical as temperature and ethylene, moderate humidity can help prevent plums from shrivelling as they ripen. However, very high humidity, especially combined with poor air circulation, can encourage mould growth.
How to Tell When Plums Are Ripe (after Off-Tree Ripening)
The signs of ripeness are the same whether the plum ripened on the tree or off it:
- Gentle Give: The plum should yield slightly to a gentle squeeze.
- Sweet Aroma: Ripe plums often emit a sweet, fruity fragrance.
- Full Colour: The colour should be deep and characteristic of the variety.
- Smooth Skin: The skin should be smooth and slightly loose over the flesh, not wrinkled or puckered (which indicates overripeness or dehydration).
- Taste Test: The ultimate test! A ripe plum will be juicy, sweet, and have a pleasant tartness.
What to Do with Overripe Plums
Sometimes, despite your best efforts, plums can become overripe. Don’t let them go to waste! (See Also: How to Use Tea Tree Oil for Tooth Pain Safely)
- Compost: If they are truly spoiled or mouldy, the best option is the compost bin.
- Sauces and Jams: Overripe plums are often softer and sweeter, making them ideal for making plum sauce, compotes, or jams.
- Smoothies: Blend them into your favourite smoothie recipes.
- Baking: If they are just slightly too soft for fresh eating, they can still be excellent in pies, tarts, or crumbles.
Storing Ripened Plums
Once your plums are perfectly ripe, you’ll want to enjoy them promptly. However, you can extend their usability slightly:
- Refrigeration: For ripe plums, refrigeration can slow down the ripening process and keep them fresh for several days to a week. Store them in a breathable bag or container in the crisper drawer.
- Freezing: If you have a surplus of ripe plums, freezing is an excellent option for long-term storage. Wash, pit, and halve or slice the plums. Spread them on a baking sheet to freeze individually, then transfer to freezer bags or containers.
Troubleshooting Common Ripening Issues
You might encounter a few bumps along the road when trying to ripen plums.
Plums Not Ripening
If your plums seem stubbornly firm after several days, consider these possibilities:
- Picked Too Early: They may have been too immature when picked. Very immature fruits may never ripen properly.
- Insufficient Ethylene: If you’re using the countertop method, there might not be enough ethylene gas being produced. Try moving them to a warmer spot or adding an apple or banana to the vicinity.
- Cold Storage: If the plums have been stored in a cool place (like a refrigerator) before you intended to ripen them, they may have been damaged and unable to ripen further.
Plums Spoiling Instead of Ripening
This usually happens when plums are picked too late, are already bruised, or are stored in conditions that promote mould:
- Overcrowding: Too many plums piled together reduce airflow and can trap moisture.
- Damaged Fruit: Bruised or damaged plums are more susceptible to rot. Remove them immediately.
- Excessive Moisture: Avoid storing ripening plums in sealed plastic bags or in very humid, unventilated areas.
- Warm, Stagnant Air: While warmth helps ripen, stagnant, overly hot air can lead to spoilage.
By understanding these methods and troubleshooting common issues, you can confidently ensure that your harvested plums reach their peak deliciousness, allowing you to savour their sweet, juicy flavour to the fullest.
Conclusion
Mastering how to ripen plums off the tree is a rewarding skill for any fruit enthusiast. By understanding the role of ethylene gas and controlling the ripening environment, you can transform firm, tart plums into sweet, succulent delights. Whether you opt for the simple countertop method, the accelerated paper bag technique, or a combination, patience and observation are key. With these simple strategies, you can enjoy perfectly ripe plums, extending the bounty of your harvest and reducing waste, ensuring every plum reaches its full flavour potential.
Recommended Products