Is your aloe vera plant looking a little cramped? Perhaps it’s outgrowing its current home, or maybe the soil seems compacted and dry. These are all telltale signs that it’s time to learn how to repot an aloe vera plant. Repotting is a crucial aspect of aloe vera care, ensuring your plant thrives and continues to provide its beneficial gel.
Aloe vera, a succulent known for its healing properties, needs the right conditions to flourish. This guide will walk you through every step, from choosing the perfect pot and soil to the aftercare required for a successful transplant. We’ll delve into the ‘why’ behind each step, ensuring you understand the process and can confidently repot your aloe vera.
Whether you’re a seasoned gardener or a beginner, this comprehensive guide will equip you with the knowledge and skills needed to repot your aloe vera plant with confidence. Get ready to give your aloe vera a fresh start and watch it thrive!
Why Repotting Aloe Vera Is Necessary
Repotting aloe vera isn’t just a cosmetic upgrade; it’s essential for the plant’s health and longevity. Over time, aloe vera plants outgrow their pots, leading to root-bound conditions and nutrient depletion. Regular repotting provides fresh soil, ample space for root growth, and a chance to assess the plant’s overall health.
Repotting also allows you to address any potential issues, such as root rot or pest infestations, before they become severe. Furthermore, the fresh soil provides essential nutrients that are often lacking in older potting mixes, promoting vigorous growth and the production of healthy leaves rich in beneficial gel. This process ensures your aloe vera plant remains vibrant and productive.
Signs Your Aloe Vera Needs Repotting
Recognizing the signs that your aloe vera needs repotting is key to its well-being. Several indicators signal that it’s time for a new home. Observing these signs allows you to act proactively and prevent potential problems.
- Root-bound roots: This is the most obvious sign. Roots circling the pot’s interior, often visible through drainage holes, indicate that the plant has outgrown its current container.
- Slowed growth: If your aloe vera’s growth has stagnated, despite adequate light and water, it might be root-bound or lacking nutrients.
- Soil compaction: The soil becomes compacted over time, reducing aeration and hindering root development. If the soil feels hard and doesn’t drain well, repotting is necessary.
- Nutrient deficiency: Older soil loses its nutrients. Yellowing leaves, especially the lower ones, can indicate a nutrient deficiency that repotting can often solve.
- Overcrowding: If the plant is producing many pups (baby plants) and the pot feels crowded, repotting allows for separation and healthier growth.
- Visible roots: Roots emerging from the top of the soil or the drainage holes are clear signs the plant needs more space.
By observing these signs, you can ensure that your aloe vera receives the care it needs to thrive. Recognizing these indicators will help you maintain a healthy and productive aloe vera plant.
How Often Should You Repot Aloe Vera?
The frequency of repotting depends on the plant’s growth rate, the size of the pot, and the overall health of the aloe vera. However, as a general rule, repotting aloe vera every one to two years is recommended. This schedule helps maintain optimal soil conditions and provides ample space for root development.
Younger plants tend to grow faster and may require repotting more frequently, perhaps annually. Mature plants, on the other hand, might only need repotting every two years or even less often, depending on their growth rate and the size of the pot. Monitoring your plant and watching for the signs mentioned previously will help you determine the best repotting schedule.
Best Time to Repot Aloe Vera
The ideal time to repot aloe vera is during the spring or early summer. This is when the plant is actively growing, and it can quickly establish roots in its new environment. Repotting during the growing season allows the plant to recover and adapt more efficiently.
While you can repot aloe vera at other times of the year, it’s best to avoid repotting during the dormant winter months. Repotting during the growing season gives the plant the best chance to recover and thrive. This timing allows for optimal root establishment and growth.
Choosing the Right Pot
Selecting the right pot is crucial for the health of your aloe vera. The pot’s size, material, and drainage capabilities all play a significant role in the plant’s well-being. Choosing the right pot will help prevent root rot and ensure proper growth.
Pot Size
When selecting a new pot, choose one that is slightly larger than the current one. A pot that is only one to two inches wider in diameter is usually sufficient. Avoid pots that are too large, as they can hold excess moisture and increase the risk of root rot. The extra space allows for root expansion without overwhelming the plant.
A pot that is significantly larger than the current one can also lead to the soil staying wet for too long, which can be detrimental to the plant’s health. The gradual increase in pot size is best for the plant’s overall health and growth.
Pot Material
The pot material affects drainage and aeration, both of which are critical for aloe vera. Terracotta pots are a popular choice due to their excellent drainage and breathability. These pots allow air to circulate around the roots, preventing them from becoming waterlogged. The porous nature of terracotta helps to wick away excess moisture.
Plastic pots, on the other hand, retain more moisture, which can be problematic for aloe vera if the soil doesn’t drain well. If you choose a plastic pot, ensure it has ample drainage holes and consider using a well-draining potting mix. Glazed ceramic pots offer a balance between aesthetics and functionality, but also need good drainage. (See Also: Basil Light Guide: How Much Light Does a Basil Plant Need?)
Drainage Holes
Drainage holes are non-negotiable for aloe vera pots. They allow excess water to escape, preventing root rot. Always choose a pot with multiple drainage holes at the bottom. These holes are essential for healthy root development.
Without adequate drainage, the roots can sit in water, leading to fungal infections and root rot. Ensure that the drainage holes are clear and unobstructed to ensure proper water drainage. This is a critical factor for the long-term health of your aloe vera.
Selecting the Right Soil
The type of soil you use significantly impacts the health and growth of your aloe vera. Aloe vera thrives in well-draining soil that doesn’t retain too much moisture. Choosing the right soil helps prevent root rot and ensures the roots get enough oxygen.
Best Soil Mix for Aloe Vera
The ideal soil mix for aloe vera should be well-draining, aerated, and slightly acidic to neutral. A good mix typically consists of a combination of ingredients that promote drainage and provide essential nutrients. A well-draining mix will prevent water from staying around the roots.
A common and effective soil mix includes:
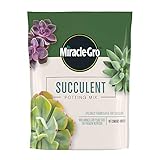
- Cactus or succulent potting mix: This is readily available and specifically formulated for plants like aloe vera, providing excellent drainage.
- Perlite or pumice: These materials improve drainage and aeration, preventing soil compaction.
- Coarse sand: Adds drainage and helps to create air pockets in the soil.
You can also create your own mix by combining these ingredients in the right proportions. The goal is to create a soil environment that mimics the plant’s natural habitat.
Avoiding the Wrong Soil
Avoid heavy, moisture-retaining soils, such as those high in clay or peat moss. These types of soils can lead to root rot. Standard potting soil, which is designed for general-purpose use, can also retain too much water.
Avoid using garden soil directly, as it often lacks proper drainage and may contain pests or diseases. The right soil mix is essential for the healthy growth of your aloe vera.
Step-by-Step Guide to Repotting Aloe Vera
Repotting your aloe vera can be a straightforward process when you follow the right steps. This guide will walk you through the process, ensuring a smooth transition for your plant. Following these steps carefully will help your aloe vera thrive in its new home.
Gather Your Supplies
Before you begin, gather all the necessary supplies to make the repotting process efficient and stress-free. Having everything ready will streamline the process and minimize any disruption to the plant.
You will need:
- A new pot with drainage holes
- Cactus or succulent potting mix
- Gloves (optional, to protect your hands from the gel)
- A trowel or small gardening shovel
- A clean, sharp knife or pruning shears (optional, for trimming roots)
- Water
Having all the supplies readily available ensures a smooth and efficient repotting process.
Prepare the New Pot
Before transplanting the aloe vera, prepare the new pot. This step ensures that the plant is ready for its new home. Preparing the pot correctly is crucial for the plant’s long-term health.
Start by:
- Adding a layer of soil: Fill the bottom of the pot with a layer of fresh potting mix. This layer should be deep enough to accommodate the aloe vera’s root ball.
- Checking the drainage: Ensure that the drainage holes are clear and not blocked. This will allow excess water to escape.
Preparing the new pot in advance will make the actual transplanting process much easier. (See Also: Mastering the Art: How to Maintain Cilantro Plant for Bountiful Harvests)
Removing the Aloe Vera From Its Old Pot
Carefully removing the aloe vera from its old pot is a delicate process. This step ensures minimal damage to the roots. Proper removal sets the stage for a successful transplant.
Follow these steps:
- Water the plant: Water the aloe vera a few hours before repotting to make the soil more pliable.
- Loosen the soil: Gently loosen the soil around the edges of the pot using a trowel or your fingers.
- Gently remove the plant: Turn the pot on its side and gently slide the aloe vera out, holding the base of the plant to support it. If the plant is stuck, you may need to tap the pot or gently squeeze the sides.
- Inspect the roots: Once the plant is out, inspect the roots for any signs of rot or disease. If you find any, trim them away with a clean, sharp knife or pruning shears.
Handling the aloe vera carefully during this step is essential to minimize stress and damage.
Planting the Aloe Vera in the New Pot
Planting the aloe vera in its new pot is the heart of the repotting process. Proper planting ensures the plant settles in comfortably and thrives. Planting the aloe vera correctly promotes healthy growth.
Here’s how to do it:
- Position the plant: Place the aloe vera in the center of the new pot, ensuring the top of the root ball is slightly below the rim of the pot.
- Add soil: Fill the pot with the remaining potting mix, gently packing the soil around the roots.
- Level the soil: Make sure the top of the root ball is level with the soil surface.
- Avoid burying the leaves: Do not bury the leaves. The base of the leaves should remain above the soil line.
Proper planting ensures the aloe vera gets the support and nutrients it needs to thrive.
Watering and Aftercare
After repotting, proper watering and aftercare are crucial for the aloe vera to establish itself in its new environment. Proper aftercare ensures that the aloe vera thrives in its new home.
Follow these aftercare tips:
- Water sparingly: Water the aloe vera lightly after repotting. Avoid overwatering, as the roots are more susceptible to rot after being disturbed.
- Provide adequate light: Place the repotted aloe vera in a location that receives bright, indirect light.
- Avoid direct sunlight: Avoid placing the plant in direct sunlight, especially immediately after repotting.
- Monitor for signs of stress: Watch for signs of stress, such as yellowing leaves or wilting.
- Resume regular watering: After a few weeks, you can resume your regular watering schedule, but always allow the soil to dry out between waterings.
By following these aftercare tips, you can help your aloe vera thrive in its new pot.
Troubleshooting Common Repotting Problems
Even with careful execution, problems can sometimes arise during or after repotting. Knowing how to troubleshoot these common issues can help you protect your aloe vera. Identifying and addressing these issues early on is crucial for the plant’s health.
Root Rot
Root rot is a common problem caused by overwatering or poor drainage. It can quickly lead to the decline and death of your aloe vera. Root rot is a serious issue that requires immediate attention.
Symptoms:
- Soft, mushy roots
- Yellowing leaves
- Foul odor
- Stunted growth
Solution:
- Remove the plant from the pot.
- Trim away any affected roots with a clean, sharp knife.
- Repot in fresh, well-draining soil.
- Water sparingly.
Addressing root rot quickly can save your plant.
Pest Infestations
Pests can sometimes find their way into the soil during repotting. Common pests include mealybugs and scale. Pests can damage the plant and hinder its growth. Identifying pests early is key to controlling them. (See Also: How to Tell What Plant I Have: A Comprehensive Guide)
Symptoms:
- White, cottony masses (mealybugs)
- Small, brown bumps on leaves (scale)
- Yellowing leaves
- Stunted growth
Solution:
- Inspect the plant thoroughly during repotting.
- If pests are present, treat with insecticidal soap or neem oil.
- Isolate the affected plant from other plants.
Prompt treatment can prevent pests from spreading and causing further damage.
Sunburn
Aloe vera plants can be sensitive to direct sunlight, especially after repotting. Sunburn can damage the leaves and hinder the plant’s growth. Protecting the plant from direct sunlight is crucial.
Symptoms:
- Brown or yellow patches on the leaves
- Wrinkled leaves
Solution:
- Move the plant to a location with bright, indirect light.
- Avoid sudden exposure to direct sunlight.
- Allow the plant to recover.
Protecting the plant from sunburn is essential for its recovery.
Propagating Aloe Vera While Repotting
Repotting provides an excellent opportunity to propagate aloe vera. You can easily create new plants from pups (baby plants) or leaf cuttings. Propagating aloe vera allows you to expand your collection or share plants with others. Propagating during repotting makes the process efficient.
Propagating From Pups
Aloe vera often produces pups, or small offshoots, around the base of the parent plant. These pups can be separated and potted to create new plants. Separating the pups is a simple and effective method of propagation.
Steps:
- Separate the pups: Gently separate the pups from the parent plant, ensuring they have their own roots.
- Pot the pups: Plant the pups in individual pots with well-draining soil.
- Water sparingly: Water the newly potted pups lightly and provide bright, indirect light.
Propagating from pups is a simple way to expand your aloe vera collection.
Propagating From Leaf Cuttings
While less common, you can also propagate aloe vera from leaf cuttings. However, this method is less reliable than propagating from pups. Propagating from leaf cuttings can be a rewarding challenge.
Steps:
- Take a leaf cutting: Cut a healthy leaf from the aloe vera plant.
- Allow the cutting to callus: Let the cut end of the leaf dry and callus over for a few days.
- Plant the cutting: Plant the callused end of the leaf cutting in well-draining soil.
- Water sparingly: Water lightly and provide bright, indirect light.
Propagating from leaf cuttings can be a fun experiment.
Conclusion: Keep Your Aloe Vera Thriving!
Learning how to repot an aloe vera plant is an essential skill for any plant owner. By following the steps outlined in this guide, you can ensure your plant remains healthy and thrives for years to come. Remember to choose the right pot, select well-draining soil, and provide proper aftercare. Regular repotting and proper care are key to maintaining a healthy and productive aloe vera plant. With a little care and attention, your aloe vera will continue to flourish and provide you with its beneficial properties.
Recommended Products