Is your trusty riding lawn mower sputtering, losing power, or refusing to start altogether? Before you resign yourself to buying a costly new machine, consider a more rewarding and economical option: rebuilding the engine yourself! It might sound daunting, but with the right preparation, tools, and a step-by-step approach, you can breathe new life into your mower’s heart.
This process isn’t just about saving money; it’s about understanding your equipment on a deeper level and gaining a valuable skill. We’ll guide you through every stage, from initial diagnosis to the final test run, ensuring you have the confidence and knowledge to tackle this project head-on. Get ready to get your hands dirty and your mower running like new!
How to Rebuild a Riding Lawn Mower Engine: A Comprehensive Guide
Rebuilding a riding lawn mower engine is a rewarding project that can significantly extend the life of your equipment and save you a considerable amount of money. While it requires patience, precision, and the right tools, it’s well within the reach of a determined DIYer. This guide will walk you through the entire process, from assessing the situation to the final tune-up.
Why Rebuild Your Riding Mower Engine?
Several factors might lead you to consider an engine rebuild:
- Performance Issues: Loss of power, excessive smoke, rough idling, or difficulty starting are common indicators of internal engine wear or damage.
- Age and Wear: Like any mechanical component, engines wear out over time. Piston rings wear down, valves can become leaky, and bearings can degrade.
- Catastrophic Failure: In some cases, a connecting rod might break, a piston could seize, or other major internal damage can occur, necessitating a complete overhaul.
- Cost Savings: A professional engine rebuild can be expensive. Doing it yourself, especially if you can source parts economically, is a far cheaper alternative to buying a new mower or engine.
- Learning and Satisfaction: There’s immense satisfaction in understanding and repairing complex machinery. It’s a great way to learn about internal combustion engines.
Assessing the Engine’s Condition
Before you even think about purchasing parts, it’s crucial to understand what’s wrong with your engine. This will help you determine if a rebuild is feasible and what specific components will need attention.
Common Symptoms and Their Causes:
1. Excessive Smoke:
- Blue Smoke: Usually indicates that oil is burning. This is often caused by worn piston rings, worn valve guides, or cracked piston skirts.
- White Smoke: Can signal that coolant is entering the combustion chamber, often due to a blown head gasket or a cracked cylinder head/block.
- Black Smoke: Typically points to an overly rich fuel mixture, meaning too much fuel and not enough air. This could be due to a clogged air filter, a faulty carburetor, or issues with the choke.
2. Loss of Power:
- Worn Piston Rings: Reduce compression, leading to less efficient combustion.
- Leaky Valves: Prevent the cylinder from sealing properly, again leading to loss of compression and power.
- Clogged Fuel System: A dirty fuel filter or carburetor can starve the engine of fuel.
- Ignition Problems: A weak spark from a faulty spark plug, coil, or ignition module will result in incomplete combustion.
3. Rough Idling or Misfiring: (See Also: How to Grow Perfect Grass Lawn: Your Ultimate Guide!)
- Spark Plug Issues: Fouled, worn, or incorrectly gapped spark plugs are a prime suspect.
- Carburetor Problems: Dirt or debris in the carburetor, or incorrect adjustments, can cause uneven fuel delivery.
- Vacuum Leaks: Leaks in intake gaskets or hoses can disrupt the air-fuel mixture.
- Valve Issues: Improperly adjusted valves or worn valve seats can cause misfires.
4. Engine Knocking or Pinging:
- Detonation/Pre-ignition: Can be caused by carbon buildup in the combustion chamber, incorrect timing, or using fuel with too low an octane rating.
- Rod Knock: A deep, rhythmic knocking sound often indicates worn connecting rod bearings, a serious issue requiring immediate attention.
Performing Basic Checks:
Before tearing into the engine, perform these checks:
- Check Oil Level and Condition: Low oil can cause severe damage. Oily, milky oil might indicate a head gasket issue.
- Inspect Spark Plug: Remove and examine the spark plug. Is it fouled, worn, or damaged?
- Check Air Filter: A clogged air filter restricts airflow, affecting performance.
- Test Compression: Using a compression tester, you can measure the pressure within each cylinder. Low or uneven readings are strong indicators of internal wear.
- Check for Fuel Delivery: Ensure fuel is reaching the carburetor.
Tools and Parts You’ll Need
Gathering the right tools and parts beforehand will make the rebuild process much smoother. Don’t skimp on quality; good tools are an investment.
Essential Tools:
| Tool | Purpose |
|---|---|
| Socket Set and Wrenches (Metric and SAE) | For removing and installing bolts and nuts. |
| Torque Wrench | Crucial for tightening bolts to manufacturer specifications, preventing damage. |
| Screwdriver Set | Various sizes for screws. |
| Pliers Set | For gripping, cutting, and manipulating small parts. |
| Piston Ring Compressor | To compress piston rings for installation into the cylinder. |
| Gasket Scraper | To remove old gasket material without scratching surfaces. |
| Feeler Gauges | For measuring valve clearances. |
| Dial Indicator (Optional but Recommended) | For measuring crankshaft and camshaft runout. |
| Honing Brush/Stones | For reconditioning the cylinder walls. |
| Valve Spring Compressor | To remove and install valve springs. |
| Parts Washer or Degreaser | For cleaning engine components. |
| Shop Manual | Absolutely essential for torque specs, procedures, and part numbers. |
| Clean Rags and Shop Towels | For cleaning and wiping. |
| Drain Pans | For draining oil and coolant. |
| Magnets (Pick-up tools) | For retrieving dropped small parts. |
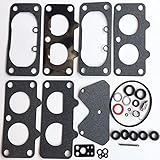
Essential Parts:
The exact parts you need will depend on your engine’s condition and model. However, a typical rebuild kit often includes:
- Piston and Piston Rings
- Connecting Rod (sometimes)
- Bearings (crankshaft, connecting rod)
- Gaskets and Seals (head gasket, valve cover gasket, oil seals, crank seals, etc.)
- Valves and Valve Springs (if damaged or worn)
- Cylinder Head Gasket Set
Pro Tip: Always purchase a quality rebuild kit specifically designed for your engine model. Generic kits may not fit correctly and could lead to premature failure.
Step-by-Step Engine Rebuild Process
This is a general guide. Always refer to your specific mower’s service manual for detailed instructions and torque specifications.
Step 1: Engine Removal
First, disconnect the battery and drain all fluids (oil and fuel). Carefully label all wires, hoses, and linkages as you disconnect them. Take photos as you go; they are invaluable for reassembly. Unbolt the engine from the mower deck and frame. Remove any belts, exhaust systems, or other components attached to the engine. (See Also: How Big Is 5 000 Square Feet Lawn: How Big Is 5,000 Sq Ft…)
Step 2: Disassembly and Cleaning
Mount the engine on a sturdy workbench or engine stand. Begin the disassembly process. Work systematically, placing parts in order on a clean surface. Use labeled bags or containers for small parts like bolts and nuts.
- Remove Valve Covers and Oil Pan: This allows access to the valvetrain and crankshaft.
- Remove Cylinder Head: Loosen bolts in the sequence specified in your manual (usually a spiral pattern from the outside in) to prevent warping.
- Remove Piston and Connecting Rod: Once the cylinder head is off, you can typically remove the connecting rod cap bolts and push the piston out from the top. Again, note the orientation of the piston and rod.
- Remove Crankshaft: Depending on the engine design, the crankshaft may be removed after the connecting rod.
- Remove Camshaft and Lifters: These are usually accessible after removing the valve covers.
Cleaning is paramount! Thoroughly clean every single part. Use a parts washer, degreaser, and wire brushes to remove all oil, carbon, and old gasket material. Inspect each component for wear, cracks, or damage. If a part is questionable, it’s often best to replace it.
Step 3: Inspection and Measurement
This is where you determine which parts need replacing. Use precision measuring tools.
- Cylinder Walls: Inspect for scoring, gouges, or excessive wear. Measure the cylinder bore diameter with a bore gauge and compare it to the service limit. If it’s out of spec or heavily scored, it will need to be bored out to accept an oversized piston.
- Piston and Rings: Check the piston for cracks or scoring. Measure the piston diameter and the ring gap. Worn rings will have excessive gap or be broken.
- Crankshaft: Inspect the journals for scoring or wear. Measure the diameter of the crank journals with a micrometer. Check for straightness (runout) using a dial indicator.
- Connecting Rod: Check for straightness and wear on the big and small ends. Measure the bore of the big end.
- Valves and Valve Seats: Inspect valves for bent stems or burnt faces. Check valve seats for pitting or wear. If valves or seats are worn, they will need to be ground or replaced.
- Camshaft: Check lobes for wear or pitting.
- Bearings: Inspect main bearings and connecting rod bearings for scoring, discoloration, or wear.
Step 4: Machining (if Necessary)
If your inspection reveals worn components beyond simple replacement, you’ll need to take the engine block and crankshaft to a machine shop.
- Cylinder Boring: The cylinder block can be bored to accept oversized pistons.
- Crankshaft Grinding: The crankshaft can be ground undersized to match with undersized bearings.
Important: Always get specific measurements and recommendations from your machine shop. They will tell you what size pistons and bearings to purchase.
Step 5: Reassembly
This is the reverse of disassembly, but with meticulous attention to detail and proper torque values.
- Install Crankshaft and Bearings: Ensure all bearing surfaces are clean and lubricated with assembly lube. Install the crankshaft and main bearings, torquing the main bearing caps to spec.
- Install Piston and Connecting Rod: Lubricate the piston skirts and rings with assembly lube. Use a piston ring compressor to carefully install the piston into the cylinder. Ensure the piston is oriented correctly (often a mark indicates the front). Install the connecting rod cap with new bearings and torque to spec. Rotate the crankshaft to ensure smooth movement.
- Install Camshaft and Lifters: Lubricate the camshaft lobes and bearings. Install the camshaft and lifters.
- Install Valves and Springs: Reassemble the cylinder head with new valves, springs, and seals if necessary. Lubricate valve stems and guides. Use a valve spring compressor to install the springs.
- Install Cylinder Head: Use a new head gasket and torque the head bolts in the correct sequence and to the specified torque values. This is critical to prevent leaks and warping.
- Install Oil Pump and Oil Pan: Install a new oil pump gasket and the oil pan with a new gasket.
- Install Valve Covers: Install with new gaskets.
- Install Other Components: Reattach the flywheel, carburetor, exhaust, and any other removed parts.
Lubrication is Key: Use plenty of assembly lube on all moving parts – bearings, journals, piston skirts, camshaft lobes, and valve stems. This prevents damage during initial startup. (See Also: How to Start a Kohler 7000 Series Lawn Mower: Start Your…)
Step 6: Reinstallation and Initial Startup
Carefully reinstall the engine back into the mower frame. Reconnect all wires, hoses, and linkages, using your labels and photos. Refill the engine with the correct type and amount of oil, and add fresh fuel. Double-check all connections.
Priming: Before attempting to start, you may need to prime the fuel system. Some engines have a manual primer bulb; others rely on the electric fuel pump.
Initial Start-up: Turn the ignition key. The engine should crank. Listen for any unusual noises. If it starts, let it run at idle for a few minutes. Watch for leaks. If everything seems okay, gradually increase the throttle.
Step 7: Break-in Period
A newly rebuilt engine needs a break-in period to allow the new piston rings to seat properly against the cylinder walls. This is crucial for long-term engine health.
- Vary Engine Speed: Do not run the engine at a constant speed for extended periods during the break-in. Vary the RPMs frequently.
- Avoid Heavy Loads: Do not mow heavy, thick grass or pull heavy loads during the initial break-in hours.
- Change Oil and Filter: After the first few hours of operation (check your manual for the exact time, often 5-10 hours), change the oil and filter. This removes any initial wear particles.
- Monitor Performance: Continue to monitor the engine for any unusual noises or performance issues.
Troubleshooting Common Rebuild Issues
Even with careful work, you might encounter problems. Here are a few common ones:
- No Start: Recheck spark, fuel, and compression. Ensure all electrical connections are secure.
- Rough Running: Could be a vacuum leak, improper valve adjustment, or a carburetor issue.
- Excessive Smoke: Likely a problem with piston ring seating, valve seals, or a blown head gasket.
- Oil Leaks: Recheck all seals and gaskets for proper installation and torque.
Don’t get discouraged if the engine doesn’t run perfectly right away. Patience and systematic troubleshooting are key.
Conclusion
Rebuilding a riding lawn mower engine is a significant undertaking, but one that offers immense rewards in terms of cost savings and mechanical understanding. By carefully diagnosing the issue, gathering the correct tools and parts, and meticulously following disassembly, inspection, and reassembly procedures, you can successfully restore your mower’s power. Remember to always consult your service manual for precise specifications and torque values. With patience and attention to detail, your rebuilt engine will be ready to tackle many more seasons of lawn care.
Recommended Products