So, you’re thinking about installing a post and rail fence? Great choice! They’re classic, attractive, and surprisingly versatile. Whether you’re looking to define your property line, contain livestock, or simply add a touch of rustic charm, a post and rail fence is a fantastic option. The good news? It’s a project you can absolutely tackle yourself, saving you money and giving you a sense of accomplishment.
This guide will walk you through how to put up a post and rail fence, from planning and preparation to the final touches. We’ll cover everything you need to know, including the necessary tools, materials, and step-by-step instructions. Get ready to transform your property and enjoy the satisfaction of a job well done. Let’s get started!
Planning and Preparation: The Foundation of Your Fence
Before you even think about swinging a post-hole digger, proper planning is crucial. A well-planned project is a successful project. Rushing this stage can lead to costly mistakes and a fence that doesn’t quite meet your needs. Let’s delve into the essential steps.
1. Define Your Needs and Goals
What do you want your fence to achieve? Are you aiming for aesthetics, security, livestock containment, or simply marking a boundary? Your answers will dictate the height, materials, and overall design of your fence. Consider the following:
- Purpose: What is the primary reason for the fence?
- Height: How tall should the fence be to meet your needs?
- Length: Measure the total length of the fence you need.
- Regulations: Check local zoning laws and homeowner association (HOA) rules regarding fence height, materials, and placement. You might need a permit.
- Aesthetics: Do you have a specific style in mind? (e.g., traditional, split rail, modern)
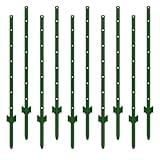
2. Choose Your Materials
The materials you select will heavily influence the fence’s durability, appearance, and cost. Here’s a breakdown of common options:
- Posts:
- Wood: Popular choices include pressure-treated pine, cedar, redwood, and locust. Pressure-treated pine is generally the most affordable. Cedar and redwood offer natural resistance to rot and insects. Locust is incredibly durable.
- Metal: Steel posts are strong and durable, often used with wood rails. They are very long-lasting.
- Concrete: Concrete posts are extremely durable and can be a good option in some areas, but they are heavy and more difficult to install.
- Rails:
- Wood: Typically made from the same wood as the posts. Split-rail fences use split rails, while other styles use sawn rails.
- Metal: Steel rails offer excellent durability and are often used with metal or wood posts.
- Composite: Composite rails are made from recycled materials and offer low maintenance.
- Fasteners:
- Screws: Use exterior-grade screws designed for wood.
- Nails: Galvanized or stainless steel nails are suitable for exterior use.
- Brackets: Metal brackets can be used to connect rails to posts, providing extra strength and stability.
People Also Ask: What is the most durable wood for a fence? (See Also: How to Setup Wireless Dog Fence: A Step-by-Step Guide for Safe Containment)
Locust is often considered the most durable wood for fencing due to its natural resistance to rot and insects. Cedar and redwood are also excellent choices, offering good longevity and requiring less maintenance than pressure-treated pine. Choosing the right wood depends on your budget and desired lifespan of the fence.
3. Calculate Materials
Accurate measurements are key to avoid buying too much or too little material. Here’s how to calculate what you need:
- Posts: Determine the spacing between posts (typically 8-12 feet). Divide the total fence length by the post spacing, then add one to account for the end post. For example, a 100-foot fence with 8-foot spacing would require (100 / 8) + 1 = 13.5, round up to 14 posts.
- Rails: The number of rails depends on the fence height and desired look. Common configurations are two, three, or four rails. Multiply the number of rails per section by the number of post sections. For the above example, a three-rail fence would need 3 rails per section multiplied by 13 sections which equals 39 rails.
- Concrete (optional): If you’re using concrete to set your posts, calculate the amount needed per hole. A good rule of thumb is to use one to two 80-pound bags of concrete per post depending on the size of the hole and the size of the post.
People Also Ask: How much does it cost to put up a post and rail fence?
The cost varies significantly based on materials, length, and labor (if you hire someone). Expect to pay anywhere from $15 to $50 or more per linear foot for materials alone. If you’re doing it yourself, factor in the cost of tools and your time. Hiring a professional can add significantly to the cost, depending on local rates.
4. Gather Your Tools
Having the right tools makes the job easier and ensures a professional finish. Here’s a list of essential tools: (See Also: How to Dog Proof a Chain Link Fence: Ultimate Guide & Solutions)
- Post Hole Digger: Manual or powered. A powered auger is recommended for larger projects.
- Level: To ensure posts are plumb (straight).
- Measuring Tape: For accurate measurements.
- String and Stakes: For marking the fence line.
- Shovel: For digging and backfilling.
- Wheelbarrow: For mixing and transporting concrete (if using).
- Hammer or Drill: For driving nails or screws.
- Circular Saw or Hand Saw: For cutting rails and posts (if necessary).
- Safety Glasses and Gloves: Essential for protecting yourself.
- Post-setting compound (Optional): Quikrete or similar.
Installation: Putting It All Together
Now for the fun part! Follow these steps to install your post and rail fence:
- Mark the Fence Line: Use string and stakes to clearly mark the path of your fence. This ensures a straight line and helps you visualize the finished product.
- Dig Post Holes: Use your post hole digger or auger to dig holes for your posts. The depth of the holes should be at least one-third to one-half the total height of the post. For example, an 8-foot post should have a hole depth of at least 2.5-4 feet. Consider your local frost line when determining the depth.
- Set the Posts:
- Place the first post (corner or end post) in the hole.
- Use a level to ensure the post is plumb (straight up and down) in both directions.
- Add gravel or small stones to the bottom of the hole for drainage.
- Option 1: Backfill the hole with soil, tamping it firmly in layers.
- Option 2: Use concrete to set the post. Pour the concrete mix into the hole, following the manufacturer’s instructions. Ensure the post remains plumb while the concrete sets. Use a level to check for plumb.
- Space and Set Remaining Posts:
- Using your chosen post spacing, set the remaining posts, using the end/corner posts as a guide.
- Use a string line stretched between the end/corner posts to keep the tops of the posts aligned.
- Level each post before backfilling or adding concrete.
- For concrete, allow the concrete to cure according to the manufacturer’s instructions (usually 24-72 hours) before proceeding to the next step.
- Attach the Rails:
- For Split Rail Fences: Simply slide the rails into the notches or pockets in the posts.
- For Sawn Rail Fences: Attach the rails to the posts using nails, screws, or brackets. Ensure the rails are level. Use a level to check.
- Space the rails evenly between the posts.
- Check and Adjust: Once all the rails are in place, walk the entire fence line and check for any unevenness or misalignment. Make any necessary adjustments.
- Clean Up: Remove any leftover materials and debris.
- Finishing Touches (Optional): Consider adding a coat of stain or sealant to protect the wood and enhance its appearance.
People Also Ask: How long does it take to put up a post and rail fence?
The time it takes depends on the length of the fence, the number of posts, the soil conditions, and your experience. A small project (e.g., 50 feet) might take a weekend, while a larger project could take several days or even weeks. Renting a powered auger can significantly speed up the process.
Tips for Success:
- Call Before You Dig: Before you start digging, call your local utility company to locate and mark any underground utilities (gas lines, power cables, etc.). This is a free service and prevents accidental damage and potential injury.
- Use a Level: A level is your best friend during this project. Check the posts frequently to ensure they are plumb and the rails are level.
- Work in Teams: Having a helper can make the job much easier, especially when setting posts and attaching rails.
- Consider Drainage: Ensure proper drainage around the posts to prevent water from pooling and causing rot.
- Proper Spacing: Maintain consistent spacing between posts and rails for a clean, professional look.
- Safety First: Wear safety glasses, gloves, and appropriate footwear throughout the project. Be careful when using power tools.
Troubleshooting Common Problems
Even with careful planning, you might encounter some challenges. Here’s how to address common issues:
- Uneven Ground: If the ground is uneven, you might need to adjust the height of the posts or use shims to ensure the rails are level.
- Loose Posts: If a post feels loose, you might need to add more concrete or tamp the soil more firmly around the base.
- Misaligned Rails: If the rails are misaligned, loosen the fasteners, adjust the rail, and then re-secure it.
- Difficult Soil: Rocky or compacted soil can make digging post holes difficult. Consider using a powered auger or pre-drilling holes with a smaller diameter bit.
- Rotting Wood: If the wood rots prematurely, replace the affected sections. Consider using rot-resistant wood like cedar or redwood, or treating the wood with a wood preservative.
People Also Ask: How do you fix a leaning fence post? (See Also: How High Fence for Chickens? Ultimate Guide to Coop Security)
The fix depends on the severity of the lean. For a minor lean, you might be able to straighten the post and add more concrete or tamp the soil more firmly around the base. For a more significant lean, you might need to remove the post, re-dig the hole, reset the post with fresh concrete, and brace it until the concrete cures.
Maintenance and Longevity: Keeping Your Fence in Top Shape
Regular maintenance ensures your post and rail fence remains attractive and functional for years to come. Here’s a maintenance checklist:
- Inspect Regularly: Inspect your fence at least twice a year, or after severe weather events. Look for signs of rot, damage, or loose fasteners.
- Clean as Needed: Remove any debris, such as leaves or branches, that might accumulate against the fence.
- Treat the Wood: Apply a coat of stain or sealant every 2-3 years (or as recommended by the product manufacturer) to protect the wood from the elements.
- Replace Damaged Sections: Promptly replace any damaged posts or rails to prevent further deterioration.
- Trim Vegetation: Keep vegetation away from the fence to prevent moisture buildup and potential rot.
- Tighten Fasteners: Check and tighten any loose screws or nails.
People Also Ask: How long does a post and rail fence last?
The lifespan of a post and rail fence depends on the materials, climate, and maintenance. With proper maintenance, a wooden fence can last 15-30 years or more. Using rot-resistant wood and applying regular treatments can significantly extend its lifespan.
Verdict
Putting up a post and rail fence is a rewarding project that can significantly enhance your property. By following these steps and paying attention to detail, you can create a beautiful and functional fence that will last for years. Remember to prioritize safety, take your time, and don’t hesitate to ask for help if needed. Enjoy the process and the satisfaction of a job well done! You now have the knowledge to successfully complete your project.
Recommended Products