Tired of raking up grass clippings after every mow? We get it. That endless chore can turn a satisfying lawn care session into a tedious one. Fortunately, there’s a simple solution that can save you a significant amount of time and effort: attaching a grass collection bag to your lawn mower.
Putting a bag on your lawn mower might seem daunting at first, but it’s usually a straightforward process designed to make your life easier. This guide will walk you through everything you need to know, from identifying the right bag for your mower to securely attaching it. Say goodbye to piles of clippings and hello to a cleaner, tidier yard with less work.
The Benefits of Bagging Your Grass
Before we dive into the ‘how-to,’ let’s quickly touch upon why you’d even want to put a bag on your lawn mower. The primary advantage, of course, is convenience. Instead of dealing with unsightly piles of grass that need raking, bagging allows you to collect the clippings directly into a container. This makes cleanup a breeze and leaves your lawn looking pristine.
Beyond aesthetics, bagging can also be beneficial for your lawn’s health in certain situations. While mulching grass clippings is often praised for returning nutrients to the soil, there are times when excessive thatch buildup can occur. In these instances, removing the clippings via a bag can help prevent this issue. It’s also particularly useful for those who prefer a very manicured look or are dealing with overgrown areas where mulching might not be as effective.
Choosing the Right Grass Bag for Your Mower
The first crucial step is ensuring you have the correct grass bag for your specific lawn mower model. Not all bags are universal, and using the wrong one can lead to improper fit, poor collection, or even damage to your mower.
Types of Lawn Mower Bags
Grass bags generally fall into a few main categories, often determined by the type of mower:
- Push Mowers: These typically use smaller, often fabric bags that attach to the rear discharge chute.
- Riding Mowers (Tractors & Zero-Turns): These often have larger capacity bags, sometimes referred to as ‘baggers’ or ‘collection systems.’ They can be single bags or dual-bag systems for extended mowing time. Some riding mowers also come with a ‘mulch plug’ that you insert when you don’t want to bag.
Compatibility Is Key
When purchasing a bag, look for: (See Also: How Do I Get Moss Out of My Lawn? Expert Guide!)
- Your Mower’s Make and Model: Most manufacturers offer specific bagging kits designed for their mowers. Check your owner’s manual for recommendations or part numbers.
- Deck Size: The size of your mower’s cutting deck (e.g., 21-inch, 42-inch, 54-inch) is a critical factor. Bags are designed to work with specific deck sizes to ensure proper airflow and collection.
- Attachment System: Examine how bags typically attach to your mower type. Some use hooks, others have clamping mechanisms, and riding mower baggers might require a special ‘hitch’ or mounting bracket.
Where to Find Replacement Bags
You can typically find grass bags at:
- Lawn Mower Dealerships: The best place for genuine, model-specific parts.
- Home Improvement Stores: Stores like Home Depot or Lowe’s often carry a selection of universal and brand-specific bags.
- Online Retailers: Amazon, eBay, and manufacturer websites offer a vast array of options. Be sure to carefully check the product description for compatibility.
Preparing Your Lawn Mower for Bagging
Before you even think about attaching the bag, there are a few preparatory steps you should take. These ensure a smooth installation and effective grass collection.
Safety First!
This is paramount. Always ensure the mower is completely turned off, and the spark plug wire is disconnected. This prevents any accidental starts while you’re working around the mower deck and blades.
Identify the Discharge Chute
Locate the discharge chute on your mower. This is the opening where the grass clippings are expelled. For most push mowers, it’s a flap on the rear or side of the deck. For riding mowers, it’s usually a port on the deck that connects to a chute leading to the bagger system.
Remove Mulch Plugs (if Applicable)
If your mower is currently set up for mulching, you’ll likely need to remove a mulch plug. This is a piece that blocks the discharge chute to keep the clippings under the deck for re-cutting. Consult your owner’s manual to see how to remove it for your specific model.
How to Put a Bag on a Push Lawn Mower (step-by-Step)
Attaching a bag to a push mower is generally quite simple. Here’s a common process: (See Also: How to Seed a New Lawn in the Spring: How to Seed a New…)
- Ensure Safety Precautions: As mentioned, turn off the mower, disconnect the spark plug wire, and allow the engine to cool.
- Locate the Bagging Attachment Point: On the rear or side of the mower deck, you’ll find where the bag is meant to attach. This might be a bracket, a hook, or a specific opening.
- Prepare the Bag: Unfold the grass bag. If it’s a fabric bag, ensure it’s properly shaped and ready to receive clippings. Some bags have a frame or support that needs to be assembled or unfolded.
- Align the Bag with the Discharge Chute: Position the opening of the grass bag directly over or against the discharge chute on your mower deck.
- Secure the Bag: This is where the attachment mechanism comes into play.
- Hook/Bracket System: Many bags simply hook onto brackets or posts located around the discharge chute area. You might need to lift a flap or lever to secure it.
- Tension Straps: Some bags use straps that you wrap around the mower deck and tighten to hold the bag in place.
- Clamps: Less common for push mowers, but some might use a clamping system.
Pro Tip: If you’re having trouble with the fit, double-check that you have the correct bag for your mower’s make, model, and deck size. Sometimes, a slight adjustment to the bag’s position or the mower’s flap can make all the difference.
How to Install a Bagger System on a Riding Mower
Installing a bagger system on a riding mower is a more involved process, often requiring a bit more assembly. These systems typically consist of a chute that connects the mower deck to one or two collection bags mounted at the rear.
Components of a Riding Mower Bagger System
A typical riding mower bagger system includes:
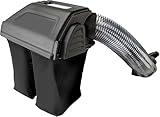
- Collection Bags: Usually made of durable fabric, these can be single or double.
- Chute: A flexible or rigid tube that directs clippings from the deck to the bags.
- Mounting Brackets/Hitch: Hardware that attaches the bagger unit to the rear of the mower.
- Deck Adapter: A piece that fits into the mower deck’s discharge opening to connect the chute.
Installation Steps (general Guide)
Note: Always refer to your specific bagger system’s installation manual, as procedures can vary significantly between brands and models.
- Safety First: Park the mower on a level surface, engage the parking brake, turn off the engine, and remove the key. Disconnect the spark plug wires.
- Remove Existing Attachments: If you have a tow hitch or other rear attachments, you may need to remove them to install the bagger mounting bracket.
- Attach the Mounting Bracket/Hitch: Securely fasten the bracket or hitch assembly to the rear of your riding mower according to the manual’s instructions. This often involves bolts and washers.
- Install the Deck Adapter: Locate the discharge chute opening on your mower deck. Remove any mulch plug or existing cover. Install the deck adapter, ensuring it creates a tight seal. This might involve screws or a snap-fit mechanism.
- Connect the Chute: Attach one end of the chute to the deck adapter and the other end to the bagger unit (where the bags will attach). Ensure the connections are secure and there are no gaps.
- Assemble and Mount the Bags: If your bags require assembly (e.g., attaching a frame or handle), do so now. Mount the collection bags onto the bagger unit, typically by sliding them onto hooks or into designated slots. Ensure they are properly seated and secured.
- Connect the Chute to the Bags: If the chute doesn’t directly connect to the bags, there might be a secondary connection point on the bagger unit.
- Final Checks: Inspect all connections to ensure they are tight and secure. Verify that the bags are properly oriented and that the chute is not kinked or obstructed.
- Reconnect Spark Plug Wires: Once everything is installed, reconnect the spark plug wires.
Important Consideration: Some riding mower baggers require a power take-off (PTO) connection or a separate drive belt to power an impeller that helps move the clippings into the bags, especially for larger capacity systems. If your system has these, consult the manual for their installation and connection.
Tips for Effective Grass Collection
Once your bag is on, you’ll want to maximize its performance. Here are some tips: (See Also: How to Turn on John Deere Lawn Mower: Easy Steps)
- Don’t Mow Wet Grass: Wet grass clumps together and is harder to collect. It can also clog the bag and chute. Wait for the grass to dry.
- Mow at the Right Height: Avoid cutting more than one-third of the grass blade length at a time. Cutting too much at once creates larger clippings that are harder to bag.
- Empty Bags Regularly: Don’t let the bags get completely stuffed. Overfilling can reduce airflow, leading to poor collection and potentially straining your mower’s engine. Empty them when they are about two-thirds full.
- Keep the Bag Clean: Periodically clean out the grass bag. Dried clippings can impede airflow and harbor mold or mildew. A quick shake-out or rinse with water often suffices.
- Check for Clogs: If you notice clippings not entering the bag, stop the mower (and disconnect the spark plug wire!) to check the chute and bag opening for clogs.
- Consider a Bagger with an Indicator: Some higher-end bagger systems come with a visual or audible indicator to let you know when the bag is full.
Troubleshooting Common Issues
Even with the right bag and careful installation, you might encounter a few hitches. Here’s how to address them:
| Problem | Possible Cause | Solution |
|---|---|---|
| Grass clippings blowing out around the bag opening. | Bag not securely attached; Chute not fully covering discharge. | Re-secure the bag, ensuring a tight fit. Verify the bag opening aligns perfectly with the mower’s discharge. |
| Poor grass collection; clippings left on lawn. | Bag is too full; Mowing wet grass; Clogged chute or bag; Mower deck height too low. | Empty the bag. Wait for grass to dry. Check and clear any clogs. Raise mower deck height. |
| Bag tears or rips. | Overfilling bag; Sharp objects in grass; Wear and tear. | Empty bags when 2/3 full. Inspect lawn for debris before mowing. Consider a more durable bag. |
| Bag won’t stay attached. | Incorrect bag for mower; Worn attachment points. | Ensure you have the correct bag for your model. Check attachment hardware for damage and replace if necessary. |
| Riding mower bagger system not collecting efficiently. | Chute obstruction; Impeller issues (if applicable); Loose connections. | Inspect and clear the chute. Check impeller for damage or debris. Ensure all connections are tight. |
Maintaining Your Grass Bag
To ensure your grass bag lasts and performs optimally, a little maintenance goes a long way:
- Cleaning: After each use, it’s a good idea to shake out any loose clippings. Periodically, wash the bag with water and mild soap. Allow it to dry completely before storing.
- Inspection: Before and after each mowing session, visually inspect the bag for any tears, holes, or worn stitching. Check the seams and the opening for any signs of damage.
- Storage: Store the bag in a dry, protected area when not in use. Avoid leaving it exposed to harsh weather conditions, which can degrade the fabric over time.
- Zipper/Closure Maintenance: If your bag has a zipper or other closure mechanism, ensure it’s kept clean and functions smoothly. Lubricate zippers if necessary.
By following these simple maintenance steps, you can significantly extend the lifespan of your grass bag and ensure it continues to collect clippings effectively season after season.
Conclusion
Putting a bag on your lawn mower is a practical upgrade that streamlines your yard work. By following the correct steps for your mower type – whether it’s a simple push mower or a more complex riding mower bagger system – you can significantly reduce cleanup time and maintain a tidier lawn. Remember to always prioritize safety, ensure you have the right equipment, and perform regular maintenance for optimal performance.
Recommended Products