Peperomias, with their diverse foliage and easy-going nature, have become a favorite amongst plant enthusiasts. Their charming appearance and relatively low-maintenance requirements make them ideal for both beginners and experienced gardeners. But have you considered expanding your collection without buying more plants?
Propagating a peperomia is a rewarding experience that allows you to multiply your beloved plants, creating more greenery for your home or sharing with friends. This guide will take you step-by-step through the process, ensuring you have the knowledge and confidence to successfully propagate your own peperomia plants. We’ll cover everything from the best propagation methods to the ideal conditions for optimal growth.
Whether you’re looking to save money, expand your collection, or simply enjoy the satisfaction of nurturing new life, learning how to propagate a peperomia plant is a valuable skill. Get ready to uncover the secrets of peperomia propagation and embark on a fulfilling journey of plant parenthood. Let’s delve into the world of peperomia propagation and discover how easy it can be!
Understanding Peperomia Plants and Propagation
Before diving into the specifics of propagation, it’s essential to understand the peperomia plant itself. Peperomias belong to the Piperaceae family, which includes over 1,000 species. They are native to tropical and subtropical regions worldwide, known for their diverse leaf shapes, sizes, and textures. These plants are generally compact, making them well-suited for indoor environments.
Peperomias are often referred to as ‘radiator plants’ due to their ability to thrive in relatively low-light conditions. They are semi-succulent, meaning they store water in their leaves and stems, making them drought-tolerant. This characteristic contributes to their ease of care and makes them a great choice for busy individuals or those new to plant care.
Why Propagate Peperomias?
There are several compelling reasons to propagate peperomias. Firstly, it’s an economical way to expand your plant collection. Instead of purchasing new plants, you can create duplicates from your existing ones, saving money in the long run. Propagating also allows you to share your plants with friends and family, spreading the joy of plant ownership.
Secondly, propagation is an incredibly rewarding experience. Watching a tiny cutting transform into a thriving plant is a testament to your care and nurturing skills. This process fosters a deeper connection with your plants and provides a sense of accomplishment. Finally, propagation can be a fun and educational activity, providing a deeper understanding of plant biology and growth processes.
Common Peperomia Species for Propagation
While many peperomia species can be propagated, some are more popular and easier to propagate than others. Some of the most common and easily propagated peperomia species include:
- Peperomia Obtusifolia (Baby Rubber Plant): Known for its thick, rounded, glossy green leaves. This species is very forgiving and roots easily.
- Peperomia Rosso: Characterized by its dark green, textured leaves with red undersides. It’s a striking plant that propagates well through various methods.
- Peperomia Watermelon (Peperomia argyreia): Distinctive for its watermelon-like striped leaves. This species is relatively easy to propagate, although it can be slightly slower than others.
- Peperomia Ginny (Peperomia clusiifolia ‘Ginny’): Features variegated leaves with creamy white and green edges. This variety propagates well, and the variegation is usually maintained.
- Peperomia Hope (Peperomia tetraphylla ‘Hope’): A trailing peperomia with small, round, succulent leaves. It propagates readily and is ideal for hanging baskets.
These are just a few examples, and the propagation techniques discussed in this guide can generally be applied to most peperomia species. Always research the specific needs of your peperomia variety for optimal results.
Methods of Propagating Peperomias
There are several effective methods for propagating peperomias. The most common include stem cuttings, leaf cuttings, and division. Each method has its advantages, and the best choice depends on the specific peperomia species and your personal preferences. The following sections will detail each of these methods.
Propagating Peperomias From Stem Cuttings
Stem cuttings are one of the most popular and reliable methods for propagating peperomias. This method involves taking a cutting from the stem of the mother plant and encouraging it to develop roots. It’s a relatively straightforward process that yields quick results.
Stem cuttings are particularly effective for peperomias with more upright or trailing growth habits. This method ensures that you are replicating the exact characteristics of the parent plant. Here’s a detailed guide on how to propagate using stem cuttings. (See Also: How Much Does It Cost to Install a Hydropower Plant? A Detailed Guide)
Materials Needed:
- Healthy peperomia plant
- Sharp, clean scissors or a knife
- Water or rooting medium (sphagnum moss, perlite, or a well-draining potting mix)
- Small container (glass jar, pot)
- Optional: Rooting hormone
Step-by-Step Instructions:
- Select and Prepare the Cutting: Choose a healthy stem with several leaves. The cutting should be approximately 3-4 inches long. Using your clean scissors or knife, cut the stem just below a node (where the leaves emerge). Remove the leaves from the bottom inch of the stem to prevent them from rotting in the water or soil.
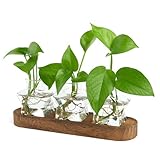
- Rooting in Water: Place the stem cutting in a glass of water, ensuring that the node is submerged. Make sure the leaves are above the water line. Change the water every few days to keep it fresh and prevent the growth of algae.
- Rooting in Potting Medium: Dip the cut end of the stem in rooting hormone (optional). Plant the cutting in a well-draining potting mix or a mixture of perlite and peat moss. Water the soil lightly and keep it consistently moist, but not waterlogged.
- Provide Ideal Conditions: Place the cutting in a location with bright, indirect light. Avoid direct sunlight, which can scorch the leaves. Maintain a warm and humid environment, which promotes root development.
- Wait for Roots to Develop: Roots should begin to appear within a few weeks, whether in water or soil. In water, you’ll see the roots directly. In soil, gently tug on the cutting to feel for resistance, or carefully examine the soil for root growth.
- Transplant (if rooted in water): Once the roots are about an inch long, transplant the rooted cutting into a pot with well-draining potting mix. Water thoroughly after transplanting.
- Care for Your New Plant: Continue to care for your new peperomia as you would a mature plant. Provide bright, indirect light, water when the top inch of soil is dry, and fertilize occasionally during the growing season.
Propagating Peperomias From Leaf Cuttings
Leaf cuttings are another effective method for propagating peperomias, particularly for species with larger leaves. This method involves taking a leaf from the mother plant and encouraging it to develop both roots and a new plant. It’s a slightly slower process than stem cuttings, but it’s still very effective.
Leaf cuttings are excellent for propagating peperomias where stem cuttings are not easily available or if you have a single leaf to work with. The process is a bit different, but with patience, you can successfully propagate your peperomia.
Materials Needed:
- Healthy peperomia plant
- Sharp, clean scissors or a knife
- Water or rooting medium (sphagnum moss, perlite, or a well-draining potting mix)
- Small container (glass jar, pot)
- Optional: Rooting hormone
Step-by-Step Instructions:
- Choose and Prepare the Leaf: Select a healthy leaf from the plant. Using a clean knife or scissors, cut the leaf from the stem. You can either cut the entire leaf with a small portion of the stem attached, or you can cut the leaf in half or into smaller sections (for larger leaves like those on Peperomia obtusifolia).
- Rooting in Water (Stem Method): If you have a leaf cutting with a small stem, you can root it in water, similar to stem cuttings. Place the stem in a glass of water, ensuring the leaf itself is above the water line. Change the water every few days.
- Rooting in Potting Medium (Stem or Leaf Sections): Dip the cut end of the leaf (or stem) in rooting hormone (optional). Plant the base of the leaf or leaf section in a well-draining potting mix or a mixture of perlite and peat moss. Ensure that the cut end is buried in the soil.
- Provide Ideal Conditions: Place the leaf cutting in a location with bright, indirect light. Maintain a warm and humid environment to encourage root and new plant development.
- Wait for Roots and New Growth: Roots should develop within a few weeks to a couple of months. New plantlets may emerge from the base of the leaf or from the cut edges of the leaf sections.
- Transplant: Once the new plantlets have developed roots and a few leaves, transplant them into individual pots with well-draining potting mix. Handle the new plants gently.
- Care for Your New Plant: Continue to provide bright, indirect light, water when the top inch of soil is dry, and fertilize occasionally during the growing season.
Propagating Peperomias Through Division
Division is a straightforward method for propagating peperomias, particularly those that form clumps or have multiple stems. This method involves separating the plant into smaller sections, each with its roots and stems. It’s best done during the plant’s active growing season (spring or summer).
Division is a simple, effective method for multiplying peperomias that naturally grow in clumps. It is less common than stem or leaf cuttings, but a valuable technique for propagating certain types of peperomias.
Materials Needed:
- Mature peperomia plant
- Sharp, clean knife or scissors
- Potting mix
- Pots
Step-by-Step Instructions:
- Prepare the Plant: Gently remove the peperomia from its pot. Loosen the soil around the roots to make it easier to separate the plant.
- Identify Divisions: Look for natural divisions in the plant, where the stems and roots are already somewhat separated.
- Divide the Plant: Using a sharp, clean knife or scissors, carefully divide the plant into sections, ensuring that each section has roots and stems. Be gentle to avoid damaging the roots.
- Pot the Divisions: Plant each division in its own pot with well-draining potting mix. Ensure that the roots are covered and the stems are upright.
- Water and Care: Water the newly potted divisions thoroughly. Place them in a location with bright, indirect light. Water when the top inch of soil is dry, and fertilize occasionally during the growing season.
Troubleshooting Common Propagation Issues
Even with careful attention, propagation can sometimes present challenges. Understanding common issues can help you troubleshoot and increase your success rate. Here are some common problems and their solutions:
Rotting:
Cause: Overwatering, using a non-sterile propagation medium, or planting cuttings too deep. Solution: Ensure the propagation medium is well-draining. Avoid overwatering; allow the soil to dry slightly between waterings. Use clean tools and sterile potting mix. Ensure that cuttings are not planted too deeply, which can trap moisture and lead to rot.
Fungal Infections:
Cause: High humidity combined with poor air circulation, or using contaminated tools and materials. Solution: Improve air circulation by placing cuttings in a well-ventilated area. Use clean tools and sterile potting mix. Avoid overcrowding cuttings. Consider using a fungicide if necessary.
Failure to Root:
Cause: Insufficient light, incorrect temperature, or using cuttings from an unhealthy plant. Solution: Provide bright, indirect light. Maintain a warm and humid environment. Ensure that the cuttings are taken from a healthy plant. Use rooting hormone to encourage root development.
Leaf Drop:
Cause: Stress from transplanting, changes in environment, or overwatering. Solution: Be gentle when transplanting. Gradually acclimate the cuttings to their new environment. Avoid overwatering; allow the soil to dry slightly between waterings. Ensure that the cuttings receive adequate light.
Essential Tips for Successful Peperomia Propagation
Beyond the specific propagation methods, several general tips can significantly increase your success rate. These tips focus on optimizing the environment and care for your cuttings and new plants. Adhering to these guidelines will help ensure your peperomia propagation efforts are fruitful.
Choosing the Right Time to Propagate
The best time to propagate peperomias is during the growing season, typically spring and summer. During this period, the plant is actively growing, and the conditions are more favorable for root development. The warmer temperatures and increased sunlight provide the energy needed for new growth. Propagation during the dormant season (fall and winter) can be more challenging, as the plant’s metabolism slows down, and root development may be slower. (See Also: Mastering Minecraft: How to Plant Things and Thrive)
However, with proper care and environmental control, you can still propagate peperomias year-round. Providing supplemental lighting and maintaining a warm, humid environment can help overcome the challenges of the off-season. Monitor your cuttings closely and adjust your care as needed.
Selecting Healthy Mother Plants
The health of the mother plant is crucial for successful propagation. Choose a healthy peperomia plant that is free from pests and diseases. A healthy plant will have robust stems and leaves, indicating that it has the energy to support new growth. Avoid taking cuttings from plants that are stressed, diseased, or infested with pests.
Inspect your mother plant for any signs of problems before taking cuttings. Look for discolored leaves, stunted growth, or any visible pests. If the plant is showing signs of distress, address the issue before propagating. This will increase the chances of your cuttings thriving.
Providing the Right Environment
The environment plays a critical role in successful peperomia propagation. The ideal environment provides the necessary conditions for root development and new growth. This includes proper light, temperature, and humidity. Understanding and controlling these factors is essential for successful propagation.
- Light: Provide bright, indirect light. Avoid direct sunlight, which can scorch the leaves. A well-lit location near a window, but not directly in the sun, is ideal.
- Temperature: Maintain a warm and consistent temperature, ideally between 65-75°F (18-24°C). Avoid temperature fluctuations, which can stress the cuttings.
- Humidity: Maintain a humid environment. You can increase humidity by misting the cuttings regularly, using a humidity tray, or placing a clear plastic bag over the cuttings to create a mini-greenhouse.
Using the Right Tools and Materials
Using the right tools and materials is essential for successful peperomia propagation. This includes sharp, clean scissors or a knife, a suitable rooting medium, and pots. Using the right tools and materials reduces the risk of contamination and ensures optimal conditions for root development.
- Sharp, Clean Cutting Tools: Use sharp, clean scissors or a knife to make precise cuts. This minimizes damage to the plant and reduces the risk of infection. Sanitize your tools before use to prevent the spread of diseases.
- Well-Draining Potting Mix: Use a well-draining potting mix or a mixture of perlite and peat moss. This prevents waterlogging and allows for proper aeration of the roots.
- Clean Pots: Use clean pots to prevent the spread of diseases. Ensure that the pots have drainage holes to allow excess water to escape.
- Rooting Hormone (Optional): Rooting hormone can help stimulate root development. If using rooting hormone, follow the manufacturer’s instructions.
Watering and Fertilizing
Proper watering and fertilizing are crucial for the health and growth of your new peperomia plants. Overwatering can lead to root rot, while underwatering can stunt growth. Fertilizing provides the necessary nutrients for healthy development. Careful attention to these factors is key.
- Watering: Water the cuttings or new plants when the top inch of soil is dry. Avoid overwatering, which can lead to root rot. Ensure that the pot has drainage holes to allow excess water to escape.
- Fertilizing: Fertilize the new plants sparingly. Use a balanced liquid fertilizer diluted to half strength during the growing season. Avoid fertilizing during the dormant season.
Patience and Observation
Propagation requires patience and observation. Root development and new growth take time. Be patient and monitor your cuttings or new plants regularly. Observe their progress and adjust your care as needed. This approach allows you to address any issues promptly and ensures the success of your propagation efforts.
Keep an eye out for any signs of problems, such as wilting, yellowing leaves, or pests. Take corrective action immediately if you notice any issues. Documenting your propagation process can help you learn from your experiences and improve your techniques over time.
Caring for Your Newly Propagated Peperomias
Once your peperomia cuttings have developed roots and new growth, it’s time to care for them as you would a mature plant. Proper care ensures the continued health and growth of your new plants. Understanding the specific needs of peperomias is key to their long-term success. Here are some essential care tips.
Light Requirements
Peperomias thrive in bright, indirect light. Place your newly propagated plants in a location where they receive plenty of light without being exposed to direct sunlight. Direct sunlight can scorch the leaves, while insufficient light can lead to stunted growth. East or west-facing windows are often ideal, providing gentle morning or afternoon sun.
If you don’t have enough natural light, consider using grow lights to supplement the lighting. LEDs are a good option because they provide the necessary light spectrum for plant growth without generating excessive heat. Monitor your plants and adjust their position as needed to ensure they receive the optimal amount of light. (See Also: Expert Guide: How to Plant a Balled and Burlap Tree)
Watering Schedule
Water your peperomias when the top inch of soil is dry. Overwatering is a common mistake that can lead to root rot. Insert your finger into the soil to check for moisture. If the soil feels dry, it’s time to water. Water thoroughly until the excess water drains from the drainage holes.
The watering frequency will vary depending on the environmental conditions, such as temperature and humidity. During the growing season, you may need to water more frequently. Reduce the watering frequency during the dormant season (fall and winter). Always allow the soil to dry out slightly between waterings.
Soil and Potting
Use a well-draining potting mix for your peperomias. A mixture of peat moss, perlite, and potting soil provides good drainage and aeration. Repot your peperomias every one to two years, or when the plant outgrows its pot. Choose a pot with drainage holes to prevent waterlogging.
When repotting, select a pot that is slightly larger than the previous one. Gently remove the plant from its old pot and loosen the roots. Place the plant in the new pot and fill it with fresh potting mix. Water thoroughly after repotting. This will help the plant establish itself in its new home.
Fertilizing
Fertilize your peperomias during the growing season (spring and summer). Use a balanced liquid fertilizer diluted to half strength. Apply the fertilizer every two to four weeks. Avoid fertilizing during the dormant season (fall and winter), as the plant’s growth slows down.
Over-fertilizing can lead to salt buildup in the soil, which can damage the roots. Always follow the manufacturer’s instructions for fertilizer application. If you notice any signs of over-fertilization, such as brown leaf tips, flush the soil with water to remove excess salts.
Humidity and Temperature
Peperomias prefer a warm and humid environment. Maintain a temperature between 65-75°F (18-24°C). If the air in your home is dry, increase the humidity by misting the plants regularly, using a humidity tray, or placing a humidifier nearby. Grouping plants together can also help to increase humidity.
Avoid placing your peperomias near drafts, heat vents, or air conditioning units, as these can create fluctuating temperatures and humidity levels. These conditions can stress your plants and negatively affect their growth. Maintaining a consistent environment is crucial for their well-being.
Conclusion: Enjoying the Fruits of Your Labor
Congratulations! You’ve successfully navigated the process of peperomia propagation. You’ve learned about the different methods, the ideal conditions, and the essential care tips. Now, you can enjoy the satisfaction of seeing your own peperomia collection flourish. Remember, patience and observation are key.
With a little practice, you’ll become a pro at propagating these charming plants. Continue to experiment with different methods and species, and share your knowledge with fellow plant enthusiasts. Happy propagating, and may your home always be filled with the beauty of thriving peperomias!
Recommended Products