Are you dreaming of a garden bursting with color and charm? Violas, with their cheerful faces and vibrant hues, are an excellent choice. These delightful little flowers are surprisingly easy to grow, offering a rewarding experience for both novice and experienced gardeners. Learning how to plant violas correctly is the first step towards a stunning display.
This comprehensive guide will walk you through every step, from selecting the right varieties to ensuring your violas thrive. We’ll delve into soil preparation, planting techniques, and ongoing care, equipping you with the knowledge to cultivate a flourishing viola garden. Get ready to transform your outdoor space into a haven of beauty!
Violas are known for their resilience and ability to bloom throughout the cooler months, making them a perfect addition to your fall and winter gardens. With the proper care, these versatile plants will reward you with a continuous show of color, brightening up even the dreariest days. Let’s get started on your journey to viola success!
Choosing the Right Violas
The first step in learning how to plant violas is selecting the right variety for your needs and climate. Violas come in a vast array of colors, sizes, and bloom times, offering something for every garden style. Consider factors such as your local climate, sunlight exposure, and desired aesthetic when making your selection. Different viola types offer unique characteristics, impacting your planting experience.
Popular Viola Varieties
- Johnny Jump-Ups (Viola tricolor): These charming, small-flowered violas are known for their cheerful, three-colored blooms. They are incredibly easy to grow and self-seed readily.
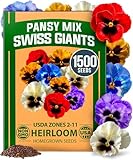
- Pansies (Viola x wittrockiana): Pansies are larger than Johnny Jump-Ups and come in a wider range of colors and patterns. They’re a classic choice for vibrant spring and fall displays.
- Horned Violets (Viola cornuta): These violas have delicate, long-spurred flowers and are known for their extended bloom period. They are also relatively heat-tolerant.
Considerations for Your Climate
Violas thrive in cooler temperatures. They generally prefer temperatures between 45°F and 65°F (7°C and 18°C). In warmer climates, plant violas in the fall for winter and spring blooms. In colder climates, plant them in the spring after the last frost. Selecting varieties that are well-suited to your region’s climate is essential for success.
When deciding how to plant violas, consider the microclimate of your garden. Areas with partial shade, especially during the hottest parts of the day, are ideal. Avoid planting violas in full sun in hot climates, as this can lead to scorching. Also, consider the local weather patterns and frost dates when planning your planting schedule.
Preparing the Soil
Proper soil preparation is crucial for the healthy growth and vibrant blooms of your violas. Violas prefer well-draining soil that is rich in organic matter. Before planting, take the time to amend your soil to create the optimal growing environment. This will provide the necessary nutrients for sustained growth.
Soil Testing and Amendment
Before planting, it’s a good idea to test your soil’s pH. Violas prefer a slightly acidic to neutral pH range, ideally between 6.0 and 7.0. You can purchase a soil testing kit at your local garden center or send a sample to a soil testing laboratory. This will provide valuable information about your soil’s composition.
Based on your soil test results, you can amend your soil to improve its drainage, fertility, and pH. Here are some common soil amendments:
- Compost: Adds organic matter, improves drainage, and provides essential nutrients.
- Well-rotted manure: Improves soil fertility and water retention.
- Peat moss: Improves soil acidity and water retention.
- Perlite or vermiculite: Improves drainage and aeration.
- Lime: Raises soil pH (use if your soil is too acidic).
Soil Preparation Steps
- Clear the area: Remove any weeds, rocks, and debris from the planting area.
- Loosen the soil: Use a garden fork or tiller to loosen the soil to a depth of at least 12 inches (30 cm).
- Amend the soil: Incorporate your chosen soil amendments, such as compost and manure, into the loosened soil. Mix them thoroughly.
- Level the soil: Rake the soil to create a smooth, even surface.
Planting Your Violas
Once your soil is prepared, it’s time to plant your violas. Whether you’re starting from seeds, seedlings, or transplants, follow these steps to ensure successful establishment. Proper planting techniques are key to promoting healthy growth and vibrant blooms.
Planting From Seed
Starting violas from seed can be a rewarding experience, but it requires patience. Sow viola seeds indoors about 8-10 weeks before the last expected frost. Use a seed starting mix and keep the soil consistently moist. Seeds should germinate in about 1-2 weeks. (See Also: Expert Guide: How to Pot an Aloe Plant for Thriving Growth)
Once the seedlings have developed a few sets of true leaves, transplant them into individual pots or cell packs. Harden off the seedlings by gradually exposing them to outdoor conditions for a week or two before planting them in the garden.
Planting Seedlings or Transplants
Planting seedlings or transplants is the easiest and most common way to grow violas. Choose healthy plants with vibrant foliage and no signs of disease. The best time to plant is in the spring or fall, depending on your climate.
- Dig holes: Dig holes slightly larger than the root balls of your viola plants, spaced 6-12 inches (15-30 cm) apart, depending on the variety.
- Remove from containers: Gently remove the violas from their pots or trays.
- Loosen roots: Gently loosen any circling roots to encourage outward growth.
- Place in holes: Place the viola plants in the holes, ensuring the top of the root ball is level with the soil surface.
- Backfill: Fill the holes with soil, gently firming the soil around the plants.
- Water thoroughly: Water the plants thoroughly after planting to help them settle in.
Spacing and Placement
Proper spacing is essential for good air circulation and to prevent overcrowding. As mentioned, space your viola plants 6-12 inches apart, depending on the variety and your desired effect. Consider the mature size of the plants when spacing them.
Choose a location that receives partial shade, especially in warmer climates. Violas also look great in containers, hanging baskets, and along borders. Consider the color and height of your violas when planning your garden layout.
Caring for Your Violas
Once your violas are planted, proper care is essential to ensure they thrive and produce an abundance of blooms. This includes regular watering, fertilizing, deadheading, and pest control. Consistent care will maximize your plants’ health and beauty.
Watering
Violas prefer consistently moist soil, but they don’t like to sit in waterlogged conditions. Water your violas regularly, especially during dry periods. Water deeply, allowing the water to soak into the soil. Avoid overhead watering, which can promote fungal diseases.
Check the soil moisture regularly by sticking your finger into the soil. Water when the top inch or two of soil feels dry. The frequency of watering will depend on the weather conditions and the type of soil.
Fertilizing
Violas benefit from regular fertilization. Feed your plants with a balanced, slow-release fertilizer or a liquid fertilizer formulated for flowering plants. Follow the instructions on the fertilizer package for application rates.
Fertilize your violas every 2-4 weeks during the growing season. Avoid over-fertilizing, as this can lead to excessive foliage growth at the expense of flowers. Consider using a fertilizer with a higher phosphorus content to encourage more blooms.
Deadheading
Deadheading, or removing spent flowers, is essential for encouraging continuous blooming. Pinch off the faded flowers at their base, just above the foliage. This will redirect the plant’s energy into producing new blooms. (See Also: Unlocking Energy: How Does a Thermal Power Plant Work?)
Deadheading also helps to keep your violas looking neat and tidy. Regularly deadheading your plants will significantly extend their blooming period. Aim to deadhead your violas at least once a week, or more frequently if needed.
Pest and Disease Control
Violas are relatively pest-resistant, but they can be susceptible to certain problems. Common pests include aphids, slugs, and snails. Common diseases include powdery mildew and fungal leaf spots. Early detection and treatment are key to preventing serious problems.
- Aphids: These small, sap-sucking insects can be controlled with insecticidal soap or neem oil.
- Slugs and snails: Use slug and snail bait or hand-pick them off your plants.
- Powdery mildew: This fungal disease can be prevented by providing good air circulation and avoiding overhead watering. Treat with a fungicide if necessary.
- Fungal leaf spots: Remove and discard infected leaves. Improve air circulation and avoid overhead watering. Treat with a fungicide if necessary.
Regularly inspect your plants for signs of pests or diseases. Address any problems promptly to prevent them from spreading. Using organic pest control methods is a great way to maintain a healthy garden ecosystem.
Troubleshooting Common Problems
Even with the best care, you may encounter some challenges when growing violas. Understanding common problems and how to address them will help you keep your plants healthy and blooming. This will improve your experience of how to plant violas.
Yellowing Leaves
Yellowing leaves can be caused by several factors, including overwatering, underwatering, nutrient deficiencies, or pest infestations. Check the soil moisture and adjust your watering accordingly. Test your soil for nutrient deficiencies and amend the soil if necessary. Inspect your plants for pests and treat them as needed.
Lack of Blooms
If your violas aren’t blooming, it could be due to several reasons, including insufficient sunlight, over-fertilizing, or a lack of deadheading. Ensure your plants are getting enough sunlight. Reduce the amount of fertilizer you’re using. Deadhead your plants regularly to encourage new blooms.
Leggy Growth
Leggy growth can be caused by insufficient sunlight or overcrowding. Move your plants to a sunnier location. Thin out overcrowded plants to improve air circulation. Prune leggy stems to encourage bushier growth.
Pest Infestations and Diseases
As mentioned earlier, monitor your plants for pests and diseases. If you see signs of infestation or disease, take action immediately. Consider using organic pest control methods, such as insecticidal soap or neem oil. Consult a local gardening expert if you’re unsure how to treat a specific problem.
Paa: What Is the Best Time to Plant Violas?
The best time to plant violas is in the fall or spring. In warmer climates, plant violas in the fall for winter and spring blooms. In colder climates, plant them in the spring after the last frost. This timing allows the plants to establish themselves before the onset of extreme temperatures, promoting robust growth and abundant flowers.
Paa: How Often Should You Water Violas?
Water violas regularly, especially during dry periods. The frequency of watering depends on the weather conditions and the type of soil. Check the soil moisture regularly by sticking your finger into the soil. Water when the top inch or two of soil feels dry. Avoid overwatering, which can lead to root rot. (See Also: How Long Can a Pepper Plant Live? Lifespan & Care Guide)
Paa: Do Violas Need Full Sun?
Violas prefer partial shade, especially in warmer climates. While they can tolerate some sun, they thrive in areas that receive morning sun and afternoon shade. In cooler climates, they can tolerate more sun. Too much direct sun can scorch the leaves and reduce flowering.
Paa: How Do You Keep Violas Blooming?
To keep violas blooming, provide them with consistent care. This includes regular watering, fertilizing, and deadheading. Deadheading, or removing spent flowers, is especially important for encouraging continuous blooms. Also, ensure they receive adequate sunlight and are protected from extreme temperatures.
Extending the Life of Your Violas
With proper care and attention, you can enjoy your violas for an extended period. Here are some tips to extend the life of your viola plants and ensure they continue to thrive.
Mulching
Mulching your violas can help to retain soil moisture, suppress weeds, and regulate soil temperature. Apply a layer of organic mulch, such as shredded bark or compost, around your plants. Keep the mulch away from the stems to prevent rot.
Mulching also helps to insulate the roots of your violas from extreme temperatures, making them more resilient to cold snaps or heat waves. Choose a mulch that complements the aesthetic of your garden.
Division
Over time, viola plants can become crowded and less productive. To rejuvenate your plants, divide them every 2-3 years. This process involves digging up the plants, separating the clumps, and replanting them. Division is best done in the spring or fall.
Dividing your violas will not only rejuvenate the existing plants but also provide you with more plants to expand your garden or share with friends. It’s a simple process that can significantly improve the health and vigor of your violas.
Protecting From Extreme Weather
Protect your violas from extreme weather conditions, such as frost, snow, or excessive heat. In colder climates, provide protection during winter by covering your plants with a layer of mulch or a frost cloth. In hot climates, provide shade during the hottest part of the day.
Consider the microclimate of your garden and the specific needs of your viola varieties when planning for extreme weather. Proper protection will help your plants survive and thrive during challenging conditions.
Conclusion
Learning how to plant violas and care for them can be a rewarding experience. From selecting the right varieties to providing the proper care, you can create a beautiful and vibrant garden. With the knowledge and tips provided in this guide, you’re well-equipped to cultivate a flourishing viola display, adding charm and color to your outdoor space. Enjoy the process of gardening, and embrace the beauty of these delightful flowers!
Recommended Products