Are you dreaming of plump, delicious squash gracing your dinner table? Planting squash is a rewarding experience, connecting you with nature and the fruits of your labor. This guide will take you step-by-step through the process, from selecting the right variety to harvesting your bounty. Get ready to transform your garden into a squash-producing paradise!
Squash plants are relatively easy to grow, making them ideal for both novice and experienced gardeners. However, success depends on understanding their specific needs and providing them with optimal conditions. We’ll explore everything from choosing the best squash varieties for your climate to combating common pests and diseases. Prepare to learn how to plant squash plants and enjoy a plentiful harvest!
This comprehensive guide covers everything you need to know, ensuring you’ll be enjoying fresh, homegrown squash in no time. We will cover the ideal planting times, soil preparation, watering techniques, and much more. Let’s delve into the exciting world of squash cultivation and unlock the secrets to a thriving squash patch!
Choosing the Right Squash Varieties
Before you even think about planting, selecting the right squash varieties is crucial. Different types of squash thrive in varying climates and have different growth habits. Consider your local climate, the space available in your garden, and your personal preferences regarding taste and culinary uses. This will greatly impact your success when you learn how to plant squash plants.
Summer Squash vs. Winter Squash
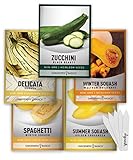
Squash varieties are broadly classified into summer and winter squash. Summer squash, such as zucchini, yellow squash, and pattypan squash, are harvested when immature, with tender skin and flesh. Winter squash, including butternut, acorn, and spaghetti squash, are harvested when mature, with a hard rind and a longer storage life. Both are delicious, just in different ways.
Summer squash generally matures faster than winter squash. They are typically ready for harvest within 50-60 days after planting. Winter squash, on the other hand, can take 80-100 days or more to mature. This difference in maturation time is crucial when determining when and how to plant squash plants.
Popular Summer Squash Varieties
- Zucchini: A prolific producer, known for its versatility in cooking.
- Yellow Squash: Similar to zucchini, but with a yellow skin.
- Pattypan Squash: Disc-shaped squash with a mild flavor.
Popular Winter Squash Varieties
- Butternut Squash: Sweet and versatile, with a distinctive butternut shape.
- Acorn Squash: Nutty flavor, often roasted or baked.
- Spaghetti Squash: Flesh separates into spaghetti-like strands when cooked.
Considering Your Climate
Your local climate is a major factor in choosing the right squash. Some squash varieties are more tolerant of cooler temperatures or shorter growing seasons. Research which varieties perform best in your specific region. Consider the average frost dates and the length of your growing season to determine the best time to plant squash plants.
For example, if you live in a region with a short growing season, you may want to choose early-maturing varieties of summer squash or consider starting your winter squash indoors. Conversely, in warmer climates with longer growing seasons, you have more flexibility in your choices.
Timing Is Everything: When to Plant Squash
Timing your planting correctly is essential for a successful squash harvest. Squash plants are sensitive to frost, so planting too early can lead to stunted growth or even plant death. The ideal time to plant squash depends on your local climate and the type of squash you are planting. Understanding when to plant squash plants is the key to thriving plants.
Last Frost Date
The most important factor is the last expected frost date in your area. Squash should be planted after the danger of frost has passed and the soil has warmed up. Check your local weather forecasts and gardening resources to determine the average last frost date for your region.
Planting too early can expose young squash plants to frost, damaging or killing them. It’s always better to wait a week or two after the last expected frost date to ensure the soil has warmed sufficiently and the risk of frost has passed. This is how you optimize when to plant squash plants.
Soil Temperature
Soil temperature is another critical factor. Squash seeds germinate best in soil temperatures between 70-95°F (21-35°C). Use a soil thermometer to check the temperature of your garden soil before planting. If the soil is too cold, the seeds may rot before they can sprout. Proper soil temperature is critical for how to plant squash plants successfully.
Direct Sowing vs. Starting Indoors
Squash can be grown from seeds sown directly into the garden or started indoors a few weeks before the last frost. Direct sowing is the most common method, especially for summer squash. Starting seeds indoors can give you a head start on the growing season, particularly for winter squash varieties with longer growing times.
If you choose to start seeds indoors, start them about 2-4 weeks before the last expected frost date. This gives the seedlings time to develop before transplanting them into the garden. Be sure to harden off the seedlings before transplanting them outdoors to acclimate them to the outdoor conditions. This is a good way to improve how to plant squash plants. (See Also: How to Plant Daffodils in Pots: A Complete Guide)
Planting Schedule
Here’s a general planting schedule for squash, based on the type:
- Summer Squash: Direct sow seeds into the garden after the danger of frost has passed and the soil has warmed. You can stagger plantings every few weeks for a continuous harvest.
- Winter Squash: Direct sow seeds into the garden after the danger of frost has passed and the soil has warmed. Alternatively, start seeds indoors 2-4 weeks before the last frost date.
Preparing the Soil for Squash
Proper soil preparation is crucial for healthy squash plants and a bountiful harvest. Squash plants are heavy feeders and require well-drained, fertile soil. Before you start to learn how to plant squash plants, you must prepare the soil.
Soil Testing
A soil test will provide valuable information about your soil’s pH, nutrient levels, and texture. This information will help you determine what amendments are needed to create the ideal growing conditions for squash. Soil testing can be done through your local agricultural extension office or a commercial soil testing lab.
Soil tests can reveal deficiencies and guide your use of fertilizers and amendments. Ideally, squash plants prefer a slightly acidic soil pH of 6.0 to 6.8. A soil test will help you determine the pH of your soil and whether you need to add lime to raise it or sulfur to lower it. This is a very important step to learn when you want to learn how to plant squash plants.
Soil Amendments
Squash plants thrive in soil rich in organic matter. Adding compost, well-rotted manure, or other organic materials will improve the soil’s fertility, drainage, and water-holding capacity. These amendments also provide essential nutrients for the plants.
Before planting, amend your soil with a generous amount of compost or well-rotted manure. Work the amendments into the soil to a depth of 6-12 inches. Consider adding a balanced fertilizer, such as a 10-10-10, according to the package instructions. This is essential for how to plant squash plants.
Sunlight and Location
Squash plants need at least 6-8 hours of direct sunlight per day. Choose a planting location that receives ample sunlight. The ideal location should also have good air circulation to reduce the risk of fungal diseases.
Avoid planting squash in areas where water tends to pool after rain. Squash plants are susceptible to root rot in poorly drained soil. Consider raised beds or mounds if your soil is poorly drained to improve drainage. This is a critical factor in how to plant squash plants.
Planting Squash Seeds and Seedlings
Once you’ve chosen your varieties, determined the planting time, and prepared the soil, it’s time to plant your squash! Whether you’re starting from seeds or seedlings, the planting process is relatively straightforward. This section will guide you on how to plant squash plants.
Direct Sowing Seeds
Direct sowing is the most common method for planting squash. Follow these steps:
- Spacing: Refer to the seed packet for spacing recommendations. Generally, plant summer squash seeds 2-3 feet apart, and winter squash seeds 3-4 feet apart.
- Depth: Plant seeds about 1 inch deep.
- Planting: Plant 2-3 seeds per hill to ensure good germination. After the seedlings emerge, thin to the strongest plant per hill.
- Watering: Water the seeds gently after planting.
Transplanting Seedlings
If you started your squash indoors or purchased seedlings, follow these steps:
- Hardening Off: Before transplanting, harden off the seedlings by gradually exposing them to outdoor conditions for a week.
- Spacing: Space the seedlings according to the variety and the seed packet instructions.
- Planting: Dig a hole slightly larger than the root ball of the seedling. Gently remove the seedling from its container and place it in the hole.
- Backfilling: Backfill the hole with soil, gently patting it around the base of the plant.
- Watering: Water the seedling thoroughly after planting.
Spacing and Companion Planting
Proper spacing is essential for squash plants to thrive. Overcrowding can lead to poor air circulation, increasing the risk of diseases. It can also cause competition for resources, such as sunlight, water, and nutrients. Companion planting can also benefit your squash plants.
Consider companion plants that can benefit squash. Marigolds can help deter squash bugs, while nasturtiums can attract aphids away from your squash plants. Avoid planting squash near potatoes or other plants that may compete for nutrients or attract similar pests. These are important tips to learn when you want to know how to plant squash plants. (See Also: Plant vs. Animal Cells: How Are They Different?)
Caring for Your Squash Plants
Once your squash plants are in the ground, proper care is essential for healthy growth and a bountiful harvest. This includes watering, fertilizing, weeding, and pest and disease control. Maintaining these is the best way to learn how to plant squash plants.
Watering
Squash plants need consistent watering, especially during hot and dry weather. Water deeply and regularly, aiming to keep the soil consistently moist but not waterlogged. Water at the base of the plants to avoid wetting the foliage, which can increase the risk of fungal diseases. Drip irrigation or soaker hoses are excellent methods for watering squash plants.
Check the soil moisture regularly by sticking your finger an inch or two into the soil. Water when the top inch of soil feels dry. Avoid overhead watering, which can promote fungal diseases. Proper watering is essential for how to plant squash plants.
Fertilizing
Squash plants are heavy feeders and benefit from regular fertilization. Apply a balanced fertilizer, such as a 10-10-10, every 4-6 weeks during the growing season. Follow the package instructions for application rates. You can also use organic fertilizers, such as compost tea or fish emulsion.
Avoid over-fertilizing, as this can lead to excessive foliage growth at the expense of fruit production. Watch your plants for signs of nutrient deficiencies, such as yellowing leaves, and adjust your fertilization schedule accordingly. Fertilizing is an integral part of how to plant squash plants.
Weeding
Weed regularly to prevent weeds from competing with your squash plants for nutrients, water, and sunlight. Mulching around the base of the plants can help suppress weeds and retain soil moisture. Hand-pull weeds or use a hoe to remove them. Weeding is another important part of how to plant squash plants.
Mulch with organic materials, such as straw or shredded leaves. This also helps to regulate soil temperature and improve soil health. Be careful not to damage the shallow roots of the squash plants when weeding.
Pest and Disease Control
Squash plants are susceptible to various pests and diseases. Common pests include squash bugs, squash vine borers, and aphids. Common diseases include powdery mildew, downy mildew, and squash mosaic virus. Early detection and prompt action are crucial for controlling pests and diseases. Knowing these pests and diseases is a critical factor in how to plant squash plants.
- Squash Bugs: Handpick squash bugs or use insecticidal soap.
- Squash Vine Borers: Inject Bt (Bacillus thuringiensis) into the stems or use row covers.
- Aphids: Spray with insecticidal soap or neem oil.
- Powdery Mildew: Improve air circulation and use fungicides.
- Downy Mildew: Improve air circulation and use fungicides.
- Squash Mosaic Virus: Remove and destroy infected plants.
Pollination
Squash plants have separate male and female flowers. Pollination is necessary for fruit production. Bees and other pollinators are essential for transferring pollen from the male flowers to the female flowers. You can also hand-pollinate the flowers if necessary.
Hand-pollination is a useful technique to ensure fruit production, especially if there are few pollinators in your garden. Identify the female flowers by the small swelling at the base of the flower. Use a small paintbrush or cotton swab to collect pollen from a male flower and transfer it to the stigma of a female flower. Knowing about pollination is a good addition to how to plant squash plants.
Harvesting Your Squash
Harvesting squash at the right time is crucial for optimal flavor and texture. The harvest time varies depending on the type of squash. Understanding when and how to harvest your squash is the final step in learning how to plant squash plants.
Summer Squash Harvest
Summer squash is typically ready for harvest when the fruits are young and tender. Harvest zucchini, yellow squash, and pattypan squash when they are 6-8 inches long. Harvest frequently to encourage continued fruit production. Use a sharp knife or pruners to cut the squash from the plant.
Harvesting summer squash regularly prevents the fruits from becoming too large and tough. Overripe summer squash can have a less desirable texture and flavor. Consistent harvesting will encourage the plant to produce more fruits. This is a very important step in how to plant squash plants. (See Also: How to Plant an Orchard: A Comprehensive Guide)
Winter Squash Harvest
Winter squash is harvested when the fruits are mature and the rind is hard. The exact harvest time varies depending on the variety. Look for signs of maturity, such as a change in color and a hardened rind. The stems should also be dry and brown.
Allow the winter squash to cure in the sun for a week or two after harvesting to harden the rind and improve storage life. Store winter squash in a cool, dry place. This will extend the shelf life of the squash and allow you to enjoy your harvest for months to come. Proper storage is crucial for how to plant squash plants.
Common Problems and Solutions
Even with the best care, squash plants can sometimes encounter problems. Understanding common problems and their solutions can help you troubleshoot issues and ensure a successful harvest. Knowing these common problems is a part of how to plant squash plants.
Pests
Pests can wreak havoc on squash plants. Squash bugs, squash vine borers, and aphids are common culprits. Regularly inspect your plants for signs of pest infestation. Early detection and prompt action are crucial for controlling pests.
Use insecticidal soap or neem oil to control aphids. Handpick squash bugs and squash vine borers. Consider using row covers to prevent pests from reaching your plants. Companion planting can also help deter pests. This is a very important part of how to plant squash plants.
Diseases
Fungal diseases, such as powdery mildew and downy mildew, can affect squash plants. These diseases thrive in humid conditions. Improve air circulation and avoid overhead watering to reduce the risk of fungal diseases.
Fungicides can be used to control fungal diseases, but prevention is key. Choose disease-resistant varieties if possible. Remove and destroy infected plant parts. Maintain proper spacing between plants to improve air circulation. This is a very important step to learn when you want to know how to plant squash plants.
Poor Fruit Set
Poor fruit set can be caused by various factors, including insufficient pollination, lack of nutrients, or extreme temperatures. Ensure adequate pollination by attracting pollinators to your garden.
Hand-pollinate the flowers if necessary. Provide adequate nutrients by fertilizing your plants regularly. Protect your plants from extreme temperatures. Make sure that you are following the steps on how to plant squash plants.
Conclusion
Congratulations! You’ve successfully navigated the journey of how to plant squash plants, from selecting the right varieties to harvesting your delicious bounty. Remember that patience, observation, and consistent care are key to a thriving squash patch. Now, enjoy the fruits of your labor and savor the satisfaction of homegrown squash. Happy gardening!
Recommended Products