Dreaming of fresh, juicy cherry tomatoes bursting with flavor? Growing your own is easier than you think! With a little patience and the right know-how, you can transform a few tiny seeds into a bountiful harvest. This guide will walk you through every step of the process, from choosing the perfect seeds to enjoying your homegrown tomatoes.
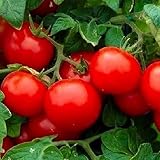
Cherry tomatoes are a fantastic choice for home gardeners, offering a quick harvest and a sweet, satisfying taste. Their compact size makes them ideal for containers, patios, and small gardens. Plus, the vibrant colors and varied shapes of cherry tomato varieties add beauty to any space. Learn how to plant cherry tomato seeds and enjoy the fruits (literally!) of your labor.
Whether you’re a seasoned gardener or a complete beginner, this comprehensive guide will equip you with the knowledge and confidence to successfully cultivate cherry tomatoes. Get ready to experience the joy of fresh, homegrown produce and the satisfaction of watching your garden flourish. Let’s get started!
Choosing the Right Cherry Tomato Seeds
The first step in learning how to plant cherry tomato seeds is selecting the right seeds. The success of your harvest hinges significantly on the quality of the seeds and the variety you choose. Consider factors like your local climate, available space, and personal preferences when making your selection. There’s a vast world of cherry tomato varieties, each with unique characteristics and flavors.
Determining Your Growing Zone
Before buying seeds, identify your USDA Plant Hardiness Zone. This zone tells you the average minimum winter temperatures in your area, which influences the types of plants that will thrive. You can easily find your zone by searching online using your zip code. Knowing your zone helps you determine the best time to start seeds indoors and when to transplant them outside.
Popular Cherry Tomato Varieties
Here are some popular cherry tomato varieties to consider:
- Sweet Million: Known for its prolific yields and sweet flavor. It’s a classic choice for a reason.
- Sungold: A golden-orange variety with an exceptionally sweet and fruity taste. Sungold is often regarded as one of the best-tasting cherry tomatoes.
- Black Cherry: Produces dark, almost black, fruits with a rich, complex flavor. This variety adds visual interest to your garden.
- Yellow Pear: A traditional variety with pear-shaped, yellow fruits and a mild, sweet flavor. It’s a fun and attractive addition to salads.
- Supersweet 100: A highly productive variety that produces long clusters of sweet, red tomatoes. It is known for its high yields.
Each variety has different growing characteristics, such as disease resistance and plant size. Researching these traits will allow you to make the best choice for your garden.
Seed Packet Information
Carefully read the seed packet. It provides crucial information, including:
- Days to Maturity: The approximate time from transplanting to harvest.
- Spacing Requirements: How far apart to plant the seedlings.
- Sunlight Needs: Cherry tomatoes require at least 6-8 hours of sunlight per day.
- Planting Instructions: Specific guidance for the variety.
- Disease Resistance: Information on the variety’s resistance to common tomato diseases.
Choosing high-quality seeds from a reputable source is essential. Look for seed companies with good reviews and a wide selection of varieties. Consider organic seeds if you prefer to avoid synthetic pesticides and fertilizers.
Starting Cherry Tomato Seeds Indoors
Starting cherry tomato seeds indoors gives you a head start on the growing season, especially in regions with short growing seasons. By starting seeds indoors, you can extend the growing period and ensure a larger harvest. This process typically begins 6-8 weeks before the last expected frost.
Materials Needed
Gather the following materials for starting seeds indoors:
- Seed Starting Trays or Pots: Choose trays with drainage holes or small pots (3-4 inches) for individual seedlings.
- Seed Starting Mix: A soilless mix specifically designed for seed starting, which provides good drainage and aeration.
- Seeds: Your chosen cherry tomato seeds.
- Watering Can or Spray Bottle: For gentle watering.
- Heat Mat (Optional): Provides consistent warmth to promote germination.
- Grow Light (Optional): Supplements natural light and prevents seedlings from becoming leggy.
Sowing the Seeds
Follow these steps to sow your cherry tomato seeds:
- Fill the Trays or Pots: Fill your seed trays or pots with seed starting mix, leaving about ½ inch of space at the top. Gently tap the container to settle the mix.
- Moisten the Mix: Thoroughly moisten the seed starting mix with water. The mix should be damp but not waterlogged.
- Sow the Seeds: Sow the seeds according to the instructions on the seed packet, usually about ¼ inch deep. Sow 2-3 seeds per pot or cell to increase the chances of germination.
- Cover the Seeds: Lightly cover the seeds with seed starting mix.
- Water Gently: Gently water the soil surface to ensure the seeds have moisture.
- Provide Warmth and Light: Place the trays or pots in a warm location, ideally between 70-80°F (21-27°C). If using a heat mat, place the trays on top. Place under a grow light if natural light is insufficient.
Caring for Seedlings
Once the seeds germinate, provide proper care to encourage healthy growth: (See Also: Cucumber Harvest: How Many Pounds of Cucumbers Per Plant?)
- Watering: Keep the soil consistently moist but not soggy. Water when the top of the soil starts to dry out. Avoid overwatering, which can lead to fungal diseases.
- Light: Ensure the seedlings receive at least 14-16 hours of light per day. If you don’t have a grow light, place the seedlings near a sunny window, but be aware that window light might not be sufficient. Rotate the trays regularly to prevent the seedlings from leaning towards the light.
- Thinning: Once the seedlings have their first true leaves, thin them to the strongest seedling in each pot or cell. Gently snip off the weaker seedlings with scissors.
- Fertilizing: Start fertilizing the seedlings with a diluted liquid fertilizer once they have their first set of true leaves. Follow the instructions on the fertilizer package.
By following these steps, you’ll give your cherry tomato seeds the best possible start.
Transplanting Cherry Tomato Seedlings Outdoors
When the weather conditions are favorable, it’s time to transplant your cherry tomato seedlings outdoors. This transition is a critical stage in the growing process. Proper timing and technique will help your plants thrive.
Preparing for Transplanting
Before transplanting, prepare your garden bed or containers:
- Harden Off the Seedlings: Gradually acclimate the seedlings to outdoor conditions. Start by placing them outside for an hour or two each day, increasing the time over a week or two. This process, called hardening off, helps them adjust to sunlight, wind, and temperature fluctuations.
- Choose a Sunny Location: Cherry tomatoes need at least 6-8 hours of direct sunlight per day. Select a spot in your garden that receives ample sunlight.
- Prepare the Soil: Amend the soil with compost or well-rotted manure to improve drainage and fertility. Cherry tomatoes thrive in rich, well-draining soil.
- Check the Weather: Transplant after the danger of frost has passed and the soil has warmed up. Nighttime temperatures should consistently be above 50°F (10°C).
Transplanting Process
Follow these steps to transplant your cherry tomato seedlings:
- Water the Seedlings: Water the seedlings a few hours before transplanting. This helps to reduce transplant shock.
- Dig Planting Holes: Dig holes slightly wider and deeper than the root ball of the seedlings. Space the holes according to the seed packet recommendations.
- Remove Seedlings from Pots: Gently remove the seedlings from their pots, being careful not to damage the roots. If the roots are root-bound, gently loosen them.
- Plant the Seedlings: Plant the seedlings deep, burying the stem up to the first set of leaves. This encourages the development of a strong root system.
- Water Thoroughly: Water the transplanted seedlings thoroughly after planting.
- Mulch: Apply a layer of mulch, such as straw or shredded leaves, around the base of the plants to retain moisture, suppress weeds, and regulate soil temperature.
Supporting the Plants
Cherry tomato plants are vining plants and need support. Provide support to prevent the plants from sprawling on the ground and to improve air circulation. Consider these support options:
- Tomato Cages: Place tomato cages around the plants at the time of planting.
- Stakes: Use wooden stakes and tie the plants to them as they grow.
- Trellises: Construct a trellis system for the plants to climb.
Proper support will help your cherry tomato plants grow strong and produce a larger harvest.
Caring for Cherry Tomato Plants
Once your cherry tomato plants are established, ongoing care is necessary to ensure healthy growth and a bountiful harvest. Regular watering, feeding, and pest control are essential components of plant care.
Watering
Consistent watering is vital for cherry tomatoes. They require regular watering, especially during hot and dry periods. However, avoid overwatering, as it can lead to root rot and other problems. The best way to water your plants is at the base of the plant to keep the foliage dry.
- Watering Frequency: Water deeply once or twice a week, depending on the weather. Check the soil moisture by sticking your finger about an inch deep into the soil. If the soil is dry, it’s time to water.
- Watering Method: Use a soaker hose or water at the base of the plants to avoid wetting the foliage. Wet leaves can promote diseases.
- Watering Time: Water in the morning to allow the foliage to dry before nightfall.
Fertilizing
Cherry tomatoes are heavy feeders and benefit from regular fertilization. Use a balanced fertilizer or a fertilizer specifically formulated for tomatoes. Follow the instructions on the fertilizer package for application rates.
- Fertilizing Schedule: Fertilize the plants every 2-3 weeks during the growing season.
- Fertilizer Types: Use a balanced fertilizer (e.g., 10-10-10) or a fertilizer with a higher phosphorus content to promote fruit production.
- Application Methods: Apply the fertilizer to the soil around the base of the plants, avoiding contact with the stems.
Pruning and Training
Pruning and training your cherry tomato plants can improve air circulation, sunlight exposure, and fruit production. There are two main types of tomato plants: determinate and indeterminate. Cherry tomatoes are typically indeterminate, meaning they continue to grow and produce fruit throughout the growing season.
- Pruning Suckers: Suckers are small shoots that grow between the main stem and the branches. Removing suckers (suckering) helps to direct the plant’s energy towards fruit production. Pinch off the suckers when they are small.
- Training: Train the plants by tying them to stakes or trellises as they grow. This helps to keep the plants off the ground and improves air circulation.
Pest and Disease Control
Cherry tomatoes are susceptible to various pests and diseases. Regular monitoring and proactive measures can help to prevent and manage these issues.
- Common Pests: Aphids, whiteflies, spider mites, and tomato hornworms. Inspect the plants regularly for signs of pests. Control pests with insecticidal soap, neem oil, or by handpicking them off the plants.
- Common Diseases: Early blight, late blight, and blossom-end rot. Prevent diseases by providing good air circulation, watering at the base of the plants, and using disease-resistant varieties. Blossom-end rot is often caused by calcium deficiency and can be addressed by adding calcium to the soil.
By implementing these care practices, you can ensure your cherry tomato plants thrive and produce a plentiful harvest. (See Also: Optimizing Soybean Yield: How Many Soybean Seeds to Plant Per Acre)
Harvesting and Enjoying Your Cherry Tomatoes
The moment you’ve been waiting for! Harvesting your homegrown cherry tomatoes is a rewarding experience. Knowing when and how to harvest your tomatoes will ensure you enjoy the best flavor and quality.
When to Harvest
The timing of your harvest is crucial. Cherry tomatoes are typically ready to harvest when they reach their mature color and are slightly soft to the touch. The exact color varies depending on the variety.
- Color: Watch for the tomatoes to turn their characteristic color, whether it’s red, yellow, orange, or black.
- Texture: Gently squeeze the tomatoes. They should be slightly soft, but not mushy.
- Ease of Picking: The tomatoes should come off the vine easily when gently tugged.
Harvesting tomatoes regularly encourages the plant to produce more fruit.
How to Harvest
Use these tips for harvesting your cherry tomatoes:
- Gently Pull: Gently pull the ripe tomatoes from the vine.
- Use Scissors: If the tomatoes are difficult to remove, use scissors or a knife to cut them from the vine.
- Harvest Regularly: Harvest frequently, typically every few days, to encourage continued production.
Storing and Enjoying Your Harvest
Proper storage is important to preserve the quality of your harvest.
- Storage: Store unwashed cherry tomatoes at room temperature or in a cool, dry place. Avoid refrigerating them unless they are fully ripe.
- Consumption: Enjoy your cherry tomatoes fresh in salads, as snacks, or in various recipes. They also can be used to make sauces, salsas, and more.
The flavor of homegrown cherry tomatoes is unmatched. Enjoying your harvest is the culmination of your hard work and dedication.
Common Problems and Solutions
Even with the best care, you may encounter some common problems when growing cherry tomatoes. Here are some issues and how to resolve them:
Blossom-End Rot
Blossom-end rot is a common problem that causes the bottom of the tomato to develop a brown, leathery patch. This is usually caused by a calcium deficiency, although it can also be caused by inconsistent watering. To prevent blossom-end rot:
- Ensure Consistent Watering: Water your tomato plants regularly, especially during dry periods.
- Add Calcium: Add calcium to the soil by amending it with compost or adding a calcium supplement.
Early Blight and Late Blight
These fungal diseases cause brown spots on the leaves and fruit. To prevent blight:
- Provide Good Air Circulation: Space your plants adequately and prune suckers to improve air circulation.
- Water at the Base: Water at the base of the plants to avoid wetting the foliage.
- Use Fungicides: Use a fungicide if necessary, following the manufacturer’s instructions.
Pests
Pests such as aphids, whiteflies, and tomato hornworms can damage your plants. To control pests:
- Inspect Regularly: Check your plants regularly for signs of pests.
- Use Insecticidal Soap or Neem Oil: Treat infestations with insecticidal soap or neem oil.
- Handpick: Handpick larger pests, such as tomato hornworms, off the plants.
By addressing these common problems proactively, you can keep your cherry tomato plants healthy and productive.
Container Gardening with Cherry Tomatoes
Cherry tomatoes are an excellent choice for container gardening, offering a convenient way to grow fresh tomatoes even if you have limited space. Container gardening provides flexibility, allowing you to move your plants to optimize sunlight exposure. It also simplifies pest control and can be a great option for patios, balconies, or decks. (See Also: Expert Guide: How to Plant Seedlings in Pots for Success)
Choosing the Right Container
Select a container that is large enough to accommodate the plant’s root system. The size of the container will depend on the variety of cherry tomato you’re growing. A good rule of thumb is to choose a container that is at least 12 inches in diameter and 12 inches deep, but larger is better, particularly for indeterminate varieties. Ensure the container has drainage holes to prevent waterlogging.
Potting Mix
Use a high-quality potting mix specifically designed for container gardening. Avoid using garden soil, as it can compact and inhibit drainage. A soilless potting mix will provide good drainage and aeration.
Watering and Fertilizing
Container-grown plants require more frequent watering and fertilizing than those grown in the ground. Water your plants when the top inch of soil is dry. Fertilize regularly with a balanced liquid fertilizer, following the manufacturer’s instructions.
Support
Provide support for your cherry tomato plants, such as a tomato cage or stakes, to keep them off the ground and prevent the fruit from touching the soil. This will also help to improve air circulation.
Container gardening is a rewarding way to grow cherry tomatoes, providing fresh, flavorful tomatoes right at your doorstep.
Troubleshooting Common Issues
Even experienced gardeners face challenges. Here’s how to troubleshoot common issues when learning how to plant cherry tomato seeds:
Failure to Germinate
If your seeds don’t germinate, consider these factors:
- Old Seeds: Use fresh seeds.
- Improper Moisture: Keep the seed starting mix consistently moist, but not soggy.
- Temperature: Ensure the soil temperature is warm enough (70-80°F).
- Poor Quality Seed: Buy seeds from a reputable source.
Leggy Seedlings
Leggy seedlings are tall and spindly, with weak stems. This is usually caused by insufficient light. To fix this:
- Increase Light: Move the seedlings closer to a sunny window or use a grow light.
- Improve Air Circulation: Provide good air circulation to strengthen the stems.
Yellowing Leaves
Yellowing leaves can indicate several problems:
- Overwatering: Reduce watering frequency.
- Nutrient Deficiency: Fertilize the plants with a balanced fertilizer.
- Pest Infestation: Check for pests and treat accordingly.
Troubleshooting is part of the gardening experience. Don’t be discouraged by setbacks. Learn from your mistakes and adjust your approach accordingly.
Conclusion
Learning how to plant cherry tomato seeds is a rewarding experience that brings fresh, flavorful tomatoes to your table. From selecting the right seeds to harvesting your bounty, this guide has provided you with the knowledge and tools you need to succeed. Embrace the journey, and enjoy the satisfaction of growing your own delicious cherry tomatoes. Happy gardening!
Recommended Products