Are you dreaming of fresh, flavorful black eyed peas straight from your garden? This guide is your ultimate resource, providing everything you need to know about how to plant black eyed peas and cultivate a successful crop. From selecting the perfect seeds to harvesting your bounty, we’ll walk you through each step, ensuring you achieve a plentiful harvest of these delicious and nutritious legumes.
Black eyed peas, also known as cowpeas, are a Southern staple and a versatile addition to any garden. They are relatively easy to grow, making them an excellent choice for both beginner and experienced gardeners. By following our comprehensive instructions, you can enjoy the satisfaction of growing your own black eyed peas, adding a touch of Southern charm to your table.
Get ready to transform your garden into a thriving haven for these remarkable beans. This guide will cover all aspects of planting, growing, and harvesting black eyed peas, allowing you to enjoy the fresh, vibrant flavors of this beloved legume. Let’s get started on your journey to a successful black eyed pea harvest!
Choosing the Right Black Eyed Pea Variety
The first step in learning how to plant black eyed peas is selecting the correct variety. Several black eyed pea varieties exist, each with unique characteristics that influence growth and yield. Consider your local climate, desired harvest time, and personal preferences when making your choice. Different varieties also have varying disease resistance, which is important for a healthy crop.
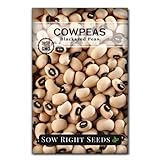
Popular choices include the California Blackeye, known for its high yields and adaptability, and the Texas Cream, prized for its creamy texture and flavor. Other varieties offer varying maturity times, allowing you to stagger your planting for a continuous harvest. Researching local seed availability and reading reviews can help you choose the best variety for your specific needs.
California Blackeye
California Blackeye is perhaps the most widely recognized variety. It is known for its high yields and adaptability to various climates. The plants are relatively sturdy and produce a significant number of pods. This variety is an excellent choice for both home gardens and larger-scale cultivation.
Texas Cream
Texas Cream black eyed peas are appreciated for their creamy texture and delicious flavor. They often have a slightly sweeter taste than other varieties. This variety is well-suited to warmer climates and produces a bountiful harvest. They are often preferred for fresh eating and cooking.
Other Varieties
Explore other varieties such as the Mississippi Silver, which offers good disease resistance, or the Elite Blackeye, known for its early maturity. Many seed companies offer a diverse selection, so browse catalogs and online resources to find varieties that fit your needs. Consider factors like heat tolerance, disease resistance, and maturity time when making your selection. Local agricultural extension offices can also provide valuable insights into the best varieties for your region.
Understanding the Ideal Growing Conditions
Black eyed peas thrive in warm weather and full sun. Understanding the optimal growing conditions is crucial to successfully growing black eyed peas. They are relatively low-maintenance but require specific environmental factors for optimal growth and yield. Ensure your garden provides the necessary sunlight, soil, and water for a flourishing crop.
The ideal conditions will include well-drained soil, a warm climate, and consistent watering. Preparing your garden bed and providing the right nutrients will set the stage for a successful harvest. Consider the timing of your planting based on your local climate, avoiding frost and ensuring adequate sunlight exposure.
Sunlight Requirements
Black eyed peas need at least six to eight hours of direct sunlight daily to thrive. Choose a location in your garden that receives ample sunlight throughout the day. Avoid planting them in shaded areas, as this will hinder their growth and reduce pod production. Full sun is essential for photosynthesis and the overall health of the plants.
Soil Preparation
Black eyed peas prefer well-drained soil that is rich in organic matter. Before planting, amend your soil with compost or other organic materials to improve drainage and fertility. Avoid heavy clay soils, as they can lead to waterlogging and root rot. A slightly acidic to neutral pH (6.0 to 7.0) is ideal for optimal growth.
Watering and Irrigation
Consistent watering is essential, especially during dry spells and the flowering and pod-filling stages. Water deeply, providing about one inch of water per week, either through rainfall or irrigation. Avoid overhead watering, which can promote fungal diseases. Drip irrigation or soaker hoses are excellent options for delivering water directly to the roots.
Planting Black Eyed Peas: A Step-by-Step Guide
Now, let’s delve into the practical aspects of how to plant black eyed peas. Planting black eyed peas involves several steps, from seed selection to sowing and spacing, ensuring your beans get off to a strong start. Following this guide will help maximize your chances of a successful and productive harvest.
Timing your planting correctly is essential. Prepare your soil well, and handle the seeds with care. Proper planting techniques will lead to healthy plants and a bountiful yield. From seed to sprout, each step plays a crucial role in the development of your black eyed pea crop.
Timing Your Planting
The best time to plant black eyed peas is after the last frost, when the soil has warmed up to at least 60°F (15°C). In most regions, this is typically in late spring or early summer. Check the average frost dates for your area and plant accordingly. Planting too early can stunt growth, while planting too late may shorten the growing season. (See Also: Optimal Spacing: How Close to Plant Garlic for Best Yield)
Seed Preparation and Sowing
Black eyed pea seeds can be directly sown into the ground. Soak the seeds in water for a few hours before planting to speed up germination. Sow the seeds about 1-2 inches deep and 3-4 inches apart. Gently cover the seeds with soil and water thoroughly. Ensure the soil remains consistently moist until the seedlings emerge.
Spacing and Row Arrangement
Proper spacing is crucial for good air circulation and plant growth. Space rows about 2-3 feet apart. Thin the seedlings to about 6-8 inches apart once they have several sets of leaves. This provides each plant with enough space to develop fully. Adequate spacing also reduces the risk of fungal diseases.
Caring for Your Black Eyed Pea Plants
Once your black eyed peas are planted, ongoing care is essential for healthy growth and a good yield. This involves regular watering, fertilization, and pest and disease management. Consistent care will ensure your plants remain healthy and productive throughout the growing season. Proper care is key to answering the question of how to plant black eyed peas successfully.
Monitoring your plants for pests and diseases, providing adequate support for climbing varieties, and keeping the area weed-free are all important aspects of care. Regular observation will help you identify and address any potential problems early on. A well-cared-for plant will reward you with a plentiful harvest.
Watering Techniques
Water black eyed peas deeply and regularly, especially during dry periods. Water at the base of the plants to avoid wetting the foliage, which can lead to fungal diseases. Check the soil moisture regularly and adjust your watering schedule accordingly. Consistent moisture is crucial for pod development.
Fertilizing Your Plants
Black eyed peas are relatively low-maintenance when it comes to fertilization. However, a light application of a balanced fertilizer at planting time can be beneficial. Avoid over-fertilizing, as this can lead to excessive foliage growth at the expense of pod production. Nitrogen-fixing bacteria in the soil also help to provide nutrients.
Weed Control
Weeds can compete with black eyed peas for nutrients, water, and sunlight. Regularly weed your garden bed to keep weeds at bay. Mulching around the plants can also help suppress weed growth and retain soil moisture. Hand-weeding or using a hoe are effective methods for weed control.
Pest and Disease Management
Black eyed peas can be susceptible to certain pests and diseases. Common pests include aphids, bean beetles, and spider mites. Common diseases include fungal infections like root rot and leaf spot. Inspect your plants regularly and take action at the first sign of any problems. Organic pest control methods include insecticidal soap, neem oil, and companion planting.
Supporting Climbing Varieties
Some black eyed pea varieties are bush types, while others are vining or climbing types. If you are growing a climbing variety, providing support is essential. This allows the plants to grow vertically, maximizing space and improving air circulation. Proper support also makes harvesting easier.
Trellises, stakes, and fences are all suitable options for supporting climbing black eyed peas. Choose a support system that is sturdy and can withstand the weight of the plants. Secure the vines to the support as they grow, guiding them upwards to ensure they are well-supported.
Trellising Methods
Trellises provide excellent support for climbing black eyed peas. Several types of trellises can be used, including: A-frame trellises, vertical trellises, and netting trellises. Choose a trellis that is appropriate for the size of your garden and the specific variety of black eyed peas you are growing. Ensure the trellis is firmly anchored in the ground.
Staking and Other Supports
Stakes can be used to support individual black eyed pea plants. Drive the stakes into the ground near the plants and tie the vines to the stakes as they grow. Other support methods include fences, which can be adapted to support climbing varieties. Make sure the support is strong enough to bear the weight of the plants during the harvest season.
Harvesting Your Black Eyed Peas
Harvesting black eyed peas at the right time is crucial for maximizing yield and flavor. Knowing when and how to harvest your black eyed peas will ensure you enjoy the best possible taste. The timing of your harvest influences the quality and flavor of the beans. Knowing the right time to harvest is a key part of how to plant black eyed peas.
Harvesting is a rewarding part of the gardening process. Regular harvesting encourages continued production, and also allows you to enjoy fresh black eyed peas throughout the growing season. Proper harvesting techniques can also extend your harvest period, providing you with a longer supply of fresh beans.
Identifying When to Harvest
Harvest black eyed peas when the pods are plump and the peas are well-developed. The pods should be firm to the touch, and the peas should be easily felt inside. The color of the pods will vary depending on the variety, but they should be a vibrant green or yellow. Avoid harvesting too early, as the peas will not be fully developed. (See Also: Planting Daylilies: How Deep Do You Plant Daylily Bulbs?)
Harvesting Techniques
Gently pull the pods from the plants, being careful not to damage the vines. You can harvest by hand or use clippers to cut the pods. Harvest frequently, usually every few days, to encourage continued production. Harvesting regularly prevents the pods from becoming overripe and tough.
Storing and Preserving Your Harvest
Freshly harvested black eyed peas can be stored in the refrigerator for a few days. For longer-term storage, you can freeze, can, or dry them. To freeze, shell the peas, blanch them for a few minutes, and then freeze them in freezer bags. Canning and drying are also effective methods for preserving your harvest.
Common Problems and Solutions
Even with careful planning and care, problems can arise. Understanding common issues and their solutions is essential for successful black eyed pea cultivation. Addressing these problems promptly will help you maintain a healthy crop and ensure a bountiful harvest. Knowledge of these challenges will further the understanding of how to plant black eyed peas effectively.
From pests and diseases to environmental challenges, many factors can impact your crop. Knowing how to identify and address these problems early on is crucial for maintaining a healthy and productive garden. Regular monitoring and proactive measures will minimize the impact of these issues.
Pests and Diseases
Aphids, bean beetles, and spider mites are common pests. Use insecticidal soap or neem oil to control them. Fungal diseases like root rot and leaf spot can also be a problem. Ensure good air circulation and avoid overhead watering to prevent fungal diseases. Rotate crops and use disease-resistant varieties.
Environmental Challenges
Excessive rainfall or drought can negatively affect black eyed pea production. Ensure proper drainage to avoid waterlogging. During dry spells, provide supplemental irrigation. Extreme heat can also stress the plants; provide shade if necessary. Consider using mulch to retain soil moisture and regulate soil temperature.
Nutrient Deficiencies
Yellowing leaves can indicate a nutrient deficiency. Conduct a soil test to determine if your soil lacks any essential nutrients. Amend the soil with the appropriate fertilizer. Over-fertilizing can also cause problems, so always follow the fertilizer manufacturer’s instructions.
Companion Planting for Black Eyed Peas
Companion planting involves growing different plants together to benefit each other. This can improve growth, deter pests, and enhance overall garden health. Companion planting techniques can increase the success of your black eyed pea crop. Understanding this method is a valuable addition to how to plant black eyed peas.
Choosing the right companion plants can help to create a balanced and thriving garden ecosystem. Companion planting can boost yields and reduce the need for pesticides. Careful selection of companion plants will contribute to the health and productivity of your black eyed pea plants.
Beneficial Companion Plants
Planting black eyed peas alongside certain plants can enhance their growth. Corn provides shade and support for climbing varieties. Marigolds deter nematodes and other pests. Basil repels flies and mosquitoes. Other good companions include sunflowers, cucumbers, and summer savory.
Plants to Avoid
Avoid planting black eyed peas near certain plants that can hinder their growth. Onions and garlic can inhibit the growth of legumes. Fennel can also negatively affect black eyed peas. Consider the potential impact of all plants in your garden layout to promote healthy growth.
Troubleshooting Common Issues
Even with the best practices, problems can sometimes arise. Knowing how to troubleshoot common issues can help you protect your crop. Addressing problems promptly will help ensure a successful harvest. Understanding these common problems is essential for anyone who wants to know how to plant black eyed peas.
From stunted growth to poor pod production, various factors can cause problems. Knowing how to identify and address these issues will help you maintain a healthy and productive garden. Regular observation and proactive measures will minimize the impact of these issues.
Poor Germination
If seeds fail to germinate, the soil may be too cold or too dry. Ensure the soil is warm enough and consistently moist. Check the seed viability and consider soaking seeds before planting. Poor seed quality can also be a cause of poor germination. Always use fresh, high-quality seeds.
Stunted Growth
Stunted growth can be caused by various factors, including nutrient deficiencies, pests, or diseases. Conduct a soil test to identify any nutrient deficiencies. Inspect the plants for pests and diseases and take appropriate action. Ensure the plants receive adequate sunlight and water. (See Also: Expert Guide: How to Plant Onion Transplants for Bumper Crops)
Poor Pod Production
Poor pod production can be due to insufficient sunlight, inadequate pollination, or nutrient deficiencies. Ensure the plants receive ample sunlight and water. Encourage pollination by planting flowers to attract pollinators. Supplement with a balanced fertilizer if needed.
The Importance of Crop Rotation
Crop rotation involves changing the location of your crops each year. This practice helps to prevent soil depletion, reduce pest and disease problems, and improve overall soil health. Crop rotation is a vital part of sustainable gardening practices. Understanding crop rotation is key to learning how to plant black eyed peas effectively.
Rotating crops helps to break pest and disease cycles. It also helps to balance nutrient depletion in the soil. Proper crop rotation practices can also improve soil structure. This will ensure the long-term health and productivity of your garden.
Benefits of Crop Rotation
Crop rotation helps to improve soil fertility by alternating crops that take up different nutrients. It also reduces the buildup of pests and diseases that can affect the same crops year after year. Crop rotation can also improve soil structure and prevent soil erosion. This results in healthier plants and higher yields.
Implementing Crop Rotation
Plan your crop rotation in advance. Divide your garden into sections and rotate different crop families each year. Avoid planting the same crop in the same location for more than two years in a row. Consider the nutrient needs of each crop and plant legumes in areas that need nitrogen.
Harvesting and Preserving Black Eyed Peas: A Deeper Dive
Beyond the basics, understanding the nuances of harvesting and preserving black eyed peas is important. Knowing the best methods will help you maximize your harvest and enjoy fresh black eyed peas throughout the year. The details are important in the understanding of how to plant black eyed peas.
From determining the optimal harvest time to selecting the best preservation methods, this section provides valuable insights. Proper harvesting techniques and preservation methods will ensure you enjoy the fruits of your labor for months to come. Preserving your harvest extends the enjoyment of these delicious legumes.
Harvest Timing Revisited
The ideal time to harvest black eyed peas is when the pods are plump and the peas are well-developed. The pods should be firm and the peas should be easily felt inside. The color of the pods will vary depending on the variety, but they should be a vibrant green or yellow. Harvest regularly to encourage continued production.
Drying Black Eyed Peas
Drying black eyed peas is a simple and effective preservation method. Shell the peas and spread them in a single layer on a drying rack or baking sheet. Dry them in a dehydrator, oven, or in a well-ventilated area until they are completely dry and hard. Store dried black eyed peas in airtight containers.
Canning Black Eyed Peas
Canning black eyed peas allows you to enjoy them throughout the year. Follow safe canning procedures to ensure your canned peas are safe to eat. Pressure canning is recommended for low-acid foods like black eyed peas. Properly canned black eyed peas can be stored for up to a year.
Conclusion: Your Path to Black Eyed Pea Success
Congratulations! You are now equipped with the knowledge and skills needed to successfully cultivate black eyed peas in your garden. From choosing the right variety and preparing the soil to harvesting and preserving your crop, this guide has provided a comprehensive overview of how to plant black eyed peas. Embrace the joy of gardening and savor the delicious rewards that await you.
Remember that patience and perseverance are key to successful gardening. With each season, you will learn and refine your techniques, leading to even more bountiful harvests. Enjoy the process, and share your fresh, homegrown black eyed peas with friends and family. Happy gardening!
Recommended Products