The twinkling glow of Christmas lights is an iconic symbol of the holiday season. It transforms a simple evergreen into a dazzling centerpiece, filling your home with warmth and festive spirit. But have you ever wondered if there’s a ‘right’ way to adorn your tree? Getting the lighting just perfect can elevate your tree from pretty to absolutely breathtaking.
This guide is your ultimate roadmap to mastering how to place lights on a Christmas tree. We’ll go beyond just winding them around branches. We’ll explore techniques that create depth, highlight your ornaments, and ensure a beautiful, even glow. Whether you’re a seasoned decorator or embarking on your first tree-trimming adventure, you’ll find valuable tips and tricks to make your holiday sparkle.
The Art of Illuminating Your Christmas Tree
Placing Christmas lights on your tree is more than just a chore; it’s an opportunity to infuse your holiday decor with personality and magic. The way you position your lights significantly impacts the overall aesthetic. A well-lit tree draws the eye, creates a cozy ambiance, and serves as a stunning focal point for your festive celebrations. Let’s break down the essential steps and considerations to achieve that perfect glow.
Choosing the Right Lights
Before you even think about placement, selecting the right type of lights is crucial. The sheer variety can be overwhelming, but understanding your options will lead you to the best choice for your tree.
Types of Christmas Lights
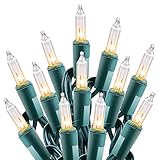
- Incandescent Lights: The traditional choice, known for their warm, classic glow. They tend to be bulkier and generate more heat. If one bulb burns out, the entire string might go dark.
- LED Lights: Energy-efficient, long-lasting, and cooler to the touch. They come in a vast array of colors and styles, from mini-lights to larger C9 bulbs. LEDs are a popular modern choice due to their durability and lower electricity consumption.
- Fairy Lights/Micro Lights: These are ultra-thin, often on a bendable wire, making them incredibly versatile. They offer a delicate, ethereal glow and are excellent for smaller trees or for adding intricate detail.
- Icicle Lights: Designed to mimic dripping icicles, these lights hang down at varying lengths, creating a beautiful cascading effect.
- Net Lights: These come in a mesh pattern and are great for quickly covering bushes or smaller, uniformly shaped trees.
Color and Size Considerations
- Warm White: Evokes a cozy, traditional feel.
- Cool White: Offers a crisp, modern look.
- Multi-colored: The classic, vibrant choice that screams holiday fun.
- Single Color: Great for a more sophisticated or themed tree.
- Bulb Size: Mini lights are standard for most trees. Larger bulbs (like C7 or C9) are often used for outdoor decorations or for a bolder statement on very large trees.
Determining the Number of Lights
A common question is: how many lights do I need? There’s no single answer, as it depends on the size of your tree and your desired level of illumination. A general guideline is to use at least 100 lights per foot of tree height. However, many enthusiasts prefer more for a truly brilliant display.
The 100 Lights Per Foot Rule (and Why You Might Exceed It)
This rule is a good starting point. For a 7-foot tree, this means 700 lights. However, if you love a densely lit tree or have a very full tree, you might want to double this recommendation, aiming for 200 lights per foot. It’s always better to have a few extra strings than to run out mid-decoration.
Factors Influencing Light Quantity
- Tree Height: The most obvious factor. Taller trees require more lights.
- Tree Fullness: A sparse tree might need fewer lights to appear well-covered, while a very full, dense tree will benefit from more lights to penetrate the foliage.
- Desired Brightness: Do you want a subtle twinkle or a dazzling, bright display? More lights equal more brilliance.
- Ornament Density: If you plan to hang many ornaments, you might need more lights to ensure they are adequately illuminated and don’t compete with the light.
The Best Techniques for Placing Lights
Now for the exciting part: actually putting the lights on your tree! The method you choose will dramatically affect the final look. Forget simply wrapping them around the outside; we’re aiming for depth and radiance.
Method 1: The ‘in-Out’ or ‘zig-Zag’ Technique
This is arguably the most popular and effective method for creating a professional-looking, evenly lit tree. It involves weaving the light string from the trunk outwards and then back in, creating a beautiful depth of light.
Step-by-Step Guide:
- Start at the Trunk: Plug in your lights (temporarily) to ensure they work. Begin by tucking the plug end of your light string near the base of the tree, close to the trunk.
- Weave Towards the Outer Branches: Gently pull the string of lights outward, aiming for the tips of the branches. Let the lights drape naturally.
- Return to the Trunk: Once you’ve reached the desired outward point on a branch, weave the light string back towards the trunk, finding a spot on an inner branch or further down the same branch.
- Repeat and Overlap: Continue this in-and-out motion, moving around the tree. Aim to overlap your light strings slightly as you work your way up. This ensures no dark spots and creates a continuous glow.
- Work Your Way Up: Gradually ascend the tree, repeating the process section by section. For a 7-foot tree, you might divide it into 3-4 horizontal sections.
- Conceal the Wires: Tuck wires and connections within the branches to hide them from view.
Method 2: The ‘layering’ Technique
This method involves starting with lights closer to the trunk and then adding subsequent layers further out, creating a luminous effect that seems to emanate from within the tree. (See Also: How to Dilute Tea Tree Oil for Scabies Safely)
How to Implement Layering:
- Inner Layer First: Start by draping your first string of lights as close to the trunk as possible. Work your way around the tree, ensuring the lights are nestled deep within the branches.
- Mid-Layer: Once the inner layer is complete, take your next string of lights and place it slightly further out on the branches, creating a second ring of illumination.
- Outer Layer: Finally, use your last string(s) of lights to decorate the outer tips of the branches. This creates a beautiful gradient of light, making the tree appear fuller and more dimensional.
- Consider the Bulb Placement: Ensure you’re not just draping; try to place individual bulbs within the branches for a more integrated look.
Method 3: The ‘spiral’ Technique
This is a straightforward method that can be effective, especially for very tall or narrow trees. It’s quick and can provide a good distribution of light.
Executing the Spiral:
- Start at the Top: Begin at the very top of the tree, securing the plug end of your light string.
- Wrap Downwards: Carefully spiral the lights down the tree, weaving them through the branches as you go. Try to keep the spacing relatively even.
- Work Back Up (Optional): For a denser look, you can then start another string at the bottom and spiral upwards, overlapping the first layer.
- Adjust as Needed: Periodically step back to check for evenness and make adjustments.
Tips for a Flawless Finish
Beyond the core techniques, several small details can elevate your Christmas tree lighting from good to spectacular.
Pre-Lighting Your Tree (artificial Trees)
If you have an artificial tree, consider pre-lighting it before you even bring it into the house. This saves a lot of hassle and allows you to test all your lights at once. You can often wrap the lights around the sections of the tree before assembling it.
Dealing with Cords
- Hide the Cords: Tuck cords behind branches, especially darker cords on darker trees. Green cords are best for real trees, while white or clear cords can blend better with artificial trees.
- Use Extension Cords Wisely: Plan your power outlets. Use heavy-duty outdoor extension cords if needed, but always ensure they are rated for indoor use if the outlet is inside.
- Connect Strings on the Back: If you have multiple strings, try to connect them on the back or less visible side of the tree.
Creating Depth and Dimension
- Vary the Depth: Don’t place all your lights on the outermost branches. Weaving lights deep into the tree creates a beautiful glow that seems to emanate from within.
- Mix Light Types (Optional): For an advanced look, consider layering different types of lights. For example, using micro-lights close to the trunk and then larger mini-lights on the outer branches.
The Importance of Testing
Always, always test your lights before you start decorating. Nothing is more frustrating than getting halfway through your tree only to discover a string of dead lights. Also, test them after they’ve been stored all year.
Consider the Tree Type
- Real Trees: Be mindful of heat generated by incandescent bulbs, which can dry out needles. LEDs are a safer choice for live trees. Ensure lights are not directly touching branches that are very dry.
- Artificial Trees: These are more forgiving. You can wrap lights tightly and they won’t dry out.
Lighting From the Inside Out
This is a key principle for a professional look. Imagine the lights are part of the tree’s structure, not just an addition. By weaving them inwards, you achieve this effect. Think of it as illuminating the tree from its core.
Don’t Forget the Top!
The tree topper is often the crowning glory. Ensure your lights are positioned to beautifully frame and highlight your chosen topper. Some people like to run a string of lights all the way to the very top.
Power Considerations
Outlets: Plan where your power source will be. You might need a power strip or a few extension cords. Ensure they are safely routed and not a tripping hazard. Using smart plugs can also be a fun way to control your lights!
Balancing Lights and Ornaments
While lights are essential, they should complement your ornaments, not overpower them. The goal is for the lights to enhance the beauty of your ornaments, making them sparkle and stand out. If you have very delicate or intricate ornaments, ensure the lights don’t cast harsh shadows or obscure their details. (See Also: How to Grow Blueberry Tree: A Comprehensive Guide)
Visualizing the Glow
Before you start, take a moment to visualize the kind of glow you want. Do you want a soft, romantic shimmer or a bright, vibrant sparkle? This visualization will guide your decisions on light quantity and placement technique.
The ‘crown’ of Lights
Some decorators like to create a concentrated ‘crown’ of lights at the very top of the tree, just below the topper, to make it stand out. You can achieve this by wrapping lights more densely in this area.
The Bottom Layer
Don’t neglect the bottom of the tree! Ensure the lights extend all the way down to the base, creating a solid foundation of light that makes the entire tree appear more robust and complete. Tuck lights around the stand if possible.
Experimentation Is Key
While these techniques are proven, don’t be afraid to experiment. Every tree is different, and personal preference plays a huge role. What looks stunning on one tree might need a slight tweak on another.
The ‘pre-Lit’ Debate
Many artificial trees now come pre-lit. This is a huge time-saver. However, if you find the existing lights aren’t enough, you can always add more strings on top. Just be sure to match the bulb type and color for a cohesive look.
LED vs. Incandescent for Depth
LEDs are fantastic for creating depth because they are often more flexible and can be woven more intricately without generating excessive heat. Their consistent brightness also helps in achieving a uniform glow.
Branch Placement
When weaving, try to place lights on both the top and underside of branches. This prevents the lights from looking flat and adds to the 3D effect. Gently bend branches to accommodate the light strings.
The ‘plug Test’
Before you start, and at various stages, plug in your lights to see how they look. This allows you to identify any gaps or areas that need more attention. It’s easier to fix issues early on. (See Also: How to Construct a B+ Tree: A Comprehensive Guide)
Seasonal Storage
Proper storage of your lights after the season is crucial for their longevity. Use light wraps or reels to prevent tangling and damage. Store them in a cool, dry place.
Safety First
Always ensure your lights are in good condition. Check for frayed wires or broken bulbs. Use only lights that are certified for indoor use. Avoid overloading circuits. Ensure your extension cords are rated appropriately.
The ‘wow’ Factor
The ultimate goal is to create a ‘wow’ factor. A well-lit tree is captivating. It draws people in, creates a sense of wonder, and truly embodies the magic of the holiday season. By following these techniques, you’ll be well on your way to achieving that stunning effect.
Final Touches
Once the lights are in place, step back and admire your work. Make any final adjustments to ensure the glow is even and beautiful. The perfect lighting sets the stage for all your other decorations.
Conclusion
Mastering how to place lights on a Christmas tree is an achievable art form. By selecting the right lights, determining the correct quantity, and employing techniques like the ‘in-out’ or ‘layering’ methods, you can create a truly dazzling display. Remember to prioritize hiding cords, creating depth, and testing your lights for a flawless, radiant glow. This careful attention to detail will transform your tree into the magical centerpiece of your holiday celebrations.
Recommended Products