Is your iron fence looking a bit worse for wear? Rust creeping in, paint peeling, and generally bringing down the curb appeal of your home? Don’t worry, you’re in the right place! Painting an iron fence might seem like a daunting task, but with the right approach and a little elbow grease, you can revitalize it and make it the envy of the neighborhood.
We understand that you want a fence that looks great and lasts. That’s why we’ve put together this comprehensive guide on how to paint an iron fence, covering everything from preparation to the final coat. We’ll walk you through each step, providing expert tips and tricks to ensure a professional-looking finish. Ready to transform your fence? Let’s get started!
Understanding Iron Fences and Why Painting Matters
Before diving into the how-to, let’s talk about iron fences themselves. These fences are a popular choice for their durability, aesthetic appeal, and ability to enhance property value. They come in various styles, from ornate Victorian designs to simpler, more modern looks. Iron, however, is susceptible to rust, especially when exposed to the elements. This is where painting becomes crucial.
Why Paint Your Iron Fence?
Painting an iron fence serves several vital purposes:
- Protection: The primary function of paint is to act as a protective barrier against the elements. It shields the iron from moisture, UV rays, and other environmental factors that can cause rust and corrosion.
- Aesthetics: A fresh coat of paint can dramatically improve the appearance of your fence, enhancing your property’s curb appeal and overall value. You can choose from a wide range of colors to complement your home’s style.
- Longevity: Regular painting helps extend the lifespan of your iron fence. By preventing rust and corrosion, you can avoid costly repairs or replacements down the line.
Common Iron Fence Problems
Iron fences often face these issues:
- Rust: The most common enemy of iron fences. Rust forms when iron reacts with oxygen and moisture.
- Peeling Paint: Caused by poor surface preparation, using the wrong type of paint, or exposure to the elements.
- Corrosion: Over time, rust can lead to corrosion, weakening the fence structure.
- Fading: Sunlight can cause paint to fade and lose its color over time.
Painting addresses these problems head-on, ensuring your fence looks great and lasts for years.
Gathering Your Supplies: What You’ll Need
Having the right tools and materials is essential for a successful painting project. Here’s a comprehensive list:
- Safety Gear:
- Safety glasses
- Gloves (rubber or nitrile)
- Respirator (especially if sanding or using spray paint)
- Old clothes or a painting suit
- Cleaning Supplies:
- Stiff-bristled brush (wire brush recommended for rust removal)
- Garden hose with a spray nozzle
- Bucket of warm, soapy water (mild detergent)
- Rags or cloths
- Surface Preparation:
- Wire brush (for removing rust and loose paint)
- Paint scraper (for removing loose paint)
- Sandpaper or a sanding block (various grits, e.g., 80-grit, 120-grit)
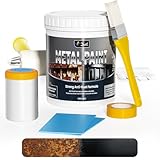
- Primer (specifically designed for metal, rust-inhibiting)
- Metal Etching Primer (optional, for extra adhesion)
- Painting Supplies:
- Exterior-grade paint for metal (oil-based or acrylic latex, consider rust-inhibiting)
- Paintbrushes (various sizes, angled brushes for detail work)
- Paint roller (small roller for larger flat areas, if applicable)
- Paint tray and liners
- Painter’s tape (for protecting surrounding areas)
- Drop cloths or plastic sheeting (to protect the ground and surrounding plants)
- Paint can opener
- Paint stirrer
- Optional Tools:
- Power washer (for cleaning) – use with caution and at a low setting
- Electric sander (for faster sanding, especially on large fences)
- Paint sprayer (for a smoother finish, requires practice)
Pro Tip: Don’t skimp on quality. Buying good-quality paint and primer will save you time and money in the long run. Also, purchase a good quality wire brush.
Step-by-Step Guide: How to Paint an Iron Fence
Now, let’s get down to the nitty-gritty. Here’s a step-by-step guide to painting your iron fence:
- Preparation is Key: Cleaning and Inspection
Before you even think about picking up a paintbrush, you need to prepare the surface. This step is crucial for ensuring the paint adheres properly and lasts. First, inspect the fence thoroughly. Look for rust, loose paint, and any structural damage. Take note of any areas that need extra attention. (See Also: How to Run an Electric Fence: A Complete Guide to Safe & Effective Fencing)
Next, clean the fence. Use a stiff-bristled brush (a wire brush is ideal for rust removal) to scrub away dirt, grime, and loose paint. Rinse the fence with a garden hose, making sure to remove all debris. For stubborn dirt or mildew, you can use a mild detergent mixed with water. Allow the fence to dry completely before moving on.
- Rust Removal
Rust is the enemy! You must remove all rust before painting. Use a wire brush, scraper, or electric sander (with a wire wheel attachment) to remove rust. Be thorough, and try to get down to the bare metal. For heavily rusted areas, you might need to use a rust remover product. Follow the manufacturer’s instructions carefully. After rust removal, clean the area again to remove any residue.
- Surface Preparation: Sanding and Scraping
After cleaning and rust removal, it’s time to sand the fence. Sanding creates a slightly rough surface that allows the primer and paint to adhere better. Use sandpaper or a sanding block to smooth out any rough edges and to feather the edges where the old paint is still adhering. Start with a coarser grit sandpaper (e.g., 80-grit) for removing loose paint and then switch to a finer grit (e.g., 120-grit) for smoothing the surface. If there’s loose or flaking paint, use a paint scraper to remove it. Be careful not to gouge the metal.
- Priming the Fence
Priming is an essential step that you shouldn’t skip. Primer provides a base for the paint to adhere to, helps to prevent rust, and can improve the paint’s durability. Choose a primer specifically designed for metal and rust-inhibiting. Apply the primer evenly, following the manufacturer’s instructions. Use a brush or roller, depending on the fence’s design. Allow the primer to dry completely before applying the paint. This usually takes several hours, or even overnight, depending on the product and weather conditions.
- Painting: Applying the First Coat
Once the primer is dry, it’s time to paint! Choose an exterior-grade paint specifically designed for metal. Oil-based paints offer excellent durability and rust protection but require mineral spirits for cleanup. Acrylic latex paints are easier to clean up with water and are more environmentally friendly. Consider a rust-inhibiting paint for extra protection.
Stir the paint thoroughly before use. Use a brush, roller, or paint sprayer to apply the first coat of paint. If using a brush, use smooth, even strokes. If using a roller, apply the paint evenly, avoiding drips and runs. If using a paint sprayer, follow the manufacturer’s instructions for proper technique. Allow the first coat to dry completely before applying a second coat. This usually takes several hours, depending on the paint and weather conditions.
- Painting: Applying the Second Coat (and possibly a Third)
After the first coat has dried, inspect the fence for any imperfections or areas that need more coverage. Apply a second coat of paint, using the same technique as before. For the best results, apply two coats of paint. In areas with high sun exposure or where the fence is exposed to harsh weather conditions, you might want to consider a third coat. Allow the paint to dry completely before touching or using the fence.
- Cleanup and Final Touches
Once the paint is dry, carefully remove any painter’s tape. Clean your brushes, rollers, and other tools thoroughly with the appropriate cleaner (mineral spirits for oil-based paints, water for acrylic latex paints). Dispose of paint and cleaning materials properly, following local regulations. Inspect your fence for any imperfections and touch up as needed. Step back and admire your handiwork!
Tips and Tricks for a Flawless Finish
- Choose the Right Weather: Avoid painting on windy or humid days, as this can affect the paint’s drying time and finish. Aim for temperatures between 50°F and 85°F.
- Protect Your Surroundings: Use drop cloths or plastic sheeting to protect the ground, plants, and other objects from paint splatters.
- Use Quality Tools: Investing in good-quality brushes, rollers, and other tools will make the job easier and result in a better finish.
- Proper Ventilation: Ensure adequate ventilation when painting, especially if using oil-based paints. Open windows and doors, or use a fan.
- Apply Thin Coats: It’s better to apply multiple thin coats of paint than one thick coat. This helps prevent drips, runs, and a less-than-perfect finish.
- Feathering: When sanding or scraping, feather the edges of the paint to create a smooth transition between the old and new paint.
- Consider the Design: For intricate iron fence designs, consider using angled brushes for detail work.
- Check Drying Times: Always follow the manufacturer’s recommendations for drying times between coats.
Choosing the Right Paint
Selecting the correct paint is critical for the longevity and appearance of your iron fence. Here’s what to consider: (See Also: How to Build a Privacy Fence Gate: A Step-by-Step Guide)
- Type of Paint:
- Oil-Based Paint: Known for its durability, excellent rust protection, and ability to create a smooth finish. However, it takes longer to dry and requires mineral spirits for cleanup.
- Acrylic Latex Paint: Easier to clean up with water, more environmentally friendly, and dries faster. Modern latex paints offer good durability, but may not be as resistant to rust as oil-based paints.
- Exterior-Grade: Always choose paint specifically formulated for exterior use, as it is designed to withstand the elements.
- Rust-Inhibiting: Consider paints that contain rust inhibitors for added protection against corrosion.
- Color and Finish: Choose a color that complements your home’s style. Glossy finishes are more durable and easier to clean, but they can highlight imperfections. Satin or matte finishes offer a more subtle look.
Dealing with Rust: A Deeper Dive
Rust is the most significant challenge when painting an iron fence. Here’s a more detailed look at rust removal:
- Wire Brushing: The most common method. Use a stiff wire brush to scrub away loose rust and paint.
- Sanding: After wire brushing, use sandpaper to remove remaining rust and smooth the surface.
- Chemical Rust Removers: For heavily rusted areas, consider using a chemical rust remover. Follow the manufacturer’s instructions carefully. These products can be very effective but require proper safety precautions.
- Power Washing: Use a power washer with caution. While it can be effective for removing loose rust and paint, it can also damage the fence if the pressure is too high.
- Rust Converter: Some products convert rust into a paintable surface. These can be useful for areas where rust is difficult to remove completely.
Pro Tip: After rust removal, clean the surface thoroughly with a degreaser to remove any residue before priming.
Common Mistakes to Avoid
- Poor Surface Preparation: This is the most common mistake. Failing to properly clean, remove rust, and sand the surface will result in poor paint adhesion and a shorter lifespan for the paint job.
- Using the Wrong Paint: Using interior paint or paint not designed for metal will lead to premature peeling and cracking.
- Skipping Primer: Primer is essential for adhesion and rust prevention.
- Painting in the Wrong Weather: Painting in extreme temperatures or high humidity can negatively affect the paint’s drying time and finish.
- Applying Thick Coats: Applying thick coats of paint can lead to drips, runs, and a less-than-perfect finish. Apply multiple thin coats instead.
- Not Allowing Enough Drying Time: Rushing the drying process can cause the paint to wrinkle or peel.
Frequently Asked Questions (people Also Ask)
Let’s address some common questions:
Q: What kind of paint do you use on an iron fence?
A: Use an exterior-grade paint specifically designed for metal. Oil-based paints are a good choice for durability and rust protection, while acrylic latex paints offer easier cleanup. Consider a rust-inhibiting paint.
Q: Do you need to prime an iron fence before painting?
A: Yes, priming is essential. Primer provides a base for the paint to adhere to, helps prevent rust, and improves the paint’s durability.
Q: How do you remove rust from an iron fence?
A: Use a wire brush, scraper, or electric sander to remove loose rust. For heavily rusted areas, you may need to use a chemical rust remover. Clean the surface thoroughly after rust removal. (See Also: How to Ground an Electric Fence: A Complete Guide for Safety & Performance)
Q: How many coats of paint should you put on an iron fence?
A: Apply two coats of paint for the best results. In areas with high sun exposure or harsh weather conditions, consider a third coat.
Q: Can you spray paint an iron fence?
A: Yes, you can spray paint an iron fence. Spray painting can provide a smoother finish than brushing or rolling, but it requires practice to avoid drips and runs. Make sure to protect surrounding areas from overspray.
Q: How long does it take for paint to dry on an iron fence?
A: The drying time depends on the type of paint and the weather conditions. Follow the manufacturer’s instructions, but generally, allow several hours between coats. Some paints may require overnight drying.
Q: How long does paint last on an iron fence?
A: The lifespan of the paint job depends on factors like the type of paint used, the quality of surface preparation, and the weather conditions. With proper preparation and care, a paint job can last for several years, often 5-10 years or more.
Final Verdict
Painting an iron fence is a rewarding project that can significantly improve the look and longevity of your property. By following these steps and paying attention to detail, you can achieve professional-looking results. Remember, preparation is key, so don’t rush the process. With the right tools, materials, and a little effort, you can transform your iron fence into a beautiful and durable feature of your home.
Recommended Products