Are your tomato plants struggling? Yellowing leaves, stunted growth, and poor fruit production can be incredibly frustrating. One of the most common culprits? Soil pH that’s not in the sweet spot for tomatoes.
Tomatoes thrive in slightly acidic soil, ideally with a pH between 6.0 and 6.8. If your soil is too alkaline (high pH), it can lock up essential nutrients, making them unavailable to your plants. The good news? We can fix this! This guide will walk you through everything you need to know about how to lower soil pH for tomatoes, from testing your soil to choosing the right amendments and techniques. Get ready for a bountiful tomato harvest!
Understanding Soil Ph and Its Importance for Tomatoes
Before we dive into the how-to, let’s understand why soil pH matters so much for your tomato plants. Soil pH is a measure of how acidic or alkaline your soil is. It’s measured on a scale from 0 to 14, with 7 being neutral. Values below 7 indicate acidity, and values above 7 indicate alkalinity.
Tomatoes are acid-loving plants. They prefer a slightly acidic environment because it affects the availability of nutrients. When the pH is too high (alkaline), essential nutrients like iron, manganese, and phosphorus become less soluble and unavailable to the plant, even if they are present in the soil. This leads to nutrient deficiencies, which manifest as:
- Yellowing leaves (chlorosis): Often starting with the younger leaves.
- Stunted growth: Plants may grow slowly and remain small.
- Poor fruit production: Fewer tomatoes or smaller, less flavorful fruits.
- Blossom end rot: A common problem caused by calcium deficiency, often linked to high pH.
Conversely, excessively acidic soil (low pH) can also cause problems, such as the increased solubility of heavy metals like aluminum, which can be toxic to plants. However, in most gardening situations, high pH is a more common issue.
Why Is Soil Ph Important for Tomatoes? (people Also Ask)
One of the most common questions is ‘Why is soil pH important for tomatoes?’ The answer is simple: nutrient availability. Tomatoes have specific nutrient needs, and the soil pH directly influences whether they can absorb those nutrients. An optimal pH range ensures that the nutrients are in a form the plant can easily take up through its roots.
What Is the Ideal Soil Ph for Tomatoes?
The ideal soil pH for tomatoes is between 6.0 and 6.8. This slightly acidic range provides the perfect balance for nutrient absorption, root health, and overall plant vigor. Aiming for this range will help your tomatoes thrive and produce the best possible harvest.
How to Test Your Soil Ph
Knowing your soil’s pH is the first and most crucial step in the process. You can’t fix a problem until you know it exists! Fortunately, testing your soil pH is relatively easy and inexpensive.
Methods for Testing Soil Ph:
- Soil pH Test Kits: These are readily available at garden centers and online retailers. They typically involve mixing a soil sample with a chemical solution and comparing the resulting color to a chart to determine the pH. They’re easy to use and provide quick results, making them a great starting point for most gardeners.
- Digital pH Meters: These meters provide more precise readings than test kits. You insert the probe directly into the soil. Digital meters are a good investment if you plan to regularly monitor your soil pH or if you need highly accurate measurements. Calibration is important for these meters.
- Soil Testing Labs: For the most comprehensive analysis, consider sending a soil sample to a local soil testing lab. These labs provide detailed reports on pH, nutrient levels, and other soil properties. This option is particularly helpful if you’re experiencing persistent problems with your tomato plants.
Step-by-Step Guide to Using a Soil Ph Test Kit:
- Gather Your Supplies: You’ll need the test kit, a small container (like a cup or bowl), and distilled water. Tap water can sometimes alter the readings.
- Collect a Soil Sample: Use a trowel or small shovel to collect a soil sample from the area where you plan to plant your tomatoes. Take several samples from different spots to get a representative reading. Aim to collect samples from about 6 inches deep.
- Mix the Soil and Water: Follow the instructions on your test kit. Typically, you’ll mix a small amount of soil with distilled water and let it settle.
- Add the Indicator Solution: Add the indicator solution provided in the kit.
- Compare the Color: After a few minutes, compare the color of the solution to the color chart provided in the kit. This will give you your soil pH reading.
- Repeat the Test: For accuracy, repeat the test a couple of times. Average the readings if there is a discrepancy.
Important Tip: Test your soil pH before planting and retest throughout the growing season, especially if you add amendments. It’s also a good idea to test your soil pH every year, even if your plants are doing well. (See Also: How to Pronounce Soil: Your Ultimate Guide for Perfect Pronunciation)
Choosing the Right Soil Amendments to Lower Ph
Once you know your soil pH, you can choose the appropriate amendments to lower it if necessary. Several materials can effectively acidify your soil. The best choice for you will depend on factors like your soil type, the severity of the pH imbalance, and your budget.
Common Soil Acidifying Amendments:
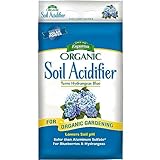
- Elemental Sulfur: This is one of the most effective and widely used amendments. It works by reacting with soil bacteria to produce sulfuric acid, which lowers the pH. It takes time to work, often several months, so it is best applied well before planting.
- Aluminum Sulfate: This acts quickly and can lower the pH quite rapidly. However, it can also raise aluminum levels in the soil, which can be toxic at high concentrations. Use it with caution and only if you’re sure your soil doesn’t already have high aluminum levels.
- Sphagnum Peat Moss: This organic material is slightly acidic and can help lower pH over time. It also improves soil structure and water retention. It works more slowly than sulfur or aluminum sulfate, but is a good option for organic gardeners.
- Acidifying Fertilizers: Fertilizers containing ammonium sulfate or ammonium nitrate can also help lower soil pH. These are best used as a supplemental approach, rather than the primary method of pH adjustment.
Choosing the Right Amendment: (people Also Ask)
Choosing the right amendment depends on several factors. Elemental sulfur is generally a good choice for long-term pH adjustment, but it takes time to work. Aluminum sulfate provides faster results, but there are potential downsides. Peat moss is a more gentle, organic option. Consider your soil type, the current pH, and how quickly you need to see results when making your decision.
Calculating Amendment Amounts:
The amount of amendment you need to use will depend on your soil type (sandy, loamy, or clay), the current pH, and the target pH. It’s best to err on the side of caution and apply less than the maximum recommended amount, then retest and adjust as needed. Most amendment products provide instructions for calculating the appropriate application rate. Here are some general guidelines:
Elemental Sulfur:
- Sandy Soil: To lower the pH by one point (e.g., from 7.5 to 6.5), you might need to apply 0.5 to 1 pound of sulfur per 100 square feet.
- Loamy Soil: You might need 1 to 2 pounds per 100 square feet.
- Clay Soil: You might need 2 to 3 pounds per 100 square feet.
Aluminum Sulfate:
- The application rates for aluminum sulfate are generally higher than for sulfur. Follow the product instructions carefully. As a general guideline, you might use 5 to 10 pounds per 100 square feet to lower the pH by one point.
Peat Moss:
- Peat moss can be incorporated into the soil at a rate of 1 to 2 inches deep.
Important Note: Always follow the manufacturer’s instructions on the product label. Over-application can make the soil too acidic, which can also harm your plants.
Applying Soil Amendments:
- Prepare the Soil: Clear the area of any weeds and debris.
- Spread the Amendment: Use a spreader or your hands (with gloves!) to evenly distribute the amendment over the soil surface.
- Incorporate the Amendment: Use a garden fork, tiller, or shovel to mix the amendment into the top 6-8 inches of soil. This helps the amendment react with the soil and ensures even distribution.
- Water the Soil: Water the area thoroughly after applying the amendment. This helps the amendment begin to work.
- Retest the Soil: Wait a few weeks (or longer for elemental sulfur) and retest your soil pH to see if you’ve achieved the desired level. Adjust the application rate as needed.
Other Techniques to Help Lower Soil Ph for Tomatoes
In addition to using soil amendments, several other techniques can help maintain the ideal pH range for your tomato plants. (See Also: How to Get Loam Soil: Your Ultimate Guide to Rich, Fertile Gardens)
Using Acidic Mulches:
Mulching with acidic materials can help gradually lower the soil pH over time. Excellent choices include:
- Pine needles: They are naturally acidic and break down slowly, releasing acids into the soil.
- Oak leaves: Similar to pine needles, oak leaves are also slightly acidic.
- Composted coffee grounds: Coffee grounds are acidic and can also add valuable nutrients to the soil. (Be careful not to overdo it, as excessive coffee grounds can sometimes create a too acidic environment.)
Apply a 2-4 inch layer of mulch around your tomato plants, keeping the mulch away from the stems. Mulching helps retain moisture, suppress weeds, and slowly acidify the soil.
Choosing the Right Fertilizers:
As mentioned earlier, some fertilizers can contribute to lowering soil pH. Look for fertilizers that contain ammonium sulfate or ammonium nitrate. These fertilizers release acidic compounds as they break down, helping to counteract alkaline conditions. However, fertilizers should not be the primary method for adjusting pH; they’re best used as a supplemental approach. Always follow the fertilizer instructions carefully to avoid over-fertilizing.
Watering with Acidic Water:
If you have access to a water source with a slightly acidic pH (e.g., rainwater), you can use it to water your tomato plants. This can help lower the soil pH over time. Avoid using tap water if it’s known to be highly alkaline. If you must use tap water, let it sit out for a day or two to allow some of the chlorine to dissipate.
Crop Rotation:
Crop rotation involves changing the crops you plant in a particular area each year. This practice can help prevent the buildup of soilborne diseases and pests. It can also help to manage soil pH. For example, planting tomatoes after a legume crop (like beans or peas) can help improve soil fertility and make it easier to maintain the ideal pH for tomatoes.
Avoid Over-Liming:
If you’ve previously added lime to your soil to raise the pH, be careful not to add too much. Over-liming can make the soil too alkaline, which can lead to nutrient deficiencies for your tomatoes. Always test your soil pH before applying lime or any other soil amendments.
Maintaining the Right Soil Ph for Long-Term Success
Lowering your soil pH for tomatoes is not a one-time fix. It’s an ongoing process that requires monitoring and maintenance. Here’s how to ensure long-term success:
- Regular Soil Testing: Test your soil pH at least once a year, or more frequently if you’re using soil amendments.
- Monitor Plant Health: Pay attention to your tomato plants. Look for signs of nutrient deficiencies, such as yellowing leaves or stunted growth.
- Adjust as Needed: If your soil pH drifts outside the ideal range, adjust your soil amendments and techniques accordingly.
- Consistent Mulching: Maintain a consistent layer of acidic mulch around your tomato plants.
- Proper Watering: Water your plants deeply and regularly, but avoid overwatering.
By following these guidelines, you can create a healthy soil environment that allows your tomato plants to thrive and produce an abundant harvest year after year. Remember, patience and consistency are key to successful tomato gardening. (See Also: How Much Soil for a 10-Gallon Pot? Your Ultimate Guide)
Common Mistakes to Avoid
While lowering soil pH is manageable, it’s easy to make mistakes. Avoiding these common pitfalls will help you achieve the best results:
- Not Testing Your Soil: This is the biggest mistake. Without knowing your soil pH, you’re just guessing.
- Over-Amending: Adding too much amendment can make the soil too acidic, which can be just as harmful as alkaline soil. Always follow the product instructions carefully and test your soil regularly.
- Using the Wrong Amendment: Choose the right amendment for your soil type and the severity of the pH imbalance.
- Ignoring Other Soil Issues: Soil pH is just one factor. Make sure your soil has good drainage, is rich in organic matter, and has the necessary nutrients.
- Not Being Patient: Lowering soil pH takes time, especially when using elemental sulfur. Don’t expect instant results.
By avoiding these common mistakes, you’ll be well on your way to growing healthy, productive tomato plants.
Troubleshooting Common Problems
Even with the best care, problems can arise. Here’s how to troubleshoot some common issues related to soil pH:
- Yellowing Leaves (Chlorosis): This is often a sign of iron deficiency, which is common in alkaline soil. If your pH is too high, consider adding elemental sulfur or aluminum sulfate.
- Stunted Growth: High or low pH can inhibit nutrient uptake, leading to stunted growth. Test your soil pH and adjust accordingly.
- Blossom End Rot: This is often caused by calcium deficiency, which can be exacerbated by high pH. Amend your soil to lower the pH and ensure adequate calcium levels.
- Poor Fruit Production: If your plants are not producing many tomatoes, check your soil pH and ensure it’s in the optimal range. Also, consider other factors like sunlight, watering, and fertilization.
If you’re still experiencing problems after addressing these issues, consult with a local gardening expert or your local agricultural extension office for personalized advice.
Maximizing Your Tomato Harvest
Beyond soil pH, several other factors contribute to a bountiful tomato harvest. Consider these tips:
- Choose the Right Varieties: Select tomato varieties that are well-suited to your climate and growing conditions.
- Provide Adequate Sunlight: Tomatoes need at least 6-8 hours of direct sunlight per day.
- Water Deeply and Regularly: Water your plants deeply, especially during dry periods. Avoid overhead watering, which can promote fungal diseases.
- Fertilize Appropriately: Use a balanced fertilizer, following the instructions on the product label.
- Provide Support: Use stakes, cages, or trellises to support your tomato plants and prevent the fruit from touching the ground.
- Prune Your Plants: Prune suckers (small shoots that grow between the main stem and branches) to improve air circulation and fruit production.
- Control Pests and Diseases: Inspect your plants regularly for pests and diseases. Take action immediately.
- Harvest Regularly: Pick your tomatoes when they are ripe to encourage continued production.
By combining proper soil pH management with these additional tips, you can maximize your chances of a bumper crop of delicious tomatoes.
Final Verdict
Mastering the art of how to lower soil pH for tomatoes is essential for any aspiring tomato grower. By understanding the importance of soil pH, regularly testing your soil, and choosing the right amendments, you can create the ideal environment for your tomato plants to flourish. Remember to be patient, consistent, and always observe your plants for signs of nutrient deficiencies.
A little effort in adjusting your soil pH will pay off handsomely, leading to healthier plants, a higher yield, and the joy of enjoying home-grown, flavorful tomatoes all season long. Happy gardening!
Recommended Products