The twinkling glow of Christmas tree lights is one of the most iconic symbols of the holiday season. It transforms a simple evergreen into a dazzling centerpiece, filling your home with warmth and festive cheer.
But the magic isn’t always automatic. Untangling stubborn wires, achieving an even distribution of light, and ensuring safety are all part of the process. This guide will walk you through everything you need to know about how to lights on a Christmas tree, from choosing the right kind of lights to making them shine their brightest.
Whether you’re a seasoned decorator or embarking on your first tree-lighting adventure, we’ve got you covered. Get ready to create a truly spectacular display that will captivate everyone who sees it!
Choosing the Right Christmas Tree Lights
Before you can even think about how to lights on a Christmas tree, you need to select the perfect illumination. The options available today are vast, offering different styles, colors, and functionalities. Understanding these choices will significantly impact the final look and feel of your tree.
Incandescent vs. LED Lights
The most significant distinction in Christmas tree lights is between incandescent and LED (Light Emitting Diode) bulbs. Each has its own set of pros and cons.
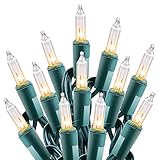
Incandescent Lights
These are the traditional Christmas lights that have been around for decades. They produce a warm, inviting glow that many people associate with classic holiday decor. However, they come with some drawbacks:
- Heat Generation: Incandescent bulbs get quite hot, which can be a fire hazard, especially if they come into contact with dry branches.
- Energy Consumption: They are significantly less energy-efficient than LEDs, meaning they use more electricity and can increase your energy bill.
- Fragility: The glass bulbs are prone to breaking, and a single burnt-out bulb can cause an entire string to go dark, requiring time-consuming troubleshooting.
- Color Fading: Over time, the colors can fade, especially if exposed to sunlight.
LED Lights
LED lights have become the dominant choice for Christmas tree lighting due to their numerous advantages:
- Energy Efficiency: LEDs use up to 75% less energy than incandescent bulbs, making them an eco-friendly and cost-effective option.
- Durability: They are much more robust. Many LEDs are made of plastic and are less likely to break if dropped.
- Cool to the Touch: LEDs generate very little heat, significantly reducing the fire risk.
- Long Lifespan: LEDs can last for tens of thousands of hours, meaning a single set can last for many holiday seasons.
- Vibrant Colors: They offer brighter, more vibrant colors that tend to maintain their intensity over time.
- Variety: Available in a wide range of colors, color-changing options (like RGB), and special effects.
Types of LED Lights
Within the LED category, you’ll find further distinctions: (See Also: Dollar Tree How Much They Pay: A Deep Dive)
- Mini Lights: These are the most common type, featuring small, unobtrusive bulbs. They are versatile and can be used for a traditional look or layered for more impact.
- Candelabra/Fairy Lights: These are even smaller and more delicate, perfect for creating a whimsical or ethereal glow.
- Bulb-Shaped Lights: Larger, often globe-shaped bulbs that offer a bolder statement. They can be retro-inspired or modern.
- String Lights: Traditional strands of lights that can be draped, wrapped, or woven through the branches.
- Net Lights: These come in a mesh pattern and are great for quickly covering bushes or large sections of a tree.
- Icicle Lights: Designed to mimic dripping icicles, they create a cascading effect.
- Battery-Operated Lights: Ideal for trees where outlets are scarce or for accentuating specific areas. Many now come with remote controls and timers.
- Smart Lights: These connect to Wi-Fi or Bluetooth and can be controlled via smartphone apps, allowing for custom color patterns, schedules, and synchronization with music.
Color Choices
The color of your lights sets the mood for your entire holiday display.
- Warm White: Offers a classic, cozy, and inviting glow, reminiscent of traditional incandescent bulbs. It’s a timeless choice that complements most decorations.
- Cool White: Provides a brighter, more modern, and crisp illumination. It can make a tree look more contemporary and is excellent for creating a winter wonderland theme.
- Multi-Colored: A festive and fun choice, especially for families. It brings a playful and vibrant energy to the tree.
- Single Colors: Popular for themed trees (e.g., all red for a traditional look, all blue for a winter theme, all gold for elegance).
Calculating How Many Lights You Need
One of the most common questions when learning how to lights on a Christmas tree is: ‘How much is enough?’ Overdoing it can be overwhelming, while too few can leave your tree looking bare.
A good rule of thumb is to aim for approximately 100 lights per foot of tree height. This can be adjusted based on your personal preference and the type of lights used.
| Tree Height (feet) | Recommended Lights (approx.) | Notes |
|---|---|---|
| 4-5 | 400-500 | A good starting point for a fuller look. |
| 6-7 | 600-700 | Standard for most 6-7 foot trees. |
| 8-9 | 800-900 | For larger, more impactful trees. |
| 10+ | 1000+ | Consider multiple strands for very tall trees. |
Factors that influence light quantity:
- Bulb Size: Larger bulbs might require fewer strings to achieve a similar brightness.
- Desired Effect: Do you want a subtle twinkle or a dazzling glow? More lights create a brighter effect.
- Branch Density: A fuller tree will need more lights to be adequately illuminated.
- Type of Lights: Mini lights are often spaced closer together, while larger globe lights might be spaced further apart. Net or icicle lights cover areas more densely.
It’s always better to have a little more than you think you’ll need, as you can always adjust the placement. Having extra strands is also useful for filling in any sparse areas.
Preparing Your Christmas Tree
Before you even unbox your lights, there are a few crucial steps to take to ensure a safe and beautiful lighting process.
Fluffing Your Artificial Tree
If you’re using an artificial tree, this is a critical step. Most artificial trees come with their branches compressed. Taking the time to ‘fluff’ them out will make a world of difference in how your tree looks and how evenly your lights will distribute. (See Also: How to Pack Artificial Christmas Tree for Storage)
- Start from the bottom: Begin with the lowest branches.
- Work branch by branch: Separate each individual ‘needle’ or ‘sprig’ on a branch.
- Bend and shape: Bend the branches outward and slightly upwards to create a fuller, more natural shape. Think about how real trees grow.
- Work your way up: Continue this process all the way to the top of the tree.
A well-fluffed tree not only looks better but also provides more surface area for your lights to cling to, creating a more cohesive glow.
Checking Your Lights
It’s incredibly frustrating to get halfway through decorating and discover a string of lights doesn’t work. Test your lights before you start decorating.
- Unspool and plug in: Gently unspool each string of lights and plug it into an outlet (preferably one you can easily reach).
- Look for any dead spots: Check for any bulbs that aren’t lighting up.
- Identify burnt-out bulbs: For incandescent lights, look for dark bulbs. For LEDs, a single dead bulb often won’t affect the rest of the string, but it’s still good to note.
- Replace or repair: If you find a dead bulb in an incandescent string, replace it with a spare from the packaging. If a whole string is out, you may need to troubleshoot or set it aside. For LEDs, if a section is out, it might indicate a loose connection or a faulty wire.
Planning Your Light Placement
Before you start wrapping, consider the look you want to achieve. Do you want lights to be close to the trunk for a deep glow, or more on the tips for a brighter, more outward sparkle? Or perhaps a combination of both?
- Deep Glow: Start wrapping lights closer to the trunk of the tree, weaving them in and out. This creates a warm, interior glow.
- Outer Sparkle: Wrap lights around the tips of the branches. This makes the tree appear brighter and more dazzling from a distance.
- Balanced Approach: Many decorators use a combination, starting with lights closer to the trunk and then adding another layer around the branch tips.
How to Lights on a Christmas Tree: The Step-by-Step Process
Now that your tree is prepped and your lights are checked, it’s time for the main event: lighting it up!
Method 1: The Traditional Wrap
This is the most common and straightforward method.
- Start at the top (or bottom): Some prefer to start at the very top and work their way down, while others start at the bottom and work up. Starting at the bottom can sometimes make it easier to hide the plug and cord.
- Secure the plug: If starting at the bottom, plug the first string into an extension cord or outlet and secure the plug with a twist tie or tape to prevent it from being accidentally unplugged.
- Weave and wrap: Gently weave the string of lights around the tree. For a deeper glow, push the lights back towards the trunk. For a brighter, more outward sparkle, wrap the lights around the tips of the branches. Aim for even distribution, ensuring no dark spots.
- Overlap slightly: As you move from one string to the next, overlap the connection point slightly with the previous string to ensure continuous lighting and to hide the connection.
- Work your way around: Continue wrapping the lights around the entire circumference of the tree, working your way up.
- Connect the next string: Once you reach the end of a string, connect the next one. If using multiple strands, ensure they are all compatible (check voltage and wattage if using non-LEDs).
- Reach the top: Continue until you’ve covered the entire tree. Ensure the final plug is accessible.
Method 2: The Vertical Drape
This method can create a more modern and sophisticated look, often used with mini lights or fairy lights.
- Start at the top: Secure the plug of your first string at the very top of the tree, near the trunk.
- Drape downwards: Let the string hang straight down towards the base of the tree.
- Gently weave: As you drape, gently weave the lights in and out of the branches, keeping them relatively close to the trunk for a unified look.
- Work in sections: Divide the tree into imaginary sections (e.g., quarters) and drape lights vertically in each section.
- Connect and repeat: Connect the next string to the end of the first and continue draping vertically in the next section.
- Fill in gaps: Once you have all the vertical strands in place, you can go back and add a few horizontal strands if you want to fill in any sparse areas or add more sparkle.
Method 3: Strategic Placement
This method is about creating specific visual effects. (See Also: How Much Can You Cut Back a Magnolia Tree?)
- Layering: Start with a base layer of lights close to the trunk for a deep glow. Then, add a second layer of lights around the branch tips for sparkle.
- Accent lighting: Use different colored lights or styles to highlight specific areas or ornaments. For example, you might use a single color for the main body of lights and then add strands of a contrasting color around the edges or around larger ornaments.
- Focus on depth: Use shorter strands closer to the trunk and longer strands that extend further out to create a sense of depth and dimension.
Tips for Perfect Christmas Tree Lighting
Mastering how to lights on a Christmas tree involves more than just wrapping them around. Here are some expert tips to elevate your decorating game:
- Use an extension cord with multiple outlets: This allows you to plug in several strings of lights without needing to search for multiple wall sockets. Look for cords specifically rated for outdoor or holiday use.
- Consider a timer: A simple plug-in timer can automate your lights, turning them on and off at set times. This is convenient and can save energy. Smart plugs offer even more control via apps.
- Hide the cords: Tuck cords behind branches or use green floral tape to blend them with the tree’s color. For artificial trees, try to run cords along the central pole.
- Don’t be afraid to mix and match: While uniformity can be elegant, mixing different types of lights (e.g., mini lights with fairy lights) can add texture and visual interest. Just be mindful of power compatibility.
- Test your lights *after* decorating: While you should test them beforehand, it’s also a good idea to plug them in once they’re on the tree to catch any connections that might have come loose during the decorating process.
- Use pipe cleaners or zip ties: For stubborn strands or to secure lights in specific positions, small zip ties or green pipe cleaners can be very helpful. Be careful not to overtighten.
- Consider the ornaments: Think about how your lights will interact with your ornaments. Lights placed behind ornaments can make them appear to glow from within.
- Safety first: Never overload electrical outlets. Ensure all cords are in good condition, with no fraying or exposed wires. Keep lights away from heat sources like fireplaces or radiators.
- Battery-operated considerations: If using battery-operated lights, ensure you have plenty of spare batteries. Check the battery life of your chosen lights beforehand.
- Clean your lights: Before storing them, dust off your light strings. This will make them easier to use and look better the following year.
Troubleshooting Common Lighting Issues
Even with the best preparation, you might encounter a hiccup when learning how to lights on a Christmas tree. Here’s how to tackle common problems:
A Whole String of Lights Won’t Turn On
- Check the plug: Ensure it’s fully inserted into the outlet or extension cord.
- Check the fuse: Many light strings have a small fuse in the plug. Look for a small compartment, usually with a slide-out tray. Replace any blown fuses with spares (often included with the lights).
- Check connections: Ensure all connections between strings are secure.
- Test the outlet: Plug in another working device to confirm the outlet is functional.
- Inspect the wire: Look for any visible damage, kinks, or cuts in the wire. If the wire is damaged, the string should be discarded for safety reasons.
Only a Section of Lights Won’t Turn on (incandescent)
- Identify the burnt-out bulb: A single burnt-out bulb can cause an entire section (or string) to go dark. Look for blackened bulbs.
- Replace the bulb: Carefully remove the burnt-out bulb and replace it with a new one of the correct wattage. Ensure the new bulb is pushed in firmly.
- Check bulb seating: Sometimes, a bulb might have just come loose. Gently push each bulb in its socket.
Only a Section of Lights Won’t Turn on (led)
LEDs are typically designed so that one dead bulb doesn’t affect the rest of the string. If a section is out:
- Check for loose connections: Gently push on each bulb to ensure it’s seated correctly.
- Look for damaged bulbs: While less likely to cause a section to go dark, a damaged LED bulb might be the culprit.
- Faulty wiring: This is more difficult to fix and may mean the string needs to be replaced.
Lights Flicker
- Loose connections: This is the most common cause. Ensure all bulb sockets and string connections are secure.
- Faulty bulb: For incandescent, a bulb that’s not quite burnt out but failing can cause flickering. Try replacing suspect bulbs.
- Power fluctuations: In rare cases, this could be due to issues with your home’s electrical system.
Beyond the Tree: Lighting Your Holiday Space
Once you’ve mastered how to lights on a Christmas tree, consider extending that festive glow to other areas of your home. String lights can be draped around doorways, windows, mantels, or even used to outline furniture. Battery-operated fairy lights are perfect for illuminating vases, centerpieces, or indoor plants, adding a touch of magic to unexpected places. Don’t forget outdoor spaces, where larger, weather-resistant lights can create a welcoming entryway and a festive ambiance for passersby.
Conclusion
Mastering how to lights on a Christmas tree is a rewarding part of the holiday decorating process. By understanding your options, calculating the right amount of lights, and following a systematic approach, you can create a stunning visual display. Remember to prioritize safety, test your lights, and don’t be afraid to get creative with placement. With a little planning and effort, your Christmas tree will shine brightly, becoming the warm, inviting heart of your holiday celebrations for years to come.
Recommended Products