Tired of your beautiful cedar fence losing its luster? Do you dream of a fence that looks as fresh and inviting as the day it was installed? You’re not alone! Many homeowners struggle to maintain the beauty of their cedar fences, watching them weather and fade over time.
The good news? Keeping a cedar fence looking new isn’t as difficult as you might think. With the right knowledge and a little effort, you can preserve its natural beauty and protect it from the elements. This guide will walk you through everything you need to know, from initial installation to ongoing maintenance, ensuring your cedar fence remains a stunning feature of your property for years to come. We’ll cover the best practices, the products to use, and the common pitfalls to avoid. Let’s dive in!
Understanding Cedar and Its Vulnerabilities
Cedar is a fantastic choice for fencing. It’s naturally beautiful, durable, and resistant to rot, decay, and insects. However, even the toughest wood needs a little help to withstand the harsh realities of the outdoors. Cedar’s natural oils provide some protection, but prolonged exposure to sunlight, moisture, and temperature fluctuations will eventually take their toll. Let’s break down the key factors that affect your cedar fence:
Sunlight and Uv Damage
Ultraviolet (UV) rays from the sun are a cedar fence’s worst enemy. They break down the lignin in the wood, which is what gives it its strength and color. This process, called photo degradation, leads to fading, graying, and eventually, the weakening of the wood fibers. The severity of UV damage depends on the amount of sun exposure your fence receives and the geographic location. A fence in the sunny south will likely experience more damage than one in a shaded area in the Pacific Northwest.
Moisture and Rot
Moisture is another significant threat. Cedar’s natural resistance to rot is impressive, but it’s not invincible. Constant exposure to rain, snow, and humidity can lead to the growth of mold, mildew, and eventually, wood rot. Proper drainage and ventilation are crucial to minimize moisture damage. Standing water, especially, is a recipe for disaster. The bottom of fence posts, which are often in contact with the ground, are particularly vulnerable.
Temperature Fluctuations
Cedar expands and contracts with changes in temperature and humidity. This constant movement can cause the wood to warp, crack, and split over time. Extreme temperature swings can exacerbate these issues. The expansion and contraction can also compromise any coatings or finishes applied to the fence, leading to peeling or cracking.
Insect Infestation
While cedar is naturally resistant to many insects, it’s not completely immune. Termites and other wood-boring insects can still pose a threat, particularly if the wood is already weakened by UV damage or moisture. Regular inspections are essential to catch any infestations early before they cause significant damage.
The Importance of Proper Installation
The foundation of a long-lasting, beautiful cedar fence starts with proper installation. A poorly installed fence is more susceptible to damage from the elements and will require more maintenance down the line. Here are some key considerations:
Post Depth and Stability
The depth of your fence posts is critical for stability. The general rule of thumb is to bury posts at least one-third to one-half of their total length below the ground. This ensures the fence can withstand wind, snow, and other forces. The type of soil also matters. In areas with loose soil, you may need to use concrete to secure the posts. Consider the local building codes, too, as they may specify post depth requirements.
Spacing and Alignment
Proper spacing between fence posts is important for both aesthetics and structural integrity. Posts should be evenly spaced to create a visually appealing fence. They should also be perfectly aligned to prevent sagging or leaning. Use a level and string line to ensure accurate alignment during installation.
Drainage
Good drainage is crucial to prevent water from accumulating around the base of the fence posts. Ensure the ground slopes away from the fence to allow water to drain freely. Consider using gravel or crushed stone around the base of the posts to improve drainage and prevent moisture buildup. Avoid planting vegetation directly against the fence, as it can trap moisture and promote rot. (See Also: Build a Beautiful Fence: How to Put Up a Fence with Wooden Posts)
Material Quality
Choose high-quality cedar for your fence. Look for wood that is free of knots, cracks, and other imperfections. The grade of cedar will affect its durability and appearance. The most common grades are Clear Heart, which is the highest quality and most expensive, followed by Select Knotty, and then Construction Grade. Consider the grade that best suits your budget and aesthetic preferences.
Protecting Your Cedar Fence: The Right Products
Choosing the right products to protect your cedar fence is essential for maintaining its beauty and longevity. There are several options available, each with its pros and cons. Let’s explore the most popular choices:
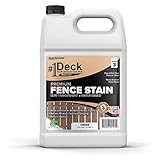
Stains
Stains are a popular choice for cedar fences because they penetrate the wood and provide both color and protection. They are available in various opacities, from transparent to solid. Transparent stains allow the natural grain of the wood to show through, while solid stains provide a more uniform color and greater protection. Stains typically contain pigments, oils, and resins that help to block UV rays and repel water. Here’s a quick comparison:
| Type | Pros | Cons |
|---|---|---|
| Transparent Stain | Enhances natural wood grain, easy application | Less protection, requires frequent reapplication |
| Semi-Transparent Stain | Shows some wood grain, better protection than transparent | Requires more frequent reapplication than solid stain |
| Semi-Solid Stain | Offers good protection and color, covers some imperfections | Less natural appearance than semi-transparent |
| Solid Stain | Maximum protection, uniform color, covers imperfections | Hides wood grain, can peel or crack |
Sealants
Sealants are designed to protect the wood by repelling water and preventing moisture penetration. They don’t typically contain pigments, so they allow the natural color of the cedar to show through. Sealants are often used in conjunction with stains to provide added protection. They’re usually clear or slightly tinted and can be oil-based or water-based. Sealants are generally easy to apply and offer good protection against moisture, but they may not provide as much UV protection as stains.
Oil-Based Finishes
Oil-based finishes, such as linseed oil and tung oil, are traditional options for protecting cedar. They penetrate the wood and enhance its natural beauty while providing some water resistance. Oil-based finishes require regular reapplication and can darken the wood over time. They’re a good choice if you prefer a natural look and are willing to commit to ongoing maintenance. They offer good UV protection if they contain pigments.
Water-Based Finishes
Water-based finishes are a more environmentally friendly option that offer good protection and durability. They dry quickly, have low odor, and are easy to clean up. Water-based finishes are available in a variety of colors and opacities. They’re a good choice for those who want a low-maintenance option that is easy to apply.
Wood Preservatives
Wood preservatives are designed to protect the wood from rot, decay, and insect infestation. They penetrate the wood and create a barrier against these threats. Wood preservatives are often used in conjunction with stains or sealants to provide comprehensive protection. Be sure to check the label for any warnings or precautions before using a wood preservative. Choose a preservative that is safe for the environment and for use around pets and children.
Step-by-Step Guide to Maintaining Your Cedar Fence
Regular maintenance is key to keeping your cedar fence looking new. Here’s a step-by-step guide to help you maintain your fence:
- Inspect Your Fence Regularly: Walk around your fence at least twice a year, preferably in the spring and fall. Look for any signs of damage, such as cracks, splits, warping, loose boards, or insect infestations. Also, look for any areas where the finish is peeling or cracking.
- Clean Your Fence: Before applying any new finish, clean your fence thoroughly. Remove any dirt, mildew, or algae with a mild detergent and water. You can use a pressure washer, but be careful not to use too much pressure, which can damage the wood. Rinse the fence thoroughly and allow it to dry completely.
- Repair Any Damage: Repair any damage to your fence before applying a new finish. Replace any damaged boards, tighten loose screws or nails, and fill any cracks or splits with wood filler.
- Choose Your Finish: Select the appropriate finish for your cedar fence. Consider the level of protection you need, the desired appearance, and your budget.
- Prepare the Surface: Sand the fence lightly to remove any existing finish and create a smooth surface for the new finish. Remove any dust or debris with a tack cloth.
- Apply the Finish: Apply the finish according to the manufacturer’s instructions. Use a brush, roller, or sprayer, depending on the type of finish you are using. Apply at least two coats, allowing each coat to dry completely before applying the next.
- Maintain Your Fence Annually: To keep your cedar fence looking new, plan to apply a fresh coat of stain or sealant every 2-3 years, depending on the product and the environmental conditions. Regular maintenance will extend the life of your fence and keep it looking its best.
Cleaning Your Cedar Fence: The Right Techniques
Cleaning your cedar fence is a crucial part of maintenance. It removes dirt, mildew, and algae that can damage the wood and detract from its appearance. Here’s how to do it effectively:
Manual Cleaning
For light cleaning, manual methods are often sufficient. You’ll need a bucket, mild detergent (such as dish soap or a specialized wood cleaner), water, a scrub brush, and a garden hose. Mix the detergent with water according to the manufacturer’s instructions. Apply the solution to the fence using a sponge or brush. Scrub the fence gently to remove dirt and grime. Rinse the fence thoroughly with clean water from the garden hose. Allow the fence to dry completely before applying any finish. (See Also: Stop the Escape Artist: How to Keep a Dog From Jumping Fence (easy Guide))
Pressure Washing
Pressure washing is an effective way to clean a cedar fence, but it requires caution. High-pressure water can damage the wood if not used correctly. Use a pressure washer with a low-pressure nozzle, such as a fan tip. Hold the nozzle at least 12 inches away from the fence and move it slowly and evenly across the surface. Avoid concentrating the water stream on any one area for too long. Rinse the fence thoroughly and allow it to dry completely before applying any finish. If you’re not comfortable using a pressure washer, consider hiring a professional.
Mildew and Mold Removal
Mildew and mold are common problems on cedar fences, especially in humid climates. To remove mildew and mold, you can use a commercial mildew cleaner or make your own solution by mixing bleach with water (use a ratio of one part bleach to three parts water). Apply the solution to the affected areas and let it sit for a few minutes. Scrub the fence with a scrub brush and rinse thoroughly with clean water. Be sure to wear protective gear, such as gloves and eye protection, when working with bleach. Rinse thoroughly and allow the fence to dry completely.
Avoiding Damage During Cleaning
To avoid damaging your cedar fence during cleaning, take these precautions:
- Avoid harsh chemicals: Harsh chemicals can strip the wood of its natural oils and damage the finish.
- Don’t use too much pressure: High-pressure water can damage the wood fibers, causing them to splinter and warp.
- Rinse thoroughly: Be sure to rinse the fence thoroughly after cleaning to remove all traces of detergent or cleaning solution.
- Allow the fence to dry completely: Before applying any finish, allow the fence to dry completely to ensure proper adhesion.
Addressing Common Problems
Even with the best maintenance practices, you may encounter some common problems with your cedar fence. Here’s how to address them:
Fading and Graying
Fading and graying are natural processes caused by UV exposure. To address fading, apply a stain or finish with UV protection. For graying, you can use a wood brightener or cleaner to restore the natural color of the wood before applying a finish. Regular maintenance, including cleaning and reapplication of the finish, is the best way to prevent fading and graying.
Cracking and Splitting
Cracking and splitting are often caused by temperature fluctuations and moisture. To prevent cracking and splitting, make sure to apply a protective finish that repels water and provides UV protection. You can also use wood filler to fill any cracks or splits that appear. If the damage is severe, you may need to replace the affected boards. Consider pre-drilling holes before screwing in fence boards to minimize splitting.
Warping and Cupping
Warping and cupping are caused by uneven moisture absorption. To prevent warping and cupping, ensure proper drainage and ventilation. Apply a protective finish that repels water and prevents moisture penetration. If the damage is severe, you may need to replace the affected boards. Consider using wider fence boards to minimize warping.
Mold and Mildew
Mold and mildew are caused by moisture and can be unsightly and damaging. To prevent mold and mildew, ensure proper drainage and ventilation. Clean your fence regularly with a mild detergent and water, and apply a mildew-resistant finish. Use a mildew cleaner to remove existing mold and mildew, followed by thorough rinsing.
Insect Infestation
Insect infestation can cause significant damage to your cedar fence. To prevent insect infestation, inspect your fence regularly for signs of insect activity. Use a wood preservative that is designed to protect against insects. If you notice an infestation, contact a pest control professional. Replace any severely damaged boards.
Extending the Life of Your Cedar Fence
Beyond the regular maintenance outlined above, there are other steps you can take to extend the life of your cedar fence: (See Also: How to Jump Over a Fence: A Complete Guide to Success!)
- Trim surrounding vegetation: Keep trees and shrubs trimmed back from your fence to improve air circulation and reduce moisture buildup.
- Improve drainage: Ensure proper drainage around your fence to prevent water from pooling and causing rot.
- Consider a fence skirt: A fence skirt, or a decorative barrier along the bottom of the fence, can help prevent weed-whacking damage and protect the bottom of the fence from moisture.
- Inspect and repair promptly: Address any damage or issues as soon as you notice them to prevent them from worsening.
- Choose quality materials: Invest in high-quality cedar and fasteners to ensure your fence is built to last.
- Consider professional help: If you’re not comfortable with any aspect of fence maintenance, consider hiring a professional.
Frequently Asked Questions (people Also Ask)
How Often Should I Stain My Cedar Fence?
The frequency of staining depends on the type of stain you use and the environmental conditions. Generally, you should reapply a stain every 2-3 years, but some products may last longer. Transparent stains typically require more frequent reapplication than solid stains.
What Is the Best Stain for a Cedar Fence?
The best stain for a cedar fence depends on your priorities. For maximum protection and longevity, a solid stain is a good choice. For a more natural look, a semi-transparent or semi-solid stain may be preferred. Consider the level of UV protection, water resistance, and aesthetic appeal when choosing a stain.
How Do I Clean Mold Off a Cedar Fence?
To clean mold off a cedar fence, mix a solution of bleach and water (one part bleach to three parts water). Apply the solution to the affected areas and let it sit for a few minutes. Scrub the fence with a scrub brush and rinse thoroughly with clean water. Be sure to wear protective gear when working with bleach.
How Do I Prevent My Cedar Fence From Graying?
To prevent your cedar fence from graying, apply a stain or finish with UV protection. Regular maintenance, including cleaning and reapplication of the finish, is the best way to prevent graying. A wood brightener can also restore the natural color of the wood.
How Do I Protect My Cedar Fence From the Sun?
To protect your cedar fence from the sun, apply a stain or finish with UV protection. Choose a product that is specifically designed to block UV rays and prevent fading. Reapply the finish every 2-3 years to maintain protection.
Can I Use a Pressure Washer on My Cedar Fence?
Yes, you can use a pressure washer on your cedar fence, but use caution. Use a low-pressure nozzle and hold the nozzle at least 12 inches away from the fence. Avoid concentrating the water stream on any one area for too long. Be careful not to damage the wood.
- How Long Is the Mexican Border Fence? Facts, Length, & History
- Invisible Fence Cost for 1 Acre: Get the Best Deal & Keep Your Dog Safe!
- Best Plant Air Fresheners: Diffusers, Gels & Cute Plants
- Red, White and Blue Flowers to Plant for Patriotic Gardens
- Best Plastic Plant Bags for Seedlings & Winter Protection
Verdict
Maintaining a cedar fence’s new appearance requires a proactive approach. Regular cleaning, proper application of protective coatings like stains or sealants, and prompt attention to any damage are key. By following these guidelines, you can significantly extend the life of your cedar fence and enjoy its natural beauty for many years. It’s an investment that pays off in curb appeal and property value.
Recommended Products