Are you tired of your shed feeling like an icebox in the winter and a sauna in the summer? You’re not alone! Many shed owners struggle with temperature regulation, making their sheds uncomfortable and potentially damaging the contents inside. The good news is, there’s a practical solution: insulating your shed floor from the top. This method is often easier and more effective than insulating from below, especially if you have an existing shed.
In this guide, we’ll walk you through the entire process, from planning and material selection to the step-by-step installation. We’ll cover everything you need to know to create a comfortable and protected space. So, grab your tools and let’s get started!
Why Insulate Your Shed Floor From the Top?
Insulating your shed floor is a smart move for several reasons. First and foremost, it significantly improves the comfort of your shed, making it usable year-round. It also helps protect your belongings from extreme temperatures and moisture, extending their lifespan. Plus, it can potentially save you money on energy bills if you plan to heat or cool your shed.
There are several ways to insulate a shed floor, but insulating from the top offers some distinct advantages:
- Accessibility: It’s often easier to access the top of your shed floor, especially if the shed is already built.
- Simplicity: The process is generally straightforward and doesn’t require you to crawl under the shed.
- Effectiveness: Properly installed insulation from the top can be very effective at preventing heat loss and gain.
Planning Your Insulation Project
Before you begin, careful planning is essential. This includes assessing your shed, selecting the right insulation materials, and gathering the necessary tools and supplies. Let’s break down each step.
1. Assess Your Shed
First, inspect your shed thoroughly. Consider these aspects:
- Floor Condition: Is the floor level and in good repair? Repair any damage before insulating.
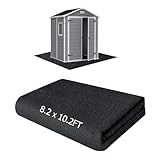
- Size and Shape: Measure the floor area to calculate the amount of insulation you’ll need. Note any obstacles like support posts or plumbing that you’ll need to work around.
- Ventilation: Ensure adequate ventilation in the shed to prevent moisture buildup. This is especially important after insulation.
2. Choose Your Insulation Material
The choice of insulation material is crucial. Several options are available, each with pros and cons. Here’s a rundown:
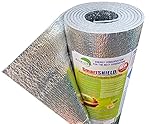
- Rigid Foam Insulation: This comes in sheets and is relatively easy to install. It provides good insulation value and moisture resistance. Common types include expanded polystyrene (EPS), extruded polystyrene (XPS), and polyisocyanurate (polyiso).
- Batt Insulation: This is made of fiberglass or mineral wool and comes in rolls or batts. It’s affordable and provides good thermal performance, but it’s important to keep it dry.
- Spray Foam Insulation: This is applied as a liquid and expands to fill gaps and cracks, creating an airtight seal. It offers excellent insulation value but requires professional installation.
Considerations When Choosing Insulation
- R-value: This measures the insulation’s resistance to heat flow. Higher R-values provide better insulation.
- Moisture Resistance: Choose a material that resists moisture, especially in areas prone to dampness.
- Ease of Installation: Consider your DIY skills and the complexity of the installation process.
- Cost: Compare the prices of different materials to fit your budget.
3. Gather Your Tools and Supplies
Here’s a list of essential tools and supplies you’ll need:
- Insulation material (rigid foam, batts, or spray foam)
- Measuring tape
- Utility knife or circular saw (for cutting insulation)
- Safety glasses and gloves
- Dust mask or respirator (for working with fiberglass or mineral wool)
- Construction adhesive (for rigid foam)
- Tape measure
- Caulk (for sealing gaps)
- Optional: Vapor barrier
- Optional: Plywood or OSB for covering the insulation
Step-by-Step Guide: How to Insulate a Shed Floor From the Top
Now, let’s get into the step-by-step process of insulating your shed floor from the top. We’ll focus on the most common method, using rigid foam insulation. However, the principles apply to other insulation types as well, with slight modifications. (See Also: How to Install a Rubbermaid Shed: Your Step-by-Step Guide)
- Prepare the Floor: Clean the shed floor thoroughly. Remove any debris, nails, or staples. Repair any damage to the floorboards.
- Measure and Cut Insulation: Measure the floor area and cut the rigid foam sheets to fit. Use a utility knife or circular saw for accurate cuts. Ensure the sheets fit snugly between the floor joists or against the shed walls.
- Install the Insulation: If using rigid foam, apply construction adhesive to the underside of the sheets. Place the insulation sheets between the floor joists, ensuring they fit tightly. For batts, simply place the batts between the joists, making sure they fill the space completely.
- Seal Gaps: Use caulk to seal any gaps or cracks around the edges of the insulation and between the sheets. This will prevent air leaks and improve insulation efficiency.
- Optional: Install a Vapor Barrier: If desired, install a vapor barrier over the insulation. This will help prevent moisture from entering the insulation and reducing its effectiveness.
- Optional: Cover with Plywood or OSB: Cover the insulation with plywood or OSB (oriented strand board) to create a walking surface and protect the insulation. Secure the plywood or OSB to the floor joists with screws.
Alternative Insulation Methods
While rigid foam is a popular choice, let’s briefly touch on other methods:
- Batt Insulation: Place batts between the floor joists, ensuring a snug fit. Be sure to wear appropriate safety gear when handling fiberglass or mineral wool.
- Spray Foam Insulation: This is best left to professionals due to the specialized equipment and safety precautions required.
Addressing Common Questions
Let’s address some frequently asked questions about insulating shed floors.
Can I Use Spray Foam Myself?
While DIY spray foam kits are available, it’s generally recommended to hire a professional for this type of project. Spray foam requires specialized equipment and expertise to apply correctly. Improper application can lead to problems like uneven insulation and off-gassing.
Do I Need a Vapor Barrier?
A vapor barrier is often recommended, especially in climates with high humidity or where the shed will be exposed to moisture. It helps prevent moisture from reaching the insulation, which can reduce its effectiveness and lead to mold growth. However, the use of a vapor barrier depends on the climate and the type of insulation you’re using. Consult local building codes for recommendations.
What About Rodent Control?
Rodents can sometimes nest in insulation. To prevent this, consider using rodent-resistant insulation materials or adding a layer of hardware cloth over the insulation before covering it with plywood or OSB. Seal any gaps or cracks where rodents could enter.
Is It Better to Insulate the Floor or the Walls?
Both floor and wall insulation are important for overall energy efficiency. However, the best approach depends on your specific needs and budget. Insulating the floor is often a good starting point, as it can significantly reduce heat loss and gain. Then, you can consider insulating the walls for even greater temperature control.
How Much Will This Cost?
The cost of insulating your shed floor varies depending on the materials you choose, the size of your shed, and whether you do the work yourself or hire a professional. Rigid foam insulation is generally more affordable than spray foam. Expect to pay anywhere from a few hundred to over a thousand dollars for materials. DIY projects can save you on labor costs, but remember to factor in the cost of tools and supplies.
What R-Value Do I Need?
The recommended R-value for your shed floor depends on your climate and how you intend to use the shed. Generally, an R-value of R-13 to R-20 is sufficient for most climates. Check local building codes for specific requirements in your area.
Can I Insulate an Existing Shed?
Yes, absolutely! Insulating from the top is often the easiest method for existing sheds. It allows you to add insulation without having to dismantle the shed or crawl underneath it. (See Also: How to Move a Metal Shed: A Step-by-Step Guide (easy & Safe))
How Long Will the Insulation Last?
Properly installed insulation can last for many years, even decades. However, its effectiveness can be reduced by moisture, damage, or settling. Inspect your insulation periodically and replace it if necessary.
What About Ventilation?
Proper ventilation is crucial, regardless of whether you insulate your shed. It prevents moisture buildup and helps maintain air quality. Ensure your shed has vents near the top and bottom to allow for air circulation. Consider adding a ridge vent or soffit vents for improved ventilation.
How Do I Prevent Moisture Problems?
Preventing moisture problems involves several strategies:
- Use a vapor barrier, especially in humid climates.
- Ensure proper ventilation.
- Seal any gaps or cracks where moisture can enter.
- Choose moisture-resistant insulation materials.
- Inspect your shed regularly for signs of moisture damage.
What Are the Benefits of Insulating?
The benefits are numerous and include:
- Improved comfort: Makes the shed more pleasant to use year-round.
- Protection of belongings: Shields items from extreme temperatures and moisture.
- Energy savings: Reduces the need for heating or cooling.
- Reduced condensation: Minimizes moisture buildup and mold growth.
- Increased property value: Adds to the overall value of your property.
How Do I Maintain the Insulation?
Maintaining your insulation is relatively simple:
- Inspect it regularly for any signs of damage or moisture.
- Repair any damage promptly.
- Ensure proper ventilation to prevent moisture buildup.
- Keep the area around the insulation clean and free of debris.
What About the Floor Covering?
After installing the insulation, you’ll need to decide on a floor covering. This could be plywood or OSB to create a walking surface. The floor covering should be durable enough to withstand the intended use of the shed. Consider factors like moisture resistance and ease of cleaning when making your selection. Also, consider the weight the floor needs to bear, and choose the plywood thickness accordingly. A thicker plywood will be able to handle more weight.
Is This a Diy Project?
Yes, insulating a shed floor from the top is a manageable DIY project for most homeowners. However, if you’re uncomfortable with any aspect of the process, don’t hesitate to hire a professional. Spray foam insulation, in particular, is best left to the experts. Be sure to wear appropriate safety gear, including safety glasses, gloves, and a dust mask or respirator.
What If I Have an Uneven Floor?
If your shed floor is uneven, you’ll need to address this before installing the insulation. You can use shims to level the floor or use self-leveling compound. Uneven floors will create gaps in the insulation, reducing its effectiveness. Take the time to ensure the floor is as level as possible before proceeding.
What About Condensation?
Condensation can be a problem in sheds, especially in humid climates. To prevent condensation, ensure your shed is well-ventilated, use a vapor barrier, and choose moisture-resistant insulation materials. Also, consider the types of items you store in your shed, as some may contribute to moisture buildup. (See Also: How to Run Electric to Shed: A Step-by-Step Guide (diy))
Can I Add Insulation Later?
Yes, you can always add insulation later. This is one of the advantages of insulating from the top. If you decide to add more insulation in the future, simply remove the existing floor covering, add the new insulation, and replace the floor covering. This flexibility is a big plus.
What About Fire Safety?
When selecting insulation, consider its fire resistance. Some insulation materials are more fire-resistant than others. Check local building codes for fire safety requirements. Also, be mindful of any electrical wiring in your shed and ensure it is properly installed and protected.
How Do I Handle Plumbing or Electrical Wiring?
If your shed has plumbing or electrical wiring, you’ll need to work around it. Carefully cut the insulation to fit around pipes and wires. Be sure to maintain proper clearances and follow all relevant building codes. Ensure that any wiring is properly protected and that you have a qualified electrician handle any electrical work.
What Are the Common Mistakes to Avoid?
Here are some common mistakes to avoid:
- Not measuring accurately: Ensure precise measurements before cutting the insulation.
- Using the wrong materials: Choose insulation appropriate for your climate and shed usage.
- Skipping the vapor barrier: This can lead to moisture problems.
- Not sealing gaps: Air leaks will reduce insulation effectiveness.
- Ignoring safety precautions: Always wear appropriate safety gear.
Can I Use Recycled Materials?
Yes, you can consider using recycled insulation materials. Some options include recycled denim insulation and recycled plastic insulation. These materials can be a more environmentally friendly choice. However, make sure that the recycled materials meet the required R-value and are suitable for your shed’s conditions.
What About Noise Reduction?
Insulating your shed floor can also help reduce noise transmission. This can be beneficial if your shed is close to your house or neighbors. Choose insulation materials with good soundproofing properties, such as mineral wool or spray foam.
How Do I Prevent Moisture From Below?
To prevent moisture from below, consider these steps:
- Install a ground cover, such as gravel, under the shed.
- Ensure proper drainage around the shed.
- Use a moisture barrier on the ground if needed.
- Elevate the shed floor slightly.
Final Verdict
Insulating your shed floor from the top is a worthwhile project that significantly improves comfort, protects your belongings, and potentially saves you money. By following our step-by-step guide and considering the factors discussed, you can create a warm and inviting space. Remember to plan carefully, choose the right materials, and prioritize safety throughout the process. Enjoy your newly insulated shed!
Recommended Products