So, you’re looking to install a sturdy and attractive stockade fence, but you want to use the long-lasting strength of metal posts? You’ve come to the right place! Metal posts offer superior durability compared to wood, making your fence more resistant to rot, pests, and the elements. This guide will walk you through the entire process, from planning and preparation to the final touches, ensuring a professional-looking fence that will last for years to come.
We’ll cover everything, including the necessary tools, materials, and step-by-step instructions. Whether you’re a seasoned DIYer or a complete beginner, this guide will provide you with the knowledge and confidence to tackle this project. Let’s get started and turn your property into a secure and beautiful space!
Planning and Preparation: Laying the Groundwork for Success
Before you even think about swinging a hammer, proper planning is crucial. A well-planned project is a successful project. Let’s break down the essential steps.
1. Assess Your Needs and Local Regulations
First things first: what are you hoping to achieve with your fence? Is it for privacy, to contain pets, or simply to define your property line? The answers to these questions will influence the height and style of your fence. Next, check your local building codes and homeowner association (HOA) rules. You might need a permit, and there could be restrictions on fence height, materials, and placement. Ignoring these regulations can lead to costly fines or even the need to remove your fence.
2. Measure and Map Your Fence Line
Once you’ve determined the fence’s purpose and checked local regulations, measure the perimeter of your desired fence area. Use a measuring tape, stakes, and string to mark the fence line. Precisely mark the corners and any changes in direction. This outline will guide you throughout the installation process. Don’t forget to account for gates; factor in their width when measuring the total fence length.
3. Gather Your Tools and Materials
Having the right tools and materials on hand is key to a smooth installation. Here’s a comprehensive list:
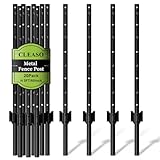
- Metal Fence Posts: Choose the appropriate height and spacing (typically 6-8 feet apart) for your stockade panels. Consider the post’s gauge; a thicker gauge offers greater durability.
- Stockade Fence Panels: Pre-made panels are convenient, or you can build your own. Calculate the total linear feet of fencing and the width of each panel to determine the number of panels you need.
- Post Hole Digger or Auger: For digging the holes for your metal posts. An auger is recommended for larger projects, as it saves time and effort.
- Level: Essential for ensuring your posts are plumb (perfectly vertical).
- Measuring Tape: For accurate measurements.
- String and Stakes: To mark the fence line.
- Concrete Mix: For setting the metal posts. Quick-setting concrete is a good option.
- Shovel or Trowel: For mixing and pouring the concrete.
- Rubber Mallet or Hammer: To drive the panels into the posts and secure them.
- Post Level: A small level designed to sit on the post while you set it.
- Safety Glasses and Work Gloves: For protection.
- Wheelbarrow or Mixing Tub: For mixing concrete.
- Fasteners (Screws or Nails): If building your own panels or attaching to the posts.
- Gate Hardware (Optional): Hinges, latches, and posts if you’re installing a gate.
4. Prepare the Site
Clear the fence line of any obstacles, such as rocks, bushes, or debris. If the ground is uneven, you may need to level it. Consider the location of underground utilities. Call your local utility companies to mark any buried lines before you dig. This is a crucial safety step to avoid damaging gas lines, electrical cables, or other utilities. (See Also: How to Put Up Wood Fence: A Step-by-Step Guide for Diyers)
Installing the Metal Posts: The Foundation of Your Fence
Now that you’ve planned and prepared, it’s time to install the metal posts. This is arguably the most critical part of the process, as the posts provide the structural support for your fence.
1. Dig the Post Holes
Using a post hole digger or auger, dig holes for your metal posts. The depth of the holes depends on your local frost line (the depth to which the ground freezes in winter). As a general rule, the holes should be at least 24 inches deep, or one-third the height of the post. The diameter of the holes should be about three times the width of the post. Space the holes according to the length of your stockade panels, typically 6-8 feet apart, center-to-center.
2. Set the Posts in Concrete
- Position the Posts: Place the metal posts in the holes, ensuring they are aligned with your marked fence line.
- Mix the Concrete: Following the manufacturer’s instructions, mix the concrete in a wheelbarrow or mixing tub. You can use pre-mixed concrete for convenience.
- Pour the Concrete: Pour the concrete around the posts, filling the holes. Use a trowel or shovel to ensure the concrete is evenly distributed.
- Level the Posts: Use a level to ensure each post is plumb (perfectly vertical) in both directions. Adjust the post position as needed while the concrete is still wet. You can use temporary bracing (pieces of wood or stakes) to hold the posts in place until the concrete sets.
- Allow the Concrete to Cure: Let the concrete cure completely according to the manufacturer’s instructions, usually 24-72 hours. Avoid disturbing the posts during this time.
People Also Ask: How long should I let concrete cure before installing a fence? The curing time depends on the type of concrete and the weather conditions. Generally, allow 24-72 hours for the concrete to cure before proceeding. Always check the manufacturer’s instructions for the specific product you are using.
3. Check Alignment and Spacing
After the concrete has cured, double-check the alignment and spacing of your posts. Ensure they are all in a straight line and that the distance between them is consistent with the width of your stockade panels. Make any necessary adjustments before proceeding.
Attaching the Stockade Panels: Building the Fence
With the posts securely in place, it’s time to attach the stockade panels. This part is relatively straightforward, but attention to detail will ensure a professional-looking finish.
1. Prepare the Panels (if Building Your Own)
If you’re building your own stockade panels, cut the pickets to the desired height and assemble them. Use screws or nails to attach the pickets to horizontal rails. Ensure the pickets are evenly spaced and that the panel is square. Consider using a jig to ensure consistent spacing. (See Also: How to Remove Mold From Wood Fence: A Step-by-Step Guide)
2. Attach the Panels to the Posts
- Position the Panel: Place the first stockade panel between the posts. The panel should be flush against the posts, or you may need to use brackets.
- Secure the Panel: Use screws or nails to attach the panel to the metal posts. Use fasteners that are specifically designed for outdoor use and are long enough to penetrate the panel and the posts. Typically, two screws or nails per post, per rail of the panel, are sufficient.
- Check for Level: Use a level to ensure the panel is straight and level. Make any necessary adjustments before securing it.
- Repeat for Remaining Panels: Continue attaching the remaining panels, ensuring they are aligned and securely fastened to the posts.
3. Addressing Uneven Ground
If your ground is uneven, you may need to trim the bottom of the panels to follow the grade. Alternatively, you can install a bottom rail or use a small amount of concrete at the base of the fence to level it. This will help maintain a consistent appearance and prevent gaps under the fence.
Adding Gates: Access and Functionality
Gates provide access to your fenced area. Installing a gate requires careful planning and execution to ensure it functions smoothly and securely.
1. Choose Your Gate Style and Hardware
Select a gate style that complements your fence. Consider the width of the opening and the level of security you need. Choose durable gate hardware, including hinges, a latch, and a handle. Make sure the hinges can handle the weight of the gate. Consider an automatic gate opener for added convenience.
2. Install the Gate Posts
If you don’t already have gate posts, install them using the same method as the fence posts, ensuring they are properly aligned and set in concrete. The gate posts need to be strong enough to support the weight of the gate, so consider using larger-diameter metal posts or reinforcing the existing ones.
3. Hang the Gate
- Attach Hinges: Attach the hinges to the gate and the gate post, ensuring they are aligned and properly secured.
- Hang the Gate: Carefully lift the gate and hang it on the hinges.
- Adjust and Test: Adjust the hinges as needed to ensure the gate swings smoothly and closes properly. Test the latch and handle to ensure they function correctly.
Finishing Touches: Adding the Final Polish
Once the panels and gates are installed, it’s time to add the finishing touches to create a polished and durable fence.
1. Inspect and Repair
Carefully inspect your fence for any imperfections or areas that need repair. Tighten any loose screws or nails. Fill any gaps with caulk or sealant to prevent water from entering the panels and posts. (See Also: How to Put Up Woven Wire Fence: A Step-by-Step Guide for Beginners)
2. Add Protective Coatings (optional)
Consider applying a protective coating to the stockade panels. This can help protect the wood from the elements and extend the life of your fence. Options include stain, paint, or a wood preservative. Follow the manufacturer’s instructions for application.
3. Clean Up the Site
Remove any leftover materials, tools, and debris from the work area. Dispose of any waste properly. Sweep or rake the area around the fence to create a clean and finished look. You can also add landscaping around the fence to enhance its appearance.
Troubleshooting Common Problems
Even with careful planning and execution, you might encounter some challenges during the installation process. Here are some common problems and how to address them:
- Uneven Ground: If the ground is uneven, you can trim the bottom of the panels or use a bottom rail to maintain a consistent appearance. You can also use concrete at the base of the fence to level it.
- Misaligned Posts: If your posts are not perfectly aligned, you can use temporary bracing to hold them in place while the concrete sets. Adjust the posts before the concrete fully hardens.
- Gate Issues: If your gate doesn’t swing smoothly or close properly, adjust the hinges and latch. You may need to shim the gate or post to achieve the correct alignment.
- Panel Gaps: If there are gaps between the panels, you can fill them with caulk or sealant.
- Concrete Cracks: If the concrete cracks, it’s usually due to improper mixing or curing. You can patch minor cracks with concrete patching compound.
Maintaining Your Stockade Fence
Regular maintenance will help extend the life of your stockade fence and keep it looking its best. Here are some maintenance tips:
- Inspect Regularly: Inspect your fence regularly for any signs of damage, such as loose panels, broken pickets, or rot.
- Clean Periodically: Clean your fence with a mild soap and water solution to remove dirt, mildew, and other debris.
- Reapply Protective Coatings: Reapply stain, paint, or wood preservative every few years to protect the wood from the elements.
- Trim Vegetation: Trim any vegetation that grows near the fence to prevent it from damaging the panels.
- Address Problems Promptly: Repair any damage or address any issues promptly to prevent them from worsening.
People Also Ask: How often should I stain my stockade fence? The frequency of staining depends on the climate and the type of stain you use. Generally, you should stain your fence every 2-5 years to maintain its appearance and protect the wood.
Conclusion
Installing a stockade fence with metal posts is a rewarding project that combines aesthetic appeal with long-lasting durability. By following these step-by-step instructions, you can create a secure and attractive barrier that enhances your property’s value and provides privacy. Remember to prioritize safety, take your time, and enjoy the process. Your new fence will be a testament to your hard work and dedication!
Recommended Products