The twinkling magic of Christmas lights is a cornerstone of holiday cheer. But before you can bask in their glow, you’ve got to get them onto your tree! It might seem simple, but there’s an art to hanging xmas tree lights that can make all the difference between a dazzling display and a tangled mess.
Are you tired of battling stubborn wires, uneven distribution, or those dreaded dark spots? This guide is here to transform your holiday decorating experience. We’ll walk you through everything you need to know, from choosing the right lights to mastering the most effective hanging techniques. Get ready to create a Christmas tree that truly shines!
Choosing the Right Lights for Your Tree
Before we even think about hanging, let’s talk about the stars of the show: your Christmas lights! The type of lights you choose will significantly impact the look and feel of your tree, as well as how easy they are to hang.
Incandescent vs. LED Lights
This is the first major decision you’ll face. Both have their pros and cons:
- Incandescent Lights: These are the traditional bulbs many of us grew up with. They emit a warm, classic glow. However, they consume more energy, get hotter, and if one bulb burns out, the whole string might go dark. They can also be more fragile.
- LED (Light Emitting Diode) Lights: LEDs are the modern standard. They are incredibly energy-efficient, producing very little heat, which is safer for your tree. They are also much more durable and long-lasting. A major advantage is that if one bulb fails, the rest of the string usually stays lit. They come in a vast array of colors and effects.
Light Styles and Bulb Sizes
Beyond the technology, consider the style:
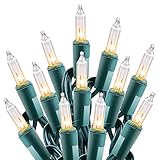
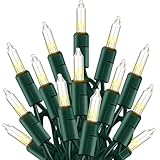
- Mini Lights: The most common type, these small bulbs are versatile and great for achieving a classic, full look.
- C9/C7 Bulbs: These larger, vintage-style bulbs offer a bolder, more retro statement. They’re often used for outdoor decorating but can look fantastic on a larger tree for a dramatic effect.
- Fairy Lights (Micro-LEDs): These are tiny, often on thin wire, offering a delicate, ethereal glow. They are perfect for achieving a subtle shimmer or for accenting specific areas.
- Novelty Lights: Shaped like stars, snowflakes, or other festive icons, these add a playful touch.
Color Palettes
Think about the overall color scheme you want for your tree and your room. Classic white, festive red and green, a cool blue and silver, or a vibrant multi-color display are all popular choices.
Calculating How Many Lights You Need
Running out of lights halfway through is a decorating disaster. Here’s how to estimate:
The Rule of Thumb
A general guideline is to use about 100 lights per foot of tree height. This is a starting point, and you can adjust based on your preference for density: (See Also: How Much Glyphosate to Kill a Tree Safely and Effectively)
- Sparse: 50-75 lights per foot
- Medium: 100-150 lights per foot
- Dense/Bright: 150-200+ lights per foot
Consider the Bulb Type
Larger bulbs (like C9) will cover more visual space, so you might need fewer strings than with mini lights for the same effect. However, for a truly opulent look, you might still want to pack them in!
Measure Your Tree
For a more precise calculation, you can measure the circumference of your tree at different heights and estimate how much light string you’ll need to wrap around it. However, the per-foot rule is usually sufficient for most home decorators.
Preparing Your Lights for Hanging
Don’t skip this crucial step! Proper preparation prevents frustration.
Untangling Is Key
This is often the most dreaded part. Gently unspool your lights. If they’re severely tangled, try laying them out on a flat surface and patiently working through the knots. Sometimes, a little bit of wiggling is all it takes. Avoid yanking, as this can break bulbs or wires.
Test Your Lights
Before they go anywhere near the tree, plug in each string of lights to ensure every bulb is working. Replace any burnt-out bulbs (especially important for incandescent lights) or faulty strings. This saves you from discovering a dead section halfway up your tree!
Organize Your Strings
Consider how you’ll manage multiple strings. You might want to group them by color or by the section of the tree you plan to decorate first. Some people use zip ties or Velcro straps to keep unused portions of a string neatly bundled.
Mastering the Art of Hanging Xmas Tree Lights
Now for the exciting part! Here are the most effective methods for hanging your lights. (See Also: How Tall Can a Fiddle Leaf Fig Tree Grow? Unveiling Its)
Method 1: The Vertical Wrap (most Popular)
This is the go-to method for most decorators and provides a beautiful, even distribution of light.
- Start at the Top: Begin by securing the plug end of your light string near the top of the tree, usually around the tree topper’s base or just below it. You can use a small hook, a twist tie, or even tuck it securely into the branches.
- Weave Downwards: Gently pull the string downwards, weaving it in and out of the branches. Aim for a zig-zag or serpentine pattern. Don’t pull the lights too taut; allow them to drape naturally.
- Work in Sections: As you move down the tree, try to cover each layer evenly. Think of it as creating vertical ribbons of light.
- Avoid Wrapping Too Tightly: Lights that are wrapped too tightly can create dark gaps and make it difficult to add ornaments later. Let them breathe!
- Connect Strings (if necessary): If you’re using multiple strings, connect them as you go, either at the top or as you reach the end of a string and the beginning of the next. Try to hide the connections within the branches.
- End at the Bottom: Secure the end of the last string near the base of the tree, ensuring the plug can reach your outlet.
Tips for the Vertical Wrap:
- Go Deep: Don’t just hang lights on the outer tips of the branches. Weave them into the interior of the tree to create depth and a more luminous effect. This also helps hide the wires.
- Vary the Depth: Some lights can be deeper in the tree, while others can be closer to the tips, creating a more dynamic sparkle.
- Use a Ladder or Stool: For taller trees, ensure you have a stable ladder or stool to safely reach all areas.
Method 2: The Horizontal Wrap (for a Denser Look)
This method involves wrapping lights around the tree in horizontal bands. It can create a very bright and dense effect.
- Start at the Base: Begin by securing the plug end of your light string near the bottom of the tree.
- Wrap Around: Gently wrap the string horizontally around the trunk, moving upwards.
- Overlap Slightly: Overlap each horizontal band slightly to ensure complete coverage and avoid gaps.
- Work Your Way Up: Continue wrapping and connecting strings as you ascend the tree.
- Adjust for Branch Spacing: You may need to adjust how tightly you wrap based on the density of your branches.
Tips for the Horizontal Wrap:
- Best for Wider Trees: This method can be particularly effective on wider, fuller trees.
- Can Hide Wires Well: The horizontal wrapping can help conceal wires by tucking them behind branches.
Method 3: The “random” or “tuck” Method (for a Natural Look)
This approach is less structured and more about letting the lights fall where they may, creating a very organic sparkle.
- Start Anywhere: Begin by tucking the plug end into a branch.
- Drape and Tuck: Simply drape and tuck sections of lights randomly throughout the branches, both deep inside and on the tips.
- Don’t Overthink It: The goal is to create a more natural, less uniform appearance.
- Connect as You Go: Connect new strings as you run out of the previous one, tucking the connections away.
Tips for the Random Method:
- Great for Specific Effects: If you want a more whimsical or ethereal glow, this method can be perfect.
- Requires Patience: While less structured, it still requires careful placement to avoid large dark areas.
Advanced Techniques and Tips
Elevate your light display with these expert tricks.
Layering Lights
For an incredibly rich and dimensional glow, consider layering different types of lights. Start with a base layer of mini lights woven deep into the tree, then add a second layer of larger bulbs or fairy lights closer to the tips for extra sparkle. This creates incredible depth and brilliance.
The “branch by Branch” Approach
This is a meticulous but rewarding method. For each major branch, gently wrap the light string around it, working from the trunk outwards and back. This ensures every part of the tree is illuminated, but it is very time-consuming.
Using Light Clips or Hooks
Specialty light clips are available that can help secure your light strings to branches without damaging the tree. They are especially useful for keeping lights in place, particularly if you have a real tree that might shed needles. (See Also: How Much Is Elm Tree Bark Worth? A Comprehensive Guide)
Hiding the Wires
The goal is to see the light, not the wires. Always try to tuck wires behind branches, as close to the trunk as possible. The deeper you weave your lights, the better the wires will be hidden.
Dealing with Different Tree Types
- Real Trees: Real trees can be a bit more challenging due to their natural shape and potential for shedding. Use clips to secure lights, and be mindful of potential fire hazards if lights get too close to dry needles. Ensure your tree is well-watered.
- Artificial Trees: Artificial trees often have a more uniform shape, making light placement easier. The branches are usually sturdier, allowing for more secure tucking of wires.
Plug Management
Plan your outlet situation. Ensure you have enough outlets and that your extension cords are rated for outdoor use if needed, and hidden from view. Consider using a timer for automatic on/off functionality.
Troubleshooting Common Light Problems
- Dark Spots: If you notice dark areas, go back and weave more lights into that section, either vertically or by adding a new string.
- Uneven Lighting: Adjust the spacing of your lights. Pull some strings tighter, loosen others, or redistribute them to create a more uniform glow.
- Falling Lights: Use clips or more secure tucking methods. For real trees, ensure lights aren’t pulling down on delicate branches.
Safety First!
Always prioritize safety when decorating with lights.
- Check Cords: Before hanging, inspect all cords for fraying or damage. Discard any damaged strings.
- Avoid Overloading Outlets: Don’t plug too many strings into a single outlet, especially if using incandescent lights that draw more power.
- Use Indoor Lights Indoors: Never use outdoor-rated lights indoors if they are designed for specific weather conditions, and vice versa.
- Keep Away from Heat Sources: Ensure lights are not touching heat sources like fireplaces or old, hot radiators.
- Unplug When Unattended: For real trees, it’s a good practice to unplug lights when you leave the house or go to bed.
- Water Your Real Tree: A well-watered real tree is less of a fire hazard.
Decorating with Lights: Beyond the Tree
Once your tree is a beacon of festive light, consider extending the magic:
- Mantelpiece Magic: Drape lights along your mantel for a cozy glow.
- Window Sparkle: Outline your windows with lights for a festive exterior view.
- Staircase Swags: Wrap lights around banisters for an elegant touch.
- Outdoor Illumination: Use weather-resistant lights to decorate porches, bushes, and trees outside.
By following these steps and tips, you can transform the often-daunting task of hanging xmas tree lights into a joyful part of your holiday tradition. Get ready to create a truly magical and well-lit Christmas!
Conclusion
Mastering how to hang xmas tree lights is a skill that brings immense holiday joy. By selecting the right lights, preparing them properly, and employing effective hanging techniques like the vertical wrap, you can achieve a beautifully illuminated tree. Remember to prioritize safety, consider layering for depth, and don’t be afraid to get creative. With a little patience and these expert tips, your Christmas tree will be the radiant centerpiece of your festive celebrations, filling your home with warmth and wonder.
Recommended Products