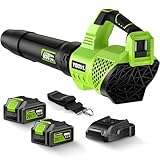
Tired of tripping over your leaf blower? We get it. That powerful tool, essential for keeping your yard pristine, can quickly become a bulky eyesore and a potential hazard when not in use.
Finding a dedicated spot for it can feel like a puzzle, especially if garage or shed space is at a premium. But what if we told you there’s a simple, effective solution that keeps your blower out of the way and readily accessible?
Learning how to hang a leaf blower is a game-changer for organization and safety. Let’s explore the best methods to get your blower securely stored and reclaim your floor space!
Mastering the Art of Leaf Blower Storage: How to Hang It Like a Pro
You’ve conquered the leaves, now it’s time to conquer the clutter. Storing your leaf blower efficiently not only tidies up your workspace but also protects your investment and prevents accidental damage or injury. We’re going to dive deep into the most effective ways to hang your leaf blower, ensuring it’s secure, accessible, and out of harm’s way.
Why Hang Your Leaf Blower? The Benefits Explained
Before we get to the ‘how,’ let’s solidify the ‘why.’ Hanging your leaf blower offers a multitude of advantages:
- Space Optimization: This is the most obvious benefit. By utilizing vertical space, you free up valuable floor real estate in your garage, shed, or workshop. No more navigating around a bulky machine!
- Safety First: A leaf blower lying on the floor is a tripping hazard. Hanging it prevents accidental falls, protecting you, your family, and even your pets. It also keeps the blower away from potential water damage or impact with other stored items.
- Tool Longevity: Proper storage can prevent damage to the blower’s motor, intake, and nozzle. Hanging it upright or in a designated position can reduce stress on components and keep dust and debris from accumulating in critical areas.
- Accessibility: When your blower is hung neatly, you know exactly where it is. No more digging through piles of equipment. Grab and go – it’s that simple!
- Organization: A well-organized space is a more productive space. Hanging your leaf blower is a key step towards a tidy and efficient workshop or garage.
Choosing Your Hanging Method: Solutions for Every Need
The ‘best’ way to hang a leaf blower depends on your specific blower type (backpack, handheld, wheeled), the available space, and your DIY comfort level. We’ll explore several popular and effective methods.
Method 1: The Simple Hook – Quick & Easy Storage
For many handheld leaf blowers, a heavy-duty hook is all you need. This is the most straightforward and budget-friendly option. (See Also: How Much To Replace A Blower Motor In A Car )
What You’ll Need:
- Heavy-duty J-hook or L-hook: Choose one rated for at least 20-30 lbs to be safe. Ensure the hook’s opening is wide enough to accommodate the blower’s body or handle.
- Screws or lag bolts: Appropriate for your wall material (wood studs, drywall anchors, concrete anchors).
- Drill and drill bits: For pilot holes and driving screws.
- Stud finder: Essential for locating wall studs for secure mounting.
- Level: To ensure your hook is installed straight.
Steps:
- Locate a Suitable Spot: Find a clear section of wall in your garage or shed. Ensure there’s enough clearance so the blower doesn’t obstruct doorways or other frequently used areas.
- Find a Wall Stud: Use your stud finder to locate the center of a wall stud. This is crucial for providing a strong anchor point. If studs aren’t conveniently located, you’ll need appropriate heavy-duty drywall anchors.
- Mark the Hook Position: Hold the hook against the wall at your desired height. Use a pencil to mark where the screw(s) will go. Consider the length of your blower and how it will hang – you don’t want the nozzle or handle hitting the floor.
- Drill Pilot Holes: If mounting into a stud, drill pilot holes slightly smaller than your screws. If using drywall anchors, follow the anchor manufacturer’s instructions for hole size.
- Install the Hook: Drive the screws or lag bolts firmly into the wall, securing the hook tightly. Ensure it doesn’t wiggle.
- Test the Strength: Gently pull on the hook to confirm it’s securely mounted.
- Hang Your Leaf Blower: Carefully lift your leaf blower and hang it by its handle or a sturdy part of its body onto the hook. Ensure it’s balanced and stable.
Method 2: Dedicated Leaf Blower Hangers & Racks – Specialized Solutions
Several manufacturers offer specialized hangers and racks designed specifically for leaf blowers. These often provide more secure and organized storage, sometimes accommodating multiple blowers or accessories.
Types of Dedicated Hangers/Racks:
- Wall-mounted racks: These typically have cradles or hooks that hold the blower’s body and sometimes a separate slot for the nozzle.
- Ceiling-mounted hoists: For heavier backpack blowers, a hoist system can be a great way to store them overhead.
- Pegboard systems: If you have pegboard in your workshop, specialized hooks and holders for leaf blowers are readily available.
What You’ll Need (varies by product):
- The dedicated hanger or rack kit.
- Appropriate mounting hardware (often included).
- Drill, drill bits, stud finder, level, and screwdriver/impact driver.
Steps (General): (See Also: How To Replace Blower Motor Resistor Connector )
- Read the Manufacturer’s Instructions: This is paramount! Each product will have specific assembly and mounting requirements.
- Choose a Location: Similar to the hook method, select a suitable wall or area where the rack won’t cause obstruction.
- Assemble the Rack (if necessary): Follow the provided instructions to put the rack together.
- Locate Studs and Mark Mounting Points: Use your stud finder to ensure you’re mounting to solid supports. Mark the screw locations accurately according to the rack’s design.
- Drill Pilot Holes: Prepare the wall for mounting.
- Securely Mount the Rack: Attach the rack firmly to the wall using the provided hardware. Ensure it is level and stable.
- Test the Rack: Apply some pressure to ensure it can hold the weight of your leaf blower.
- Place Your Leaf Blower: Carefully position your leaf blower onto or into the rack as intended by the design.
Method 3: Diy Solutions – Customizing Your Storage
Feeling creative? You can build custom storage solutions tailored to your exact needs and space.
DIY Ideas:
- Wooden Brackets: Build simple L-shaped brackets from scrap wood to create custom cradles for your blower. Mount these securely to wall studs.
- PVC Pipe Holders: For some handheld blowers, a strategically cut and mounted piece of PVC pipe can act as a secure holster.
- Modified Tool Holders: Adapt existing tool holders (like those for shovels or rakes) by adding extra padding or modifying them to better fit your blower.
Considerations for DIY:
- Material Strength: Ensure the materials you use are strong enough to support the weight of your leaf blower, especially if it’s a backpack model.
- Blower Design: Measure your blower carefully. Note the shape of the body, the position of the handle, and the nozzle to ensure a good fit.
- Safety First: Always prioritize secure mounting. Use appropriate hardware and mount to studs whenever possible.
Special Considerations for Different Leaf Blower Types
Not all leaf blowers are created equal, and their storage needs can vary significantly.
Handheld Leaf Blowers
These are the most common and generally the easiest to hang. The simple hook method or a dedicated wall rack is usually sufficient. Look for options that grip the handle or the main body securely.
Backpack Leaf Blowers
These are heavier and bulkier. Hanging them requires more robust solutions: (See Also: How To Start A John Deere Snow Blower )
- Heavy-duty Wall Mounts: Look for specialized backpack blower wall mounts designed to support their weight and shape. These often have wide cradles.
- Ceiling Hoists: A pulley system can be an excellent way to lift and store a heavy backpack blower overhead, keeping your floor clear.
- Floor Stands (with an option to hang): Some floor stands might have integrated hooks or points where you could attach a secondary hanging mechanism.
Wheeled Leaf Blowers
These are typically stored upright on their wheels. While not typically ‘hung’ in the traditional sense, you might consider:
- Wall Brackets to Secure Them: A bracket that holds the body of the blower can prevent it from tipping over.
- Dedicated Storage Carts: Specialized carts designed for wheeled blowers often have a compact footprint.
Choosing the Right Location: Beyond Just a Wall
Where you hang your leaf blower is as important as how you hang it.
- Garage Walls: The most common and often best location. Ensure you’re mounting to studs.
- Shed Walls: Similar to garages, but ensure the shed is dry and secure.
- Workshop Areas: If you have a dedicated workshop, integrate the blower storage into your overall organization system.
- Avoid Direct Sunlight and Extreme Temperatures: Prolonged exposure can degrade plastic components and affect battery life (if electric/battery-powered).
- Keep Away from Flammable Materials: Especially important if you store gasoline for gas-powered models.
- Consider Accessibility: Can you easily reach it without moving other items? Is it at a height that’s comfortable for you to lift the blower?
Installation Tips for a Secure Hang
We can’t stress enough how important proper installation is. A poorly mounted hanger is worse than no hanger at all.
Key Installation Principles:
- Always Find Studs: For any significant weight, mounting directly into wall studs is the gold standard. Use a reliable stud finder.
- Use Appropriate Hardware: Screws, lag bolts, and anchors are not one-size-fits-all. Match them to your wall material and the expected load. For drywall, use heavy-duty toggle bolts or screw-in anchors rated for much more than your blower’s weight.
- Pre-Drill Pilot Holes: This prevents wood from splitting and makes driving screws easier, especially into hard studs.
- Level Installation: A crooked hanger looks bad and can lead to the blower not sitting securely.
- Test, Test, Test: Before trusting your blower to the hanger, give it a good tug.
Maintenance and Safety Checks
Once your leaf blower is hung, it’s not a ‘set it and forget it’ situation. Regular checks ensure continued safety and security.
- Periodic Inspection: Every few months, visually inspect the hanger and mounting hardware for any signs of wear, rust, or loosening.
- Check for Stability: Give the blower a gentle nudge while it’s hanging to ensure it’s still stable and hasn’t shifted.
- Clean the Area: Keep the area around the hanging blower free of debris, especially if it’s a gas-powered model, to reduce fire hazards.
- Re-tighten if Necessary: If you notice any looseness, re-tighten the mounting screws or bolts.
Troubleshooting Common Hanging Issues
Even with the best intentions, you might run into snags.
| Problem | Solution |
|---|---|
| Blower feels unstable on the hook. | Ensure the hook is the right size and shape for your blower. Try a different hanging point on the blower. Consider a dedicated rack for better stability. |
| Wall is too flimsy for direct mounting. | Use heavy-duty drywall anchors specifically designed for significant weight. Ensure you’re using the correct type for your wall material. |
| No studs in the desired location. | Explore alternative mounting points (e.g., a different wall, a sturdy workbench if it’s designed for load). If mounting on drywall without studs, use the strongest anchors available and be mindful of the weight limit. |
| Blower doesn’t fit the commercial hanger. | Double-check the product specifications against your blower’s dimensions. Some hangers are designed for specific types or sizes of blowers. Consider a DIY solution. |
By addressing these common issues, you can ensure a safe and effective hanging solution for your leaf blower.
Conclusion: Secure Your Blower, Simplify Your Space
Learning how to hang a leaf blower is a straightforward yet impactful way to enhance your garage or shed organization. Whether you opt for a simple hook, a specialized rack, or a custom DIY solution, prioritizing secure mounting and a convenient location will pay dividends in saved space and improved safety. Invest a little time now, and enjoy a tidier, more accessible workspace for seasons to come.