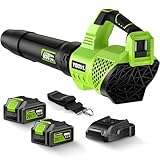
Is your powerful backpack blower hogging valuable floor space in your garage or shed? You’re not alone! These essential tools, while incredibly effective for yard work, can be bulky and awkward to store. Finding a smart, accessible place for it can make a huge difference in keeping your workspace organized and your blower readily available for those impromptu clean-up tasks.
The good news is that with a few simple solutions, you can reclaim that space and ensure your blower is both protected and easy to grab. We’ll walk you through the best ways to hang your backpack blower, from DIY hacks to commercially available racks. Get ready to transform your storage woes into a streamlined, efficient system!
Mastering the Art: How to Hang a Backpack Blower for Optimal Storage
A backpack blower is a fantastic tool for tackling large areas of leaves, debris, and grass clippings. However, its size and weight can make storage a challenge. Leaving it on the floor can create tripping hazards, take up precious workbench space, and potentially lead to damage. Fortunately, hanging your backpack blower is a practical and effective solution. This guide will cover everything you need to know, from understanding the benefits to exploring various hanging methods, materials, and safety considerations.
Why Hang Your Backpack Blower? The Undeniable Benefits
Before we dive into the ‘how,’ let’s solidify the ‘why.’ Proper storage, especially hanging, offers several significant advantages:
- Space Efficiency: This is the most obvious benefit. By utilizing vertical space, you free up valuable floor and workbench real estate. Imagine a cleaner, more organized garage or shed where you can actually walk around and find other tools easily.
- Protection and Longevity: Storing your blower off the ground protects it from accidental bumps, spills, and potential damage. It also keeps it away from moisture and pests that might inhabit floor level. A well-protected blower will last longer.
- Accessibility and Convenience: When your blower is mounted, it’s always in a designated spot and ready for use. No more digging through piles of equipment or searching for misplaced items. Just grab and go!
- Safety First: A hanging blower eliminates tripping hazards. This is particularly important in busy workshops or garages where people and equipment are constantly moving.
- Neatness and Professionalism: A tidy workspace is not only more pleasant to be in but also reflects a sense of order and professionalism, even if it’s just your personal garage.
Assessing Your Backpack Blower and Your Space
Before you grab your tools, take a moment to evaluate a few key factors:
- Blower Weight and Size: Backpack blowers vary considerably in size and weight. Larger, more powerful models will require sturdier mounting solutions than smaller, lighter ones. Check your blower’s specifications if you’re unsure.
- Mounting Location: Where do you plan to hang it? Consider the wall material (wood studs, concrete, drywall), available space, and proximity to where you’ll be using it. A location near the garage door or the main exit to your yard might be ideal.
- Wall Strength: Ensure the wall you choose can support the weight of the blower, especially when it’s fully fueled.
- Your DIY Skill Level: Some methods are simpler than others. Be honest about your comfort level with tools and construction.
Methods for Hanging Your Backpack Blower
There are several effective ways to hang your backpack blower. We’ll explore some of the most popular and practical options.
1. The Simple Hook Method (for Lighter Blowers or Specific Designs)
For smaller, lighter backpack blowers, or those with a strategically placed handle or frame, a heavy-duty utility hook can be a surprisingly effective solution. These are often the most affordable and easiest to install.
Materials Needed:
- Heavy-duty utility hook (rubber-coated is ideal to prevent scratches)
- Drill with appropriate drill bit
- Screwdriver or impact driver
- Wall anchors (if not drilling into studs)
Steps:
- Locate a Stud: Use a stud finder to locate a wall stud. This is crucial for secure mounting. If studs aren’t available, you’ll need appropriate heavy-duty wall anchors designed for the weight.
- Mark the Spot: Hold the hook against the wall at your desired height and mark the screw hole location. Ensure there’s enough clearance for the blower’s frame and straps.
- Drill Pilot Hole: Drill a pilot hole slightly smaller than the hook’s screw.
- Install the Hook: Screw the hook firmly into the stud (or anchor).
- Test the Strength: Gently pull on the hook to ensure it’s securely fastened.
- Hang the Blower: Carefully lift your backpack blower and hang it by its frame or a sturdy handle.
Pros: Inexpensive, very easy to install, quick access.
Cons: May not be suitable for heavier blowers, can scratch the blower if not careful, might not offer the most stable hang for all blower designs. (See Also: How Much To Replace A Blower Motor In A Car )
2. The Diy Wall Rack (customizable and Sturdy)
Creating your own wall rack offers the most flexibility and can be tailored precisely to your blower’s shape and your available space. This is a fantastic option for those who enjoy basic woodworking.
Materials Needed:
- Wood: 1×4 or 2×4 lumber (depending on desired sturdiness and design)
- Screws: Wood screws of appropriate length (e.g., 2-inch or 3-inch)
- Mounting hardware: Long screws or lag bolts for attaching the rack to wall studs.
- Tools: Saw, drill, measuring tape, level, stud finder, sandpaper.
- Optional: Wood glue, primer, paint, rubber padding.
Design Ideas for a DIY Rack:
The basic principle is to create a sturdy frame that supports the blower’s weight and keeps it from sliding. Here are a few popular designs:
a) The Shelf Design:
This involves creating a simple shelf that the blower can rest on, with some sort of retaining mechanism.
- Build a Simple Shelf: Cut a piece of wood to the desired width (slightly wider than your blower). Attach two L-brackets to the underside of the shelf, spaced to support the blower’s base.
- Add Retaining Arms/Hooks: Cut two shorter pieces of wood (or use sturdy hooks) to act as arms or hooks that will go over the top of the blower’s frame or straps, preventing it from tipping forward. Attach these securely to the shelf or directly to the wall behind the shelf.
- Mount to Wall: Locate studs and use long screws or lag bolts to secure the shelf to the wall. Ensure it’s level.
b) The Cradle Design:
This design mimics a cradle, holding the blower securely.
- Create a Base: Cut a piece of wood for the base, designed to sit under the blower’s main body.
- Build Upright Supports: Cut two pieces of wood to act as upright supports that will hold the blower’s tank or frame. These should be angled slightly to cradle the blower.
- Assemble the Cradle: Attach the upright supports to the base using screws and wood glue for extra strength.
- Add Securing Hooks/Straps: Install hooks or eye bolts on the uprights or the wall behind to secure the blower’s straps or frame.
- Mount to Wall: Locate studs and securely mount the entire cradle assembly to the wall.
c) The Pegboard System:
If you have pegboard in your garage, you can adapt it. (See Also: How To Replace Blower Motor Resistor Connector )
- Install Heavy-Duty Pegboard: Ensure your pegboard is securely mounted to wall studs.
- Use Strong Hooks/Pegs: Purchase heavy-duty pegboard hooks or custom-made wooden pegs that can support the blower’s weight. You might need to double up hooks or create a custom wooden bracket that attaches to the pegboard.
- Position for Support: Arrange the hooks or pegs to create a stable resting place for the blower’s frame and tank.
General Steps for DIY Rack Construction and Installation:
- Measure and Plan: Accurately measure your blower and sketch out your rack design. Consider where the weight will be distributed.
- Cut Wood to Size: Use your saw to cut all wooden components according to your plan.
- Assemble the Rack: Use screws and wood glue (if desired) to assemble the rack components. Pre-drilling pilot holes will prevent wood from splitting.
- Sand and Finish (Optional): Sand down any rough edges. You can paint or stain the wood for a more finished look, or add rubber padding to protect your blower.
- Locate Studs: Use a stud finder to mark the locations of wall studs where you’ll mount the rack.
- Mark Mounting Points: Hold the assembled rack against the wall at your desired height and mark the screw hole locations, ensuring they align with studs.
- Drill Pilot Holes: Drill pilot holes into the studs at your marked locations.
- Secure the Rack: Use long wood screws or lag bolts to firmly attach the rack to the wall studs. Ensure it’s level.
- Test Stability: Apply firm pressure to the rack to ensure it’s stable and can hold the blower’s weight.
- Hang Your Blower: Carefully place your backpack blower onto the rack, ensuring it’s balanced and secure.
Pros: Highly customizable, can be very sturdy, can be designed to perfectly fit your blower, rewarding DIY project.
Cons: Requires basic woodworking skills and tools, takes more time than simple hooks.
3. Commercial Backpack Blower Racks
If DIY isn’t your forte, or you’re looking for a quick, professional solution, there are many commercially available racks designed specifically for backpack blowers.
Types of Commercial Racks:
- Wall-mounted racks: These are the most common, often featuring hooks, cradles, or shelves. They are typically made from metal for durability.
- Ceiling-mounted hoists: Less common for blowers, but can be an option if wall space is extremely limited.
- Freestanding units: Some units are designed to stand on their own, though they tend to take up more floor space.
What to Look for in a Commercial Rack:
- Material: Steel or heavy-gauge aluminum are ideal for strength and durability.
- Weight Capacity: Ensure it can safely support your blower’s weight.
- Design: Does it have padded areas to protect the blower? Is it easy to load and unload?
- Mounting Hardware: Does it come with appropriate screws or anchors?
- Ease of Installation: Check reviews for comments on how easy it is to assemble and mount.
Installation (General):
- Read Instructions: Always follow the manufacturer’s specific assembly and installation instructions.
- Locate Studs: Just like with DIY, finding wall studs is critical for secure mounting.
- Mark and Drill: Mark your mounting holes, drill pilot holes, and install the rack using the provided hardware or appropriate heavy-duty fasteners.
- Test Strength: Ensure the rack is firmly attached before hanging your blower.
Pros: Designed for purpose, often very sturdy and safe, professional look, relatively easy to install if you can find studs.
Cons: Can be more expensive than DIY or hook options, limited customization.
4. Using Existing Storage Systems
Sometimes, you can adapt existing garage storage solutions: (See Also: How To Start A John Deere Snow Blower )
- Heavy-Duty Shelving: If you have sturdy shelves, you can place your blower on it, but ensure it’s secure and won’t slide off. You might need to add a lip or a strap.
- Tool Organizers: Some specialized tool organizers might have a slot or hook suitable for a blower.
Important Safety and Best Practice Considerations
No matter which method you choose, keep these tips in mind:
- Fuel Considerations: If your blower has fuel in it, ensure the tank is secure and the blower is hung in a well-ventilated area. For long-term storage, consider draining the fuel according to the manufacturer’s instructions.
- Weight Distribution: Always aim to hang your blower in a way that distributes its weight evenly and securely. Avoid hanging it from a single flimsy point.
- Clearance: Ensure there’s enough clearance around the blower so that it doesn’t interfere with other stored items or pathways.
- Regular Checks: Periodically check that your mounting hardware and the rack itself are still secure and haven’t loosened over time.
- Protect Your Blower: If your chosen method doesn’t have padding, consider adding some felt or rubber strips to prevent scratches.
- Consult Your Manual: Always refer to your backpack blower’s owner’s manual for any specific storage recommendations.
Troubleshooting Common Issues
My blower feels unstable on the hook/rack.
This usually means the hook or rack isn’t strong enough, isn’t properly installed into a stud, or the blower isn’t positioned correctly. Re-evaluate your mounting hardware, ensure you’re hitting studs, or consider a more robust rack system.
I can’t find any wall studs.
If you’re in an area without accessible studs (like a concrete wall), you’ll need to use heavy-duty wall anchors specifically rated for the weight of your blower. Toggle bolts or molly bolts are good options for drywall, while concrete anchors are necessary for concrete walls.
The rack is scratching my blower.
Add self-adhesive felt pads, rubber strips, or even pieces of old bicycle inner tube to the points where the blower contacts the rack.
My blower is too heavy for this method.
This is a sign to upgrade! Invest in a stronger, commercially made rack designed for heavier loads, or build a more robust DIY solution using thicker lumber and secure mounting techniques.
I’m worried about the fuel leaking.
For long-term storage, always drain the fuel. If storing with fuel, ensure the tank cap is tightly secured and the blower is hung in a way that any potential minor drips won’t cause damage (e.g., over a drip pan or on a surface that’s easy to clean).
Verdict
Hanging your backpack blower is a smart move for anyone looking to optimize their garage or shed space. It enhances safety by eliminating tripping hazards, protects your equipment from damage, and makes your blower readily accessible. By choosing the right method – whether it’s a simple hook, a DIY rack, or a commercial solution – you can significantly improve your workspace organization and ensure your powerful tool is always ready for action.