So, you’re curious about growing autoflowering cannabis in soil? You’ve come to the right place! We’ll get you growing like a pro. Autoflowers are a fantastic choice for beginners because of their resilience and relatively short life cycle. Unlike photoperiod plants, autoflowers transition to the flowering stage automatically, regardless of light exposure. This makes them easier to manage, especially if you’re new to the world of cultivation.
This guide will walk you through every step, from choosing the right seeds and soil to harvesting your buds. We’ll cover everything you need to know to achieve a successful and rewarding grow. Get ready to cultivate your own high-quality cannabis, right in your own home. Let’s get started!
Understanding Autoflowering Cannabis
Autoflowering cannabis strains are a game-changer for home growers. They are bred from Cannabis Ruderalis, a hardy, short-lived species native to harsh climates. This lineage gives autoflowers their unique ability to flower based on age, not light cycles. This characteristic simplifies the growing process significantly.
Key Differences From Photoperiod Plants
The primary difference lies in the flowering phase. Photoperiod plants require a change in light cycle (typically 12 hours of light and 12 hours of darkness) to trigger flowering. Autoflowers, on the other hand, begin flowering after a set amount of time, usually 2-4 weeks after germination. This makes them ideal for growers with limited space or time.
Photoperiod plants offer more control over the vegetative and flowering stages, allowing for longer vegetative periods to maximize plant size and yield. Autoflowers, however, have a predetermined life cycle, making them predictable and quick to harvest.
Benefits of Autoflower Strains
- Faster Harvests: Autoflowers have a shorter overall life cycle, allowing for multiple harvests per year.
- Simplicity: They require less management of light cycles, making them easier for beginners.
- Compact Size: Autoflowers typically grow to a smaller size, suitable for indoor grows or limited spaces.
- Resilience: They are generally more resistant to pests and diseases.
Popular Autoflower Strains
The market is flooded with amazing autoflower strains. Here are a few popular ones to get you started:
- Northern Lights Auto: A classic, known for its relaxing effects and easy cultivation.
- Royal Gorilla Auto: A potent strain with high THC levels and a balanced high.
- Blueberry Auto: A fruity and flavorful strain with a relaxing body high.
- Girl Scout Cookies Auto: A sweet and potent strain with a balanced high and great bag appeal.
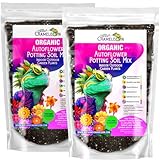
Choosing the Right Soil for Autoflowers
The soil is the foundation of your autoflower’s success. Choosing the right soil mixture is crucial for healthy growth and optimal yields. We need a soil that drains well, retains moisture, and provides essential nutrients.
Ideal Soil Composition
A well-draining soil mix is essential to prevent root rot. We recommend a blend of the following:
- High-Quality Compost: Provides essential nutrients and organic matter.
- Coco Coir: Improves drainage and aeration, and retains moisture.
- Perlite: Enhances drainage and aeration.
- Worm Castings: Adds beneficial microbes and nutrients.
A good starting point is a soil mix ratio like this:
- 40% Compost
- 30% Coco Coir
- 20% Perlite
- 10% Worm Castings
Pre-Mixed vs. Diy Soil
You can either buy pre-mixed soil specifically formulated for cannabis or create your own. Pre-mixed soils offer convenience, but DIY allows you to customize the mix to your needs. Always check the pH of your soil, as cannabis prefers a slightly acidic environment (pH 6.0-6.8).
Considerations for Autoflower Soil
Autoflowers have a relatively short life cycle, so the soil needs to provide the necessary nutrients throughout their growth. Avoid heavy soils that retain too much moisture, as this can lead to root problems. Also, ensure the soil is well-aerated to promote healthy root development.
Germinating Autoflower Seeds
Germination is the critical first step. There are several methods to germinate autoflower seeds. The goal is to encourage the seed to sprout and develop a taproot.
Germination Methods
- Paper Towel Method:
- Moisten a paper towel with water.
- Place the seeds on the paper towel, spacing them apart.
- Fold the paper towel over the seeds.
- Place the paper towel in a sealed bag or container.
- Store in a dark, warm place (70-80°F or 21-27°C).
- Check daily for germination (usually within 24-72 hours).
- Direct Sowing:
- Plant the seeds directly into the final growing pot.
- Water gently.
- Keep the soil moist but not waterlogged.
- Jiffy Pellets/Rockwool Cubes:
- Soak the pellets or cubes in water.
- Place a seed in the pre-made hole.
- Keep them moist and in a warm environment.
Tips for Successful Germination
- Use Fresh Seeds: Older seeds may have a lower germination rate.
- Maintain Moisture: Keep the paper towel or soil consistently moist, but not soaking wet.
- Temperature Control: Maintain a stable temperature for optimal germination.
- Gentle Handling: Handle seedlings with care to avoid damaging the delicate taproot.
Planting and Transplanting Autoflower Seedlings
Once the seeds have sprouted, it’s time to plant them. Autoflowers don’t appreciate being transplanted, as it can stress them and stunt their growth. It’s often best to sow them directly into the final pot.
Choosing the Right Pot Size
Select a pot size that is appropriate for the expected size of your autoflower strain. Generally, a 3-5 gallon pot is ideal. Larger pots provide more room for root development and can lead to bigger yields. Ensure your pots have drainage holes to prevent waterlogging. (See Also: How to Turn Soil Over: A Beginner’s Guide to Healthy Gardens!)
Planting the Seedling
- Prepare the Pot: Fill the pot with your prepared soil mix.
- Make a Hole: Create a small hole in the center of the soil, about 1/4 to 1/2 inch deep.
- Plant the Seedling: Gently place the seedling (taproot down) into the hole.
- Cover Lightly: Cover the seedling with soil.
- Water Gently: Water the soil around the seedling gently, avoiding overwatering.
Transplanting Considerations (if Necessary)
If you used a small starter pot, you might need to transplant. Do it carefully and quickly to minimize stress. Transplant when the seedling has a few sets of true leaves, and the roots are starting to fill the starter pot. Water the soil a few hours before transplanting. Dig a hole in the new pot, gently remove the seedling and its root ball from the old pot, and place it in the new pot. Fill in around the root ball with soil and water. Autoflowers typically don’t recover as well from transplanting as photoperiod plants, so minimize this if possible.
Light Requirements for Autoflowers
Autoflowers need adequate light to thrive. The amount and spectrum of light play a crucial role in their growth, from the vegetative stage to the flowering stage.
Light Cycles
Autoflowers can grow under various light cycles. A common and effective approach is a 18/6 light cycle (18 hours of light, 6 hours of darkness) throughout the entire grow. Some growers use a 20/4 light cycle for slightly faster growth. Avoid a 24/0 light cycle, as it can stress the plants. The key is consistency.
Types of Grow Lights
- LED Grow Lights: Efficient, cost-effective, and provide a full spectrum of light.
- Metal Halide (MH) and High-Pressure Sodium (HPS) Lights: Traditional choices, but less efficient than LEDs. MH is often used for the vegetative stage, and HPS for flowering.
- Fluorescent Lights: Suitable for seedlings and early vegetative growth but may not provide enough light for flowering.
Light Distance and Intensity
The distance between the grow light and the plants is crucial. Too close, and the plants can suffer from light burn. Too far, and they won’t receive enough light. Start with the light manufacturer’s recommended distance. As the plants grow, adjust the distance accordingly. Consider using a light meter to measure the PAR (Photosynthetically Active Radiation) level to ensure your plants are receiving sufficient light intensity.
Watering and Feeding Autoflowers
Proper watering and feeding are crucial for healthy autoflower plants. We need to find the right balance to avoid overwatering or nutrient deficiencies.
Watering Techniques
Watering frequency depends on several factors, including pot size, environmental conditions, and the plant’s stage of growth. The soil should dry out slightly between waterings. A good rule of thumb is to water when the top inch or two of soil feels dry to the touch. Water thoroughly until you see runoff from the drainage holes.
Nutrient Requirements
Autoflowers have different nutrient needs during the vegetative and flowering stages. Use a balanced nutrient solution formulated for cannabis. Follow the manufacturer’s instructions for dosage. Start with a lower concentration and gradually increase it as the plant grows.
Nutrient Deficiencies and Excesses
Monitor your plants for signs of nutrient deficiencies or excesses. Yellowing leaves, stunted growth, and unusual spots on the leaves can indicate a problem. Refer to a nutrient deficiency chart to identify and address any issues. Flush the soil with plain water if you suspect nutrient buildup.
Ph Levels
Maintaining the correct pH level of your water and nutrient solution is essential for nutrient uptake. Aim for a pH of 6.0-6.8 for soil grows. Use a pH meter to measure the pH and adjust it as needed.
Vegetative Stage Care
The vegetative stage is the period of growth before the plant starts flowering. During this stage, the plant focuses on developing its leaves, stems, and roots.
Environmental Conditions
- Temperature: Maintain a temperature range of 70-85°F (21-29°C).
- Humidity: Keep humidity levels around 60-70% for seedlings and the vegetative stage.
- Air Circulation: Use fans to provide air circulation and prevent mold and mildew.
Training Techniques (optional)
While not strictly necessary, some training techniques can improve yields. Low-Stress Training (LST) involves gently bending and tying down branches to create a more even canopy. Topping involves cutting off the top of the main stem to encourage multiple colas (main buds). Use these techniques with caution, as autoflowers have a limited recovery time.
Common Problems
- Overwatering: Leads to root rot. Allow the soil to dry out between waterings.
- Nutrient Deficiencies: Address with appropriate nutrient solutions.
- Pest Infestations: Inspect plants regularly and use organic pest control methods.
Flowering Stage Management
Once your autoflower starts showing signs of flowering (small pistils or pre-flowers), you’ll need to adjust your care accordingly.
Light Cycle Consistency
Maintain a consistent light cycle, typically 18/6 or 20/4. Avoid any light leaks during the dark period, as this can disrupt the flowering process. (See Also: How to Mix Peat Moss with Soil: A Gardener’s Complete Guide)
Nutrient Adjustments
Switch to a flowering nutrient solution with higher levels of phosphorus and potassium. These nutrients are essential for bud development. Reduce nitrogen levels. Follow the manufacturer’s instructions.
Environmental Control
Maintain a slightly lower humidity level (40-50%) to reduce the risk of mold and mildew. Keep the temperature within the recommended range.
Monitoring for Problems
Inspect your plants daily for any signs of pests, diseases, or nutrient deficiencies. Watch for bud rot, which can occur in humid environments. Ensure good air circulation.
Harvesting Autoflowers
Harvesting at the right time is crucial for potency and flavor. It is the culmination of all the previous efforts.
Signs of Ripeness
Use a magnifying glass or jeweler’s loupe to examine the trichomes (tiny resin glands) on the buds. The trichomes will change color as the plant matures. Harvest when:
- Most trichomes are milky white: This indicates peak THC levels.
- Some trichomes are amber: This indicates the THC is starting to degrade into CBN, which is associated with a more relaxing effect.
Harvesting Process
- Flush the Plants: Stop feeding nutrients about 1-2 weeks before harvest. This helps improve the flavor of the buds. Water with plain, pH-balanced water.
- Cut the Plants: Cut the entire plant at the base or cut individual branches.
- Trim the Buds: Trim the fan leaves and any excess foliage from the buds.
Drying and Curing Autoflower Buds
Drying and curing are essential steps to preserve the quality and flavor of your harvest. This process removes excess moisture and allows the buds to develop their full potential.
Drying
- Hang the Buds: Hang the trimmed buds upside down in a dark, well-ventilated room.
- Maintain Environment: Keep the temperature around 60-70°F (16-21°C) and the humidity around 50-60%.
- Drying Time: Drying usually takes 7-14 days. The buds are ready when the stems snap easily.
Curing
- Jar the Buds: Place the dried buds in airtight glass jars. Fill the jars about 75% full.
- Burp the Jars: Open the jars for 15-30 minutes daily for the first week to release excess moisture.
- Curing Time: Cure for at least 2-4 weeks, or longer for optimal flavor and potency.
- Storage: Store the cured buds in a cool, dark place.
Common Problems and Solutions
Even experienced growers can encounter problems. Here are some common issues and how to address them:
Pests
Spider mites, aphids, and fungus gnats are common pests. Inspect your plants regularly. Use organic pest control methods, such as neem oil or insecticidal soap, if needed. Introduce beneficial insects like ladybugs.
Nutrient Deficiencies
Yellowing leaves, stunted growth, and other visual symptoms are common signs. Refer to a nutrient deficiency chart to identify the problem. Adjust your nutrient solution accordingly.
Overwatering and Root Rot
Overwatering is a common mistake. Allow the soil to dry out between waterings. Ensure the pot has proper drainage. Root rot can be fatal; use a fungicide if necessary.
Light Burn
Leaves closest to the light source may exhibit yellowing or bleaching. Adjust the distance between the light and the plants. Ensure proper ventilation to prevent heat buildup.
Ph Imbalance
Use a pH meter to monitor the pH of your soil or nutrient solution. Adjust the pH as needed to ensure optimal nutrient uptake.
Troubleshooting Tips
- Keep a Grow Journal: Document your grow to track your progress and identify any problems. Note the date, strain, watering schedule, nutrients used, and any observations.
- Research Your Strain: Understand the specific needs of your chosen strain. Some strains are more sensitive than others.
- Don’t Panic: Most problems can be resolved. Take your time, observe your plants, and adjust your approach accordingly.
- Seek Advice: Don’t hesitate to consult online forums or experienced growers for help.
Faq: People Also Ask
Let’s address some common questions: (See Also: How to Prevent Soil Erosion on a Slope: A Complete Guide)
What Is the Best Soil for Autoflowers?
A well-draining soil mix with a balance of nutrients is ideal. A mix of compost, coco coir, perlite, and worm castings is a great starting point.
How Often Should I Water My Autoflower Plants?
Water when the top inch or two of soil feels dry. The frequency depends on the pot size, environmental conditions, and the plant’s stage of growth.
What Nutrients Do Autoflowers Need?
Autoflowers need a balanced nutrient solution formulated for cannabis. During the flowering stage, switch to a solution with higher levels of phosphorus and potassium.
How Much Light Do Autoflowers Need?
Autoflowers thrive under 18/6 or 20/4 light cycles. Ensure your plants receive adequate light intensity throughout the entire growth cycle.
Can You Transplant Autoflowers?
Transplanting autoflowers can stress them and stunt their growth. It’s generally best to plant them directly into their final pot.
Advanced Techniques and Tips
Once you’ve mastered the basics, you can explore advanced techniques to maximize your yields. This includes:
Advanced Nutrient Schedules
Experiment with different nutrient ratios and feeding schedules. Adjust the nutrient levels based on the plant’s specific needs and stage of growth. Research advanced nutrient programs to learn more.
Defoliation
Carefully remove some fan leaves to improve light penetration and airflow. Remove leaves that are blocking bud sites or are yellowing. Do this sparingly, as excessive defoliation can stress the plant.
Pruning
Prune lower branches and leaves to improve airflow and direct the plant’s energy towards the top buds. Again, avoid excessive pruning, especially during the flowering stage.
Environmental Control
Fine-tune your environmental conditions to optimize growth. Use a dehumidifier and air conditioner to maintain ideal temperature and humidity levels. Monitor and adjust the CO2 levels in your grow room.
Harvesting and Maximizing Yields
Here are some more tips to maximize your yields:
- Choose the Right Strain: Select autoflower strains with high-yielding genetics.
- Optimize Your Environment: Maintain ideal temperature, humidity, and light conditions.
- Provide Adequate Nutrients: Use a balanced nutrient solution and adjust the levels as needed.
- Train Your Plants: Use low-stress training (LST) techniques to create a more even canopy.
- Harvest at the Right Time: Harvest at the peak of trichome development to maximize potency and yield.
Verdict
Growing autoflowers in soil can be a rewarding experience. By following these guidelines, you’ll be well on your way to a successful harvest. Remember to be patient, observe your plants closely, and adjust your approach as needed. With a little practice, you’ll be enjoying your homegrown cannabis in no time. Happy growing!
Recommended Products