Need more privacy or security in your yard? You’re not alone! Many homeowners find their chain link fences just aren’t tall enough. The good news is, you don’t necessarily need to replace the entire fence. Learning how to extend chain link fence height is a practical and often cost-effective solution. This guide will walk you through everything you need to know, from planning and material selection to the step-by-step installation process.
We’ll cover different methods, discuss the pros and cons of each, and help you choose the best option for your specific needs and budget. Whether you’re dealing with nosy neighbors, protecting your pets, or simply seeking more peace of mind, extending your fence can make a big difference. Let’s get started!
Understanding the Need to Extend Your Chain Link Fence
Before diving into the ‘how,’ let’s address the ‘why.’ Why are you considering extending your chain link fence in the first place? Understanding your motivations is crucial for choosing the right method and materials.
Common Reasons for Extending a Chain Link Fence
- Increased Privacy: This is perhaps the most common reason. Taller fences provide a visual barrier, making your yard feel more secluded from neighbors and passersby.
- Enhanced Security: A higher fence makes it more difficult for intruders to climb over. This can deter potential burglars and protect your property.
- Pet Containment: If you have dogs, a taller fence can prevent them from jumping over and escaping. This is especially important for larger or more agile breeds.
- Child Safety: A higher fence can also provide an added layer of safety for children, preventing them from wandering out of the yard.
- Aesthetic Appeal: Sometimes, a taller fence simply looks better, especially if you want to create a more defined boundary for your property.
- Compliance with Local Regulations: Some areas may have height restrictions. Extending your fence might be necessary to meet zoning requirements.
What Are the Typical Chain Link Fence Heights?
Chain link fences come in a variety of standard heights. The most common heights are:
- 3 feet
- 4 feet
- 5 feet
- 6 feet
- 8 feet
The height you choose depends on your needs. For instance, a 4-foot fence might be enough to keep a small dog in, but a 6-foot or 8-foot fence is better for privacy and security. Always check local regulations regarding fence height limits.
Considerations Before You Start
Before you start, there are several things to consider. These will help you plan your project effectively and avoid potential problems.
- Local Regulations: Check with your local zoning department or homeowners association (HOA) for any height restrictions, setback requirements, or permit requirements. Failure to comply can result in fines or the need to remove the extended fence.
- Neighborly Relations: It’s always a good idea to inform your neighbors about your plans, especially if your fence is on the property line. This can help prevent misunderstandings and maintain good relationships.
- Budget: Determine how much you’re willing to spend. The cost will vary depending on the method you choose, the materials you use, and the size of your fence.
- Your Skills and Experience: If you’re not comfortable with DIY projects, consider hiring a professional. Extending a fence can involve digging, concrete work, and working with tools.
- Existing Fence Condition: Inspect your existing fence for any damage, such as rust, bent posts, or loose sections. Address these issues before extending the height. A weak base will compromise the new height.
Methods for Extending Chain Link Fence Height
There are several methods for extending the height of a chain link fence. Each method has its pros and cons, so choose the one that best fits your needs and budget. (See Also: Master the Knot: How to Tie a Lead Rope to a Fence (safe & Secure))
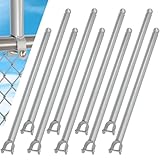
1. Adding Extension Posts
This is one of the most common and straightforward methods. It involves adding extension posts to the existing fence posts and attaching new chain link fabric to the extended posts.
Pros:
- Relatively easy to install, even for DIYers.
- Cost-effective compared to replacing the entire fence.
- Provides a clean and professional look.
Cons:
- Requires digging holes for the new posts.
- May require concrete for stability, especially for taller extensions.
- Can be labor-intensive, depending on the size of the fence.
How to Install Extension Posts (step-by-Step):
- Gather Materials: You’ll need extension posts (matching the existing post diameter), post caps, chain link fabric, tension bars, tie wires, concrete (optional), a post hole digger or auger, a level, a measuring tape, and safety glasses.
- Measure and Plan: Determine the desired height of your fence. Calculate the length of the extension posts needed.
- Prepare the Existing Posts: Ensure your existing fence posts are in good condition. If needed, repair or replace any damaged posts.
- Dig Post Holes: Dig holes for the extension posts. The depth of the holes should be about one-third the height of the post. For example, if you’re extending the fence by 2 feet, the holes should be at least 8 inches to 1 foot deep.
- Set the Extension Posts: Insert the extension posts into the holes. Use a level to ensure they are plumb (straight).
- Pour Concrete (Optional): If you want to increase stability, pour concrete around the extension posts. Let the concrete cure according to the manufacturer’s instructions.
- Attach the Extension Posts: Attach the extension posts to the existing posts using clamps or welding.
- Install New Chain Link Fabric: Unroll the new chain link fabric and attach it to the extension posts using tension bars, tie wires, and any necessary tools.
- Tension the Fabric: Use a tension bar and a chain link stretcher to ensure the fabric is taut and even.
- Secure the Fabric: Secure the chain link fabric to the posts using tie wires. Space the tie wires evenly along the posts.
2. Using Fence Extensions (pre-Made Panels)
These are pre-fabricated panels that attach to the top of your existing fence. They come in various heights and styles.
Pros:
- Easy to install; often simply clamp onto existing framework.
- Available in many styles (e.g., decorative, privacy).
- Requires minimal tools and effort.
Cons:
- Can be more expensive than adding extension posts.
- May not be as structurally sound as other methods (check the quality).
- Limited in terms of height customization.
How to Install Fence Extensions (step-by-Step):
- Gather Materials: You’ll need fence extension panels, clamps, and any necessary tools (e.g., wrench, screwdriver).
- Measure and Plan: Measure the length of your fence and determine how many extension panels you need.
- Attach Clamps: Attach the clamps to the top of your existing fence posts.
- Attach Panels: Align the fence extension panels with the clamps and secure them using screws or bolts.
- Ensure Stability: Check the panels to make sure they are secure and stable.
3. Adding a Top Rail and Fabric
This method involves adding a top rail to the existing fence posts and then attaching new chain link fabric to the top rail.
Pros:
- Provides a clean and finished look.
- Can be more stable than adding extension posts.
- Allows for a variety of heights.
Cons:
- Requires more materials and labor.
- May require welding if attaching to existing framework.
How to Install Top Rail and Fabric (step-by-Step):
- Gather Materials: You’ll need a top rail, post caps, chain link fabric, tension bars, tie wires, clamps or welding equipment, and safety glasses.
- Measure and Plan: Determine the desired height of your fence.
- Attach Top Rail: Attach the top rail to the existing fence posts using clamps or welding.
- Install New Chain Link Fabric: Unroll the new chain link fabric and attach it to the top rail and existing posts using tension bars and tie wires.
- Tension the Fabric: Use a tension bar and a chain link stretcher to ensure the fabric is taut and even.
- Secure the Fabric: Secure the chain link fabric to the posts and top rail using tie wires. Space the tie wires evenly.
4. Using Privacy Slats
While not strictly extending the height, adding privacy slats to your existing chain link fence can create a visual barrier and enhance privacy.
Pros:
- Relatively easy to install.
- Provides privacy.
- Available in various colors and styles.
Cons:
- May reduce airflow.
- Can be less secure than a solid fence.
How to Install Privacy Slats (step-by-Step):
- Gather Materials: You’ll need privacy slats, and any necessary tools (e.g., scissors, gloves).
- Choose Slat Style: Select the type of slats you want (e.g., vertical, horizontal).
- Insert Slats: Insert the slats vertically or horizontally through the chain link mesh.
- Secure Slats: Some slats may require additional securing methods, such as locking strips. Follow the manufacturer’s instructions.
Choosing the Right Method for Your Needs
The best method for extending your chain link fence depends on several factors.
- Budget: Consider the cost of materials, tools, and labor (if hiring a professional).
- Desired Height: Determine how much taller you want your fence to be.
- Privacy Needs: If privacy is your primary concern, privacy slats or solid panels might be a good choice.
- Security Needs: If security is your priority, extension posts or a top rail with fabric might be more effective.
- Aesthetic Preferences: Consider the overall look you want to achieve.
- DIY Skills: Assess your comfort level with DIY projects.
Materials You’ll Need
The materials you’ll need will vary depending on the method you choose. However, some common materials include: (See Also: Build a Stunning Wooden Garden Fence: Your Ultimate Guide)
- Extension Posts: Matching the diameter of your existing posts.
- Post Caps: To cover the top of the posts and prevent water from entering.
- Chain Link Fabric: The material used to create the fence.
- Tension Bars: Used to attach the fabric to the posts and keep it taut.
- Tie Wires: Used to secure the fabric to the posts.
- Clamps: Used to attach the extension posts or fence extensions to the existing posts.
- Concrete: (Optional) Used to provide extra stability for the posts.
- Privacy Slats: (If using this method)
- Top Rail: (If using this method)
- Tools: Post hole digger or auger, level, measuring tape, pliers, wire cutters, safety glasses, gloves.
Where to Buy Materials
You can purchase the materials at most home improvement stores (e.g., Home Depot, Lowes), online retailers, and fencing supply stores. Compare prices and read reviews before making your purchase.
Safety Precautions
Safety should be your top priority when working on any DIY project. Here are some important safety precautions to take:
- Wear Safety Glasses: Protect your eyes from flying debris.
- Wear Gloves: Protect your hands from cuts and scrapes.
- Use Appropriate Tools: Use the right tools for the job and follow the manufacturer’s instructions.
- Be Aware of Underground Utilities: Before digging, call your local utility company to locate and mark any underground lines (e.g., gas, electricity).
- Get Help If Needed: If you’re not comfortable with a task, ask for help from a friend or hire a professional.
- Be Mindful of Weather Conditions: Avoid working in extreme weather conditions (e.g., heavy rain, high winds).
Maintaining Your Extended Chain Link Fence
Once you’ve extended your chain link fence, it’s important to maintain it to ensure it lasts for years to come. Here are some maintenance tips:
- Inspect Regularly: Check the fence for any signs of damage, such as rust, loose sections, or bent posts.
- Repair Damage Promptly: Address any damage as soon as possible to prevent it from worsening.
- Lubricate Moving Parts: Lubricate any moving parts, such as gates, to keep them working smoothly.
- Clean the Fence: Clean the fence periodically to remove dirt and debris.
- Trim Vegetation: Trim any vegetation that grows near the fence to prevent it from damaging the fabric.
Troubleshooting Common Problems
Here are some common problems you might encounter and how to solve them:
- Loose Fabric: If the fabric is loose, tighten the tension bar.
- Bent Posts: Replace any bent posts.
- Rust: Remove rust with a wire brush and apply rust-resistant paint.
- Sagging Gate: Adjust the hinges or replace the gate.
- Difficulty Digging: If you encounter rocks or roots while digging, use a post hole digger with a rock-breaking blade or a root saw.
Frequently Asked Questions (people Also Ask)
Here are some common questions people ask about extending chain link fences:
Can I Extend a Chain Link Fence Myself?
Yes, you can. It’s a manageable DIY project, especially if you choose the extension post or pre-made panel methods. However, if you’re not comfortable with DIY projects, you can always hire a professional. (See Also: How Deep Should a 4 Foot Fence Post Be? Ultimate Guide & Depth Calculator)
How Much Does It Cost to Extend a Chain Link Fence?
The cost varies depending on the method, materials, and size of your fence. Expect to spend a few hundred to a few thousand dollars. Get quotes from several suppliers for the best price.
Do I Need a Permit to Extend My Fence?
Check with your local zoning department or HOA for any permit requirements. It’s always better to be safe than sorry.
How Tall Can a Chain Link Fence Be?
The maximum height is often dictated by local regulations. Check your local ordinances. This can vary from 4 to 8 feet, or even higher in some cases. Always check before you start.
What Is the Best Way to Extend a Chain Link Fence?
The best method depends on your needs, budget, and DIY skills. Adding extension posts is often the most cost-effective and straightforward method. Pre-made panels are easier to install but may be more expensive. Adding a top rail and new fabric is a more involved but potentially more secure method.
How Do I Attach Chain Link Fabric to Extension Posts?
Use tension bars, tie wires, and a chain link stretcher to ensure the fabric is taut and even. Space the tie wires evenly along the posts.
Verdict
Extending your chain link fence is a practical solution for increased privacy, security, and pet containment. By understanding the different methods, choosing the right materials, and following these step-by-step instructions, you can easily enhance your property’s boundaries. Remember to prioritize safety and check local regulations before you begin your project. With careful planning and execution, you can enjoy the benefits of a taller, more functional fence.
Recommended Products