That stubborn tree stump has been an eyesore for far too long. Whether it’s a tripping hazard, an obstacle to your landscaping dreams, or simply an unwelcome guest in your yard, getting rid of it is a priority. While traditional methods like digging can be back-breaking and time-consuming, there are faster ways to tackle this woody problem.
If you’re wondering how to dry out a tree stump fast, you’ve come to the right place. This guide will walk you through effective techniques that accelerate the decomposition process, turning that formidable stump into manageable material. We’ll explore methods that leverage natural elements and readily available tools to speed up what would otherwise be a years-long ordeal.
The Science of Stump Decomposition
Before we dive into the ‘how,’ let’s briefly touch on the ‘why.’ Tree stumps are essentially living wood, even after the tree has been felled. They contain moisture and nutrients that support ongoing biological activity. Decomposition is a natural process driven by fungi, bacteria, insects, and environmental factors like moisture and oxygen. To speed this up, we need to disrupt these natural processes in a way that encourages rapid decay or makes the stump more susceptible to these agents.
Drying out a stump is a critical first step for many rapid removal methods. Moisture is a key ingredient for rot and decay, but excessive moisture can slow down the process by creating anaerobic conditions. By actively removing moisture, we create an environment that is more conducive to rapid breakdown, whether through natural decomposition or the application of specific treatments.
Methods to Accelerate Stump Drying
1. The Drilling and Chemical Treatment Approach
This is arguably one of the most popular and effective methods for drying out a stump quickly. It involves creating numerous entry points for drying agents and decay accelerators.
Drilling for Success
Tools You’ll Need:
- A powerful, high-quality drill (corded or a robust cordless model with a strong battery)
- Large drill bits (e.g., 1/2 inch to 1 inch diameter)
- Safety glasses
- Gloves
The Process:
- Assess the Stump: Ensure the stump is relatively clean of soil and debris.
- Drill Deep Holes: Using your large drill bits, drill as many holes as possible into the top surface of the stump. Aim for holes that are at least 6-8 inches deep, or as deep as your drill bit allows. If the stump is wide, drill holes around the perimeter as well, angling them downwards into the stump’s core. The more holes you create, the better the aeration and penetration of your chosen treatment.
- Vary Hole Placement: Don’t just drill in a uniform pattern. Create a network of holes, overlapping slightly, to maximize surface area exposure within the stump.
Choosing Your Chemical Agent
Once you have your drilled stump, it’s time to introduce agents that will accelerate drying and decomposition. The goal is to draw out moisture and create an environment where fungi and bacteria can thrive.
Potassium Nitrate (saltpeter)
Potassium nitrate is a readily available chemical compound that acts as a powerful oxidizer and fertilizer. When introduced into the wood, it breaks down the lignin and cellulose, the structural components of wood, making it more porous and susceptible to decay. It also helps to draw moisture out of the stump.
Application: (See Also: How Long Does a Tree Preservation Order Last? Explained)
- Fill each drilled hole with potassium nitrate crystals.
- You can use a funnel for easier application.
- Once the holes are filled, pour boiling water into the holes. The heat helps dissolve the potassium nitrate and drives it deeper into the wood fibers.
- Cover the stump with a tarp or plastic sheeting to retain moisture and heat, allowing the chemical to work its magic.
Pros: Relatively fast-acting, readily available.
Cons: Can be toxic if ingested, requires careful handling.
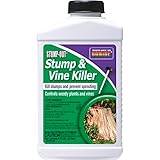
Copper Sulfate
Copper sulfate is another effective chemical that can be used. It acts as a fungicide and also contributes to the breakdown of wood fibers. It’s often used in conjunction with drilling.
Application:
- Mix copper sulfate with water to create a concentrated solution. Follow product instructions carefully regarding dilution ratios.
- Pour the solution into the drilled holes.
- Allow it to soak in.
Pros: Effective at killing wood-boring insects and fungi.
Cons: Can be toxic to surrounding plant life and aquatic environments, requires careful disposal of any runoff.
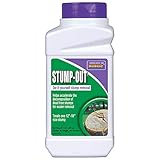
Commercial Stump Removers
Many garden centers offer commercially formulated stump removers. These are typically granular products containing high concentrations of nitrogen, which feeds the microorganisms responsible for decomposition. Some may also contain other chemicals to accelerate the process.
Application:
- Follow the manufacturer’s instructions precisely.
- Typically, you’ll pour the granules into the drilled holes.
- Add water to activate the product.
Pros: Specifically designed for stump removal, often easy to use.
Cons: Effectiveness can vary, may contain strong chemicals.
2. The ‘fire and Forget’ (with Caution!) Method
This method involves using controlled burning to break down the stump. It’s effective but requires significant safety precautions.
Controlled Burning
Tools You’ll Need: (See Also: How to Cut Down Tree Animal Crossing: A Complete Guide)
- Drill with large bits
- Potassium nitrate (optional, but highly recommended for faster results)
- Charcoal briquettes
- Kindling (dry leaves, twigs)
- Fire starter
- Water source (hose or buckets)
- Shovel
- Fire extinguisher
- Metal sheeting or fire-resistant barrier
The Process:
- Drill Holes: As described in the chemical treatment method, drill numerous deep holes into the stump. If using potassium nitrate, fill these holes and add boiling water.
- Add Fuel: Place charcoal briquettes on top of the stump and around the base. Add some dry kindling.
- Ignite: Carefully light the kindling. The goal is to get the stump smoldering and burning from the inside out.
- Maintain the Burn: The stump will slowly burn down over time. You may need to add more charcoal or kindling periodically. The potassium nitrate will help the stump burn more efficiently and deeply.
- Safety First: This is crucial. Ensure there are no flammable materials (dry grass, leaves, overhanging branches) within a 10-foot radius of the stump. Have a water source and fire extinguisher readily available. Never leave a burning stump unattended. Consider using a metal ring or barrier around the stump to contain the fire.
- Monitor: Allow the stump to burn for several days, checking it regularly. The internal heat will dry out the wood, making it brittle and easier to break apart.
Pros: Can be very effective at reducing the stump to ash.
Cons: Significant fire hazard, requires constant supervision, may not be permitted in all areas due to fire regulations, can take time.
3. The Natural Decomposition Accelerator
If you’re looking for a less chemical-intensive approach, you can still speed up natural decomposition.
Encouraging Fungal Growth
Fungi are nature’s primary decomposers of wood. By creating an ideal environment, you can encourage their proliferation.
- Drilling: Drilling holes (as described earlier) is still beneficial as it allows for better air circulation and moisture retention within the stump, creating microclimates favorable to fungi.
- Moisture: While we’re aiming to ‘dry out’ in the sense of making it susceptible to rapid breakdown, a certain level of consistent moisture is needed for fungal activity. You can achieve this by regularly watering the drilled holes, especially during dry spells.
- Nitrogen Source: Fungi, like plants, need nitrogen. Adding a nitrogen-rich fertilizer (like urea or compost) to the drilled holes can provide the necessary nutrients for fungal growth.
- Compost/Manure: Layering compost or well-rotted manure on top of and around the stump can introduce beneficial microorganisms and fungi, further accelerating decomposition.
- Sunlight: While not directly a drying agent, sunlight can help warm the stump, which can encourage some types of fungal activity.
4. The Physical Removal Augmentation
While not strictly a ‘drying’ method, these techniques make the physical removal of a dried-out stump much faster.
Leveraging Time and Weather
If you have the luxury of time, allowing the stump to naturally dry and begin to rot on its own is the simplest approach. However, ‘fast’ is the keyword here, so this is usually combined with other methods.
The Salt Method (caution Advised)
Epsom salts (magnesium sulfate) or regular table salt (sodium chloride) can be used. Salt draws moisture out of organic material, effectively dehydrating it. However, this method can also harm surrounding soil and vegetation.
- Application: Drill deep holes into the stump. Fill the holes generously with salt.
- Water: Add water to help the salt dissolve and penetrate the wood.
- Wait: Allow the salt to work for several weeks or months. The salt will dehydrate the wood, making it brittle.
Pros: Simple to apply.
Cons: Can sterilize the soil, harming plants and soil microbes; requires a significant amount of salt; takes time.
The Importance of Aeration
Regardless of the method you choose, good aeration is key to drying. Airflow helps moisture evaporate. If your stump is in a damp, shaded area, consider clearing some surrounding vegetation to improve air circulation. (See Also: How to Put Tea Tree Oil on Piercing Safely)
Safety Considerations for All Methods
Always prioritize safety. Wear appropriate personal protective equipment (PPE) such as gloves, safety glasses, and sturdy footwear. If using chemicals, read and follow all product instructions and warnings. Be mindful of children and pets. If using fire, maintain extreme caution and adhere to local fire regulations.
The Role of Time
While these methods aim to speed up the process, drying out a large, dense stump naturally takes time. Be patient, and understand that ‘fast’ is relative. You’re aiming to reduce a process that could take years to a matter of weeks or months.
Evaluating Your Stump’s Dryness
How do you know when your stump is sufficiently dry? A dry stump will feel significantly lighter than it did initially. The wood will appear lighter in color and may start to show signs of cracking and brittleness. You might be able to easily break off small pieces with your hands or a pry bar. If you’re planning to burn it, a dry stump will ignite and burn much more readily.
The Final Stages of Removal
Once your stump is thoroughly dried and brittle, removal becomes much easier. You can:
- Break it apart: Use a sledgehammer or pry bar to break it into smaller, manageable pieces.
- Burn it: A dried stump will burn down much more effectively.
- Dig it out: The root system will also be drier and more brittle, making it easier to excavate.
- Grind it: A stump grinder can quickly turn a dried stump into wood chips.
Choosing the Right Method for You
The best method for drying out a tree stump fast depends on several factors:
- Stump Size and Type: Larger, denser hardwoods will take longer to dry than smaller, softer woods.
- Your Comfort Level with Chemicals: Some methods involve stronger chemicals than others.
- Environmental Concerns: Consider the impact on your soil and surrounding plants.
- Time and Effort: Some methods require more active involvement than others.
- Local Regulations: Check for any restrictions on burning or chemical use in your area.
No matter which method you choose, the key to drying out a tree stump fast lies in creating an environment that encourages moisture loss and accelerates decomposition. By following these expert-driven techniques, you can reclaim your yard from that stubborn woody obstacle much sooner than you might think.
Conclusion
Drying out a tree stump rapidly is achievable with the right techniques. By strategically drilling holes and applying desiccants like potassium nitrate, or by carefully managed burning, you can significantly accelerate decomposition. Even natural methods can be enhanced with proper aeration and nutrient addition. Remember to prioritize safety, consider your environmental impact, and choose the method that best suits your stump and circumstances. With patience and the application of these methods, you can effectively tackle that unwanted stump and enjoy your revitalized outdoor space much sooner.
Recommended Products