Is your lawn looking a little… lackluster? Are you dreaming of a thick, vibrant, and healthy green carpet under your feet? The secret to achieving lawn perfection often lies hidden beneath the surface – in the soil itself. Conducting a soil test is the crucial first step to understanding what your lawn needs to thrive. It’s like a blood test for your lawn, revealing vital information about its health and potential deficiencies.
We’ll guide you through everything you need to know about how to do a soil test for your lawn, from collecting the sample to interpreting the results. You’ll learn what a soil test reveals, why it’s important, and how to use the information to achieve the lawn of your dreams. Forget guesswork; let’s get scientific about your lawn care!
Why Is a Soil Test Important for Your Lawn?
Before we dive into the ‘how,’ let’s talk ‘why.’ Why should you bother with a soil test? The answer is simple: it’s the most effective way to understand what your lawn needs to flourish. Without a soil test, you’re essentially guessing, potentially wasting money on fertilizers and amendments that your lawn doesn’t even require. A soil test provides a wealth of information, including:
- Nutrient Levels: Identifies the levels of essential nutrients like nitrogen (N), phosphorus (P), and potassium (K), which are crucial for plant growth.
- pH Level: Determines the acidity or alkalinity of your soil. The pH level significantly impacts nutrient availability.
- Organic Matter Content: Indicates the amount of decomposed plant and animal material in the soil, which affects soil structure and water retention.
- Cation Exchange Capacity (CEC): Measures the soil’s ability to hold and provide nutrients.
- Presence of Heavy Metals: In some cases, tests can also identify the presence of heavy metals or other contaminants.
By understanding these factors, you can:
- Optimize Fertilizer Application: Apply the right type and amount of fertilizer, avoiding over-fertilization, which can harm your lawn and the environment.
- Correct pH Imbalances: Adjust the soil pH to make nutrients more available to your lawn.
- Improve Soil Structure: Amend the soil to improve drainage, aeration, and water retention.
- Save Money: Avoid unnecessary expenses on fertilizers and amendments.
- Promote a Healthy Lawn: Achieve a lush, green lawn that is more resistant to diseases and pests.
What Can Happen If You Skip a Soil Test?
If you skip the soil test, you might be unknowingly starving your lawn of essential nutrients or applying the wrong kind of fertilizer. This can lead to:
- Poor Growth: Your lawn might struggle to grow thick and healthy.
- Yellowing or Discoloration: Nutrient deficiencies can cause your grass to turn yellow or brown.
- Increased Susceptibility to Diseases and Pests: A weakened lawn is more vulnerable to infestations.
- Inefficient Fertilizer Use: You could be wasting money on fertilizers that your lawn doesn’t need.
- Environmental Impact: Over-fertilization can lead to runoff, polluting waterways.
When to Conduct a Soil Test
The best time to conduct a soil test is before you start any major lawn care projects, such as planting a new lawn, renovating an existing one, or simply changing your fertilizer regime. Ideally, you should test your soil:
- In the Spring or Fall: These are generally the best times for testing, as you’ll have ample time to address any issues before the peak growing season.
- Every 2-3 Years: Even if your lawn is thriving, testing every few years helps you monitor changes in your soil and adjust your care accordingly.
- When You Notice Problems: If you observe any signs of nutrient deficiencies, such as yellowing grass or stunted growth, it’s time to test.
How to Do a Soil Test for Lawn: Step-by-Step Guide
Now, let’s get down to the nitty-gritty of how to do a soil test for your lawn. Following these steps will ensure you get accurate and reliable results. (See Also: How to Remove Lead From Soil: A Complete Guide to Safe Remediation)
- Gather Your Supplies: You’ll need a soil probe or trowel, a clean plastic bucket, a plastic bag or container, a marker, and a soil testing kit (available at most garden centers or online).
- Prepare Your Lawn: Before taking samples, mow your lawn to a reasonable height. Remove any thatch or debris that might interfere with the sampling process.
- Take Multiple Samples: For an accurate representation of your soil, collect samples from several different areas of your lawn. The number of samples will depend on the size of your lawn, but a good rule of thumb is to take at least 10-15 samples from various spots. Avoid areas that are obviously different (e.g., heavily shaded areas, areas near concrete, or areas that have been recently fertilized).
- Collect the Soil Samples: Use a soil probe or trowel to dig down to the recommended depth, which is usually 4-6 inches for lawns. If using a trowel, dig a V-shaped hole and take a slice of soil from the side.
- Mix the Samples: Place all the soil samples in the clean plastic bucket and mix them thoroughly. This ensures that you have a representative composite sample.
- Prepare the Sample for Testing: Take a portion of the mixed soil (usually about 1-2 cups) and place it in the plastic bag or container provided by your soil testing kit.
- Label the Sample: Clearly label the sample with your name, the date, and any other relevant information, such as the location of the sample (e.g., front yard, back yard).
- Send the Sample to the Lab: Follow the instructions provided by your soil testing kit to send the sample to the lab. This typically involves filling out a form with information about your lawn and its needs.
- Wait for the Results: The lab will analyze your soil sample and send you a report with the results. This may take a few days or weeks, depending on the lab’s workload.
- Interpret the Results: Once you receive the results, carefully review the report. It will provide information about your soil’s nutrient levels, pH, and other important factors. Most reports will also include recommendations for fertilizers and amendments.
- Take Action: Based on the recommendations in the report, take the necessary steps to improve your soil. This may involve applying fertilizer, adjusting the pH, or adding organic matter.
Detailed Instructions for Soil Sampling
Let’s delve deeper into the crucial step of soil sampling. The accuracy of your soil test results hinges on how well you collect the samples. Here’s a more detailed breakdown:
- Tools of the Trade: A soil probe is the ideal tool. It’s designed to take a consistent core of soil. If you don’t have a probe, a trowel or spade will work, but be sure to dig a consistent depth.
- Depth Matters: For lawns, aim for a depth of 4-6 inches. This is where the majority of the root systems reside and where you’ll get the most relevant information.
- Sampling Pattern: Don’t just sample in one spot. Use a random sampling pattern. Imagine your lawn is a grid, and take samples from different squares within that grid. Avoid areas that are significantly different (e.g., near driveways, where the soil might be compacted or contaminated).
- Avoiding Contamination: Make sure your tools are clean. Don’t use tools that have been used to apply fertilizer or pesticides without thoroughly cleaning them first.
- Mixing is Key: After you’ve collected your individual samples, mix them thoroughly in a clean bucket. This creates a composite sample that represents your entire lawn.
- Sample Size: The amount of soil you need will depend on the testing lab’s instructions. Usually, a cup or two of the mixed soil is sufficient.
- Drying the Soil (If Necessary): Some labs require the soil to be air-dried before testing. Follow the lab’s instructions. If drying, spread the soil on a clean surface and allow it to air dry, avoiding direct sunlight.
Understanding Your Soil Test Results
Once you receive your soil test results, it’s time to decipher them. The report will likely include information on the following:
- pH Level: This indicates the acidity or alkalinity of your soil. A pH of 7 is neutral; below 7 is acidic, and above 7 is alkaline. Most lawns prefer a pH between 6.0 and 7.0.
- Nutrient Levels (N, P, K): The report will show the levels of nitrogen (N), phosphorus (P), and potassium (K) in your soil. These are the primary nutrients essential for plant growth. The report will likely indicate if these levels are low, adequate, or high.
- Other Nutrients: The report may also include information on the levels of other essential nutrients, such as calcium (Ca), magnesium (Mg), iron (Fe), and micronutrients.
- Organic Matter: The report will indicate the percentage of organic matter in your soil. Higher levels of organic matter are generally beneficial for soil health.
- Recommendations: The most valuable part of the report is the recommendations for fertilizers and amendments. These recommendations are based on your specific soil conditions and the type of grass you have. They will tell you what fertilizers to use, how much to apply, and when to apply them.
Decoding the Fertilizer Recommendations
Fertilizer recommendations are typically expressed as a ratio of N-P-K (Nitrogen-Phosphorus-Potassium). For example, a fertilizer labeled 10-10-10 contains 10% nitrogen, 10% phosphorus, and 10% potassium. The report will tell you what ratio of fertilizer is best for your lawn. It will also specify the amount of fertilizer to apply per 1,000 square feet.
Example: Let’s say your soil test recommends a fertilizer with a 20-5-10 ratio. This means you need a fertilizer that contains 20% nitrogen, 5% phosphorus, and 10% potassium. The report might then say to apply 2 pounds of nitrogen per 1,000 square feet. To figure out how much of the 20-5-10 fertilizer to apply, you would divide 2 pounds by 0.20 (the percentage of nitrogen in the fertilizer). This tells you that you need to apply 10 pounds of the 20-5-10 fertilizer per 1,000 square feet.
Addressing Ph Imbalances
If your soil pH is too low (acidic), you can raise it by adding lime. If your soil pH is too high (alkaline), you can lower it by adding sulfur. The soil test report will tell you how much lime or sulfur to apply, depending on your soil’s pH and the type of grass you have. Be sure to follow the recommendations carefully, as applying too much lime or sulfur can harm your lawn.
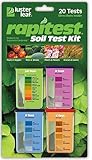
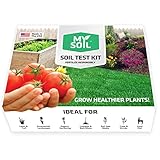
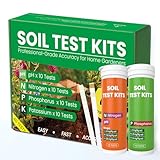
Choosing the Right Soil Testing Kit or Service
You have two main options for soil testing: DIY kits and professional lab services. Here’s a comparison to help you decide which is best for you: (See Also: How Many Liters in a Cubic Yard of Soil? Your Ultimate Guide!)
| Feature | DIY Soil Testing Kit | Professional Soil Testing Lab |
|---|---|---|
| Cost | Less expensive (typically $10-$50) | More expensive (typically $20-$100+) |
| Accuracy | Less accurate, results may be less detailed | More accurate, provides detailed analysis |
| Ease of Use | Easy to use, can be done at home | Requires sending a sample to a lab |
| Information Provided | Usually provides basic information on pH and NPK levels | Provides detailed information on nutrient levels, pH, organic matter, and recommendations for fertilizers and amendments |
| Turnaround Time | Results available immediately | Results may take a few days to a few weeks |
| Recommendations | May provide general recommendations | Provides specific recommendations tailored to your soil and grass type |
DIY Soil Testing Kits: DIY kits are a quick and convenient option for basic soil testing. They typically provide information on pH and NPK levels. However, they are generally less accurate than professional lab tests and may not provide specific recommendations for your lawn. DIY kits are a good option if you just want a general idea of your soil conditions.
Professional Soil Testing Labs: Professional soil testing labs offer more accurate and detailed analysis of your soil. They typically provide information on a wider range of nutrients, pH, organic matter, and other important factors. They also provide specific recommendations for fertilizers and amendments based on your soil and the type of grass you have. While more expensive than DIY kits, professional lab tests are often the best option for achieving a healthy lawn.
Where to Find Soil Testing Kits and Labs
You can find DIY soil testing kits at most garden centers, home improvement stores, and online retailers like Amazon. To find a professional soil testing lab, you can search online for “soil testing labs near me” or contact your local agricultural extension office. Your local extension office can often provide recommendations for reputable labs in your area. You can also contact your local university’s agricultural department.
Common Lawn Problems and Their Soil-Related Causes
Many common lawn problems are directly related to soil conditions. Understanding these connections can help you diagnose and address issues in your lawn more effectively.
- Yellowing Grass: This can be caused by a nitrogen deficiency, a low pH (which can limit nutrient availability), or a lack of iron. A soil test will identify these deficiencies and guide you in applying the appropriate fertilizers or amendments.
- Stunted Growth: Poor soil fertility, compacted soil, or an imbalanced pH can all lead to stunted growth. A soil test will reveal these issues, allowing you to amend the soil with the necessary nutrients or improve its structure.
- Thinning Lawn: A thin lawn can be caused by nutrient deficiencies, a low pH, or poor soil drainage. A soil test will help you identify the underlying cause and determine the appropriate corrective measures.
- Weed Infestations: Weeds often thrive in soils with nutrient imbalances or poor soil health. By correcting these issues, you can create a healthier lawn that is more resistant to weeds.
- Disease Problems: Diseases can be more prevalent in lawns with nutrient deficiencies or poor drainage. A soil test can help you identify these issues and take steps to improve your lawn’s health.
Maintaining Healthy Soil for a Lush Lawn
Once you’ve addressed any issues identified by your soil test, it’s important to maintain healthy soil to ensure your lawn thrives. Here are some tips:
- Fertilize Regularly: Follow the recommendations from your soil test and fertilize your lawn regularly, typically in the spring and fall.
- Aerate Your Lawn: Aeration helps improve soil drainage and aeration, which is essential for healthy root growth.
- Overseed Your Lawn: Overseeding helps to thicken your lawn and fill in any bare spots.
- Mow Properly: Mow your lawn at the recommended height for your grass type, and avoid mowing more than one-third of the grass blade at a time.
- Water Deeply and Infrequently: Water your lawn deeply and infrequently, allowing the water to soak into the soil. This encourages deep root growth.
- Add Organic Matter: Incorporate organic matter, such as compost or well-rotted manure, into your soil to improve its structure, water retention, and nutrient content.
- Control Pests and Diseases: Take steps to control pests and diseases, such as by using appropriate insecticides or fungicides.
Troubleshooting Common Soil Testing Problems
Even with careful planning, things can go wrong. Here are some common problems and how to avoid them: (See Also: How to Test Your Soil: Unlock a Thriving Garden (step-by-Step))
- Inconsistent Sampling: The biggest mistake is not taking enough samples or not mixing them thoroughly. This can lead to inaccurate results. Be sure to sample from multiple locations and mix the samples well.
- Contamination: Using dirty tools or containers can contaminate your sample. Always use clean tools and containers.
- Improper Storage: If you’re not sending your sample to the lab immediately, store it properly. Follow the lab’s instructions for storing the sample. Usually, it’s best to keep it in a cool, dry place.
- Misinterpreting Results: Soil test reports can be complex. If you’re unsure how to interpret the results, consult with a professional.
- Ignoring Recommendations: The soil test is only as good as the actions you take based on the results. Be sure to follow the recommendations for fertilizers and amendments.
Soil Testing for Different Grass Types
The specific recommendations for fertilizers and amendments will vary depending on the type of grass you have. Here’s a general overview of the soil requirements for some common lawn grasses:
- Kentucky Bluegrass: This grass type generally prefers a pH of 6.0-7.0 and requires moderate levels of nitrogen, phosphorus, and potassium.
- Tall Fescue: Tall fescue can tolerate a slightly wider pH range (5.5-7.0) and requires moderate levels of nitrogen, phosphorus, and potassium.
- Bermuda Grass: Bermuda grass thrives in a pH of 6.0-7.0 and requires high levels of nitrogen and moderate levels of phosphorus and potassium.
- St. Augustine Grass: St. Augustine grass prefers a pH of 6.0-6.5 and requires moderate levels of nitrogen, phosphorus, and potassium.
Always consult your soil test report for specific recommendations for your grass type.
Verdict
Performing a soil test for your lawn is a fundamental step toward achieving a healthy and vibrant green space. By understanding your soil’s composition, you can tailor your lawn care practices to meet its specific needs. Armed with the knowledge from your soil test, you can take informed action to improve your lawn’s health, save money, and contribute to a more sustainable environment.
So, don’t delay! Take the first step towards lawn perfection today by conducting a soil test. Your lawn will thank you for it! Happy gardening!
Recommended Products