Are your plants struggling, despite your best efforts? Yellowing leaves, stunted growth, and poor yields can often be traced back to one hidden culprit: soil pH. Don’t worry, you’re not alone! Many gardeners face this challenge. The good news? Checking your soil’s pH is a simple, affordable task, and understanding it is the key to unlocking a thriving garden.
This guide will show you exactly how to check the pH of soil, step-by-step, using various methods. We’ll explore why pH matters, what the ideal ranges are for different plants, and how to adjust your soil to create the perfect growing environment. We’ll also cover the tools you’ll need and answer some frequently asked questions. Let’s get started!
Why Soil Ph Matters: The Foundation of Plant Health
Soil pH, or potential hydrogen, measures the acidity or alkalinity of your soil. It’s measured on a scale of 0 to 14, with 7 being neutral. Values below 7 indicate acidity, and values above 7 indicate alkalinity. But why is this seemingly small number so important? The answer lies in nutrient availability.
The pH level significantly impacts how easily plants can absorb essential nutrients from the soil. When the pH is too high or too low, certain nutrients become unavailable to the plants, even if they’re present in the soil. Imagine trying to eat a nutritious meal but not being able to digest it – it’s the same principle.
Soil pH affects:
- Nutrient Availability: Controls the solubility of nutrients.
- Microbial Activity: Influences the beneficial microorganisms in the soil.
- Root Health: Affects root growth and function.
- Pest and Disease Resistance: Can make plants more or less susceptible.
Understanding your soil’s pH is the first step toward a flourishing garden. It allows you to tailor your soil management practices to meet the specific needs of your plants. For example, blueberries thrive in acidic soil, while many vegetables prefer a slightly acidic to neutral pH.
The Ideal Ph Ranges for Common Plants
Different plants have different pH preferences. Here’s a general guide:
| Plant Type | Ideal pH Range |
|---|---|
| Acid-loving plants (e.g., blueberries, azaleas, rhododendrons) | 4.5 – 5.5 |
| Most vegetables (e.g., tomatoes, peppers, beans) | 6.0 – 7.0 |
| Lawns and grasses | 6.0 – 7.0 |
| Fruit trees (e.g., apples, peaches) | 6.0 – 7.0 |
| Ornamental shrubs (e.g., roses, hydrangeas) | 6.0 – 7.0 |
Always research the specific pH requirements for the plants you intend to grow. This table provides a general guideline.
Tools You’ll Need to Check Soil Ph
Fortunately, checking your soil pH doesn’t require expensive equipment. Here’s what you’ll typically need:
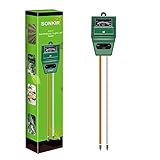
- Soil pH Meter: A handheld device that directly measures pH.
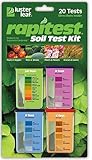
- Soil Test Kit (liquid or digital): These kits use chemical reactions or digital sensors to determine pH.
- Distilled Water: Crucial for accurate results, as tap water can affect the readings.
- Clean Containers: For mixing soil samples and solutions.
- Gloves: To protect your hands.
- Small Trowel or Garden Spade: For collecting soil samples.
These tools are readily available at most garden centers and online retailers. The method you choose will influence the specific tools you need.
Methods for Checking Soil Ph
There are several methods you can use to check your soil pH. Each has its pros and cons, from simplicity to accuracy. Let’s explore the most common options:
1. Using a Soil Ph Meter
Soil pH meters are a popular choice for their ease of use and quick results. They typically have a probe that you insert directly into the soil. There are two main types: digital and analog. Digital meters usually provide more accurate readings.
- Prepare the Soil: Clear away any surface debris (leaves, grass clippings) from the area you want to test. Moisten the soil slightly if it’s dry.
- Insert the Probe: Insert the probe of the pH meter into the soil to the depth recommended by the manufacturer. Make sure the probe is clean.
- Wait for the Reading: Allow the meter to settle for the recommended time (usually a few seconds to a minute).
- Record the Result: Note the pH reading displayed on the meter.
- Clean the Probe: After use, clean the probe with water and a soft cloth.
Pros: Quick, easy to use, and provides instant results. Often relatively inexpensive.
Cons: Can be less accurate than other methods. The probe may need regular calibration.
2. Using a Soil Test Kit
Soil test kits provide a more thorough analysis, including pH and often other essential nutrients. These kits come in various forms, including liquid and digital versions.
- Collect Soil Samples: Collect soil samples from several locations in your garden. Mix them together in a clean container to get a representative sample.
- Prepare the Sample: Follow the kit’s instructions for preparing the soil sample. This typically involves mixing the soil with distilled water.
- Add Reagents: Add the chemical reagents (if using a liquid kit) or insert the sensor (if using a digital kit) to the soil-water mixture.
- Wait for the Reaction: Wait for the specified time for the chemical reaction to occur or for the digital meter to display the results.
- Compare the Result: Compare the color change (liquid kit) or the reading (digital kit) to the chart provided in the kit to determine the pH.
Pros: Relatively inexpensive, easy to use, and often includes information about other nutrients.
Cons: Can be less accurate than professional lab tests. Liquid kits can be messy. (See Also: How to Apply Soil Drench Insecticide: A Step-by-Step Guide for Pest Control)
3. Using the Baking Soda and Vinegar Test (diy Method)
This is a simple, inexpensive, but less precise method to get a general idea of your soil’s pH. It’s a quick way to determine if your soil is likely acidic or alkaline.
- Collect Soil Samples: Take soil samples from different areas of your garden.
- Vinegar Test: Place a small amount of soil in a container. Add a half-cup of vinegar. If the soil fizzes, it’s likely alkaline (pH above 7).
- Baking Soda Test: Place a separate sample of soil in another container. Add distilled water until the soil is muddy. Add a half-cup of baking soda. If the soil fizzes, it’s likely acidic (pH below 7).
Pros: Very inexpensive and easy to do.
Cons: Not very accurate. Only provides a general indication of acidity or alkalinity.
4. Sending a Soil Sample to a Laboratory
For the most accurate and comprehensive analysis, consider sending a soil sample to a professional soil testing laboratory. They can provide detailed reports on pH, nutrient levels, and other important soil properties.
- Collect Soil Samples: Collect soil samples from various locations in your garden, following the lab’s instructions.
- Package and Ship: Package the soil samples according to the lab’s instructions and ship them to the lab.
- Receive the Report: The lab will send you a detailed report with the results and recommendations.
Pros: Most accurate and provides the most comprehensive information.
Cons: The most expensive option and requires waiting for results.
Step-by-Step Guide: How to Check Soil Ph with a Soil Ph Meter
Let’s focus on the most common and convenient method: using a soil pH meter. Here’s a detailed, step-by-step guide:
- Gather Your Supplies: You’ll need a soil pH meter, distilled water, a small trowel or garden spade, and gloves.
- Prepare the Testing Area: Choose the areas in your garden you want to test. Clear away any surface debris, such as leaves or grass clippings.
- Moisten the Soil (If Necessary): If the soil is dry, gently moisten it with distilled water. The soil should be damp, but not soaking wet. This helps the meter function properly.
- Insert the Probe: Insert the probe of the soil pH meter into the soil. Push it in to the depth recommended by the manufacturer, typically around 2-4 inches. Ensure the probe is clean.
- Wait for the Reading: Allow the meter to sit in the soil for the recommended time, usually a few seconds to a minute. Refer to your meter’s instructions.
- Read the pH Level: Observe the reading on the meter’s display. This is your soil’s pH level.
- Record the Results: Note the pH reading and the location where you took the sample. This will help you track changes over time.
- Repeat the Process: Repeat the process in several locations throughout your garden to get a good understanding of the overall pH.
- Clean the Probe: After each use, clean the probe with water and a soft cloth to remove any soil particles.
- Calibrate the Meter (If Necessary): Some meters require periodic calibration. Follow the manufacturer’s instructions for calibration.
By following these steps, you can easily and accurately check your soil’s pH using a soil pH meter.
Interpreting Your Soil Ph Results
Once you’ve checked your soil’s pH, the next step is to understand what the results mean. Here’s a breakdown of the pH scale and what it implies for your garden:
- pH below 6.0 (Acidic): This indicates acidic soil. Some plants, like blueberries and azaleas, thrive in acidic conditions. However, if you’re growing plants that prefer a more neutral pH, you may need to amend your soil to raise the pH.
- pH 6.0 – 7.0 (Neutral to Slightly Acidic): This is the ideal range for many plants, especially vegetables and general garden plants. Most nutrients are readily available in this range.
- pH 7.0 (Neutral): This is considered neutral.
- pH 7.0 – 8.0 (Alkaline): This indicates alkaline soil. High pH can make some nutrients less available to plants. You may need to amend your soil to lower the pH.
- pH above 8.0 (Highly Alkaline): This is a very alkaline soil. Amending the soil is usually necessary to improve plant growth.
Important Note: Always consider the specific pH requirements of the plants you are growing when interpreting your results.
Adjusting Soil Ph: What to Do After Testing
If your soil pH is not within the ideal range for your plants, you can adjust it using various amendments. Here’s a general guide:
Raising Soil Ph (making Soil Less Acidic)
If your soil is too acidic (low pH), you’ll need to add materials that increase alkalinity.
- Lime (Calcium Carbonate or Dolomitic Lime): This is the most common and effective way to raise pH. Dolomitic lime also adds magnesium. Apply lime based on the soil test recommendations.
- Wood Ash: Wood ash from a fireplace or wood stove can also raise pH, but use it in moderation as it can also add excessive potassium.
How to Apply Lime:
- Test Your Soil: Before applying lime, always test your soil to determine the current pH.
- Calculate the Amount: Follow the soil test recommendations for the amount of lime to apply.
- Spread Evenly: Spread the lime evenly over the soil surface.
- Incorporate into the Soil: Work the lime into the soil to a depth of 6-8 inches. This helps it react with the soil and raise the pH more effectively.
- Water Well: Water the soil thoroughly after application.
- Re-test: Wait several weeks and re-test the soil pH to see the results.
Lowering Soil Ph (making Soil More Acidic)
If your soil is too alkaline (high pH), you’ll need to add materials that increase acidity.
- Sulfur: This is a slow-acting amendment that lowers pH.
- Aluminum Sulfate: Provides a quick fix for lowering pH, but can be harmful in high concentrations.
- Sphagnum Peat Moss: Can also add acidity, but it breaks down slowly.
How to Apply Sulfur:
- Test Your Soil: Before applying sulfur, always test your soil to determine the current pH.
- Calculate the Amount: Follow the soil test recommendations for the amount of sulfur to apply.
- Spread Evenly: Spread the sulfur evenly over the soil surface.
- Incorporate into the Soil: Work the sulfur into the soil to a depth of 6-8 inches. This helps it react with the soil and lower the pH more effectively.
- Water Well: Water the soil thoroughly after application.
- Re-test: Wait several weeks and re-test the soil pH to see the results.
Important Considerations: (See Also: How to Measure Ppm in Soil: A Complete Guide for Accurate Results)
- Amendments Take Time: It takes time for soil amendments to change the pH. Be patient and re-test your soil periodically.
- Avoid Over-Amending: Adding too much of any amendment can be harmful to your plants. Always follow soil test recommendations.
- Organic Matter: Adding organic matter, like compost, can help buffer soil pH and improve overall soil health.
Troubleshooting Common Soil Ph Problems
Even with the best intentions, you might encounter some challenges when dealing with soil pH. Here are some common problems and how to address them:
1. Inaccurate Readings
Problem: You’re getting inconsistent or inaccurate pH readings.
Solutions:
- Calibrate Your Meter: If using a pH meter, make sure it’s calibrated according to the manufacturer’s instructions. Calibration ensures accurate readings.
- Clean the Probe: Ensure the probe of your meter is clean and free of soil particles before each use.
- Use Distilled Water: Always use distilled water when mixing soil samples or rinsing the probe, as tap water can affect the readings.
- Test Multiple Locations: Test multiple locations in your garden to get a representative sample of the overall pH.
- Consider Lab Testing: If you’re consistently getting questionable results, consider sending a soil sample to a professional lab for a more accurate analysis.
2. Slow Ph Changes
Problem: You’ve amended your soil, but the pH isn’t changing as quickly as you’d like.
Solutions:
- Give it Time: Soil amendments take time to work. It may take several weeks or even months for the pH to change significantly.
- Incorporate Thoroughly: Make sure you’ve thoroughly incorporated the amendment into the soil. This helps it react with the soil and change the pH more effectively.
- Water Properly: Water the soil thoroughly after applying the amendment. This helps the amendment react with the soil.
- Repeat Applications: You may need to apply the amendment more than once, especially if your soil pH is far from the desired range.
3. Nutrient Deficiencies
Problem: Your plants are showing signs of nutrient deficiencies, such as yellowing leaves or stunted growth, even after amending the soil.
Solutions:
- Check the pH: Make sure your soil pH is within the ideal range for the plants you’re growing. Incorrect pH can lock up nutrients, making them unavailable to plants.
- Consider a Nutrient Test: If the pH is correct, consider getting a soil test to check for specific nutrient deficiencies.
- Choose the Right Fertilizer: Use a fertilizer that provides the nutrients your plants need. Consider the pH of the fertilizer, as well.
- Improve Drainage: Poor drainage can lead to nutrient deficiencies. Amend your soil with organic matter to improve drainage.
4. Over-Amending
Problem: You’ve added too much of a soil amendment, and your plants are suffering.
Solutions:
- Flush the Soil: Water the soil thoroughly to flush out excess amendments.
- Add Organic Matter: Adding organic matter, such as compost, can help buffer the soil and improve its overall health.
- Monitor Closely: Keep a close eye on your plants and adjust your care practices as needed.
- Consider Lab Testing: If you’re concerned about the effects of over-amending, consider sending a soil sample to a professional lab for analysis.
By addressing these common problems, you can overcome any challenges you encounter and create a thriving garden.
Frequently Asked Questions About Soil Ph
Here are some of the most common questions gardeners have about soil pH:
Q: How often should I check my soil pH?
A: It depends on your garden and the plants you’re growing. Generally, it’s a good idea to check your soil pH at least once a year, or more often if you’re experiencing problems with your plants. Before planting, it’s always a good idea to test.
Q: Can I change my soil pH permanently?
A: It’s not usually possible to permanently change your soil pH, but you can maintain the desired pH range by regularly monitoring and amending the soil as needed. Soil pH can naturally fluctuate over time.
Q: What’s the best time of year to check soil pH? (See Also: How to Prepare Soil for Lavender: The Ultimate Guide for Lush Blooms)
A: Any time is a good time to check your soil pH, but it’s often best to test before planting in the spring or fall. This allows you to make any necessary adjustments before planting your crops.
Q: Can I use tap water to test soil pH?
A: It’s best to use distilled water when testing soil pH, as tap water can contain minerals and chemicals that can affect the readings. If you don’t have distilled water, let the tap water sit out for 24 hours to allow chlorine to dissipate.
Q: What are the benefits of using organic soil amendments?
A: Organic soil amendments, such as compost and manure, can help improve soil structure, drainage, and nutrient retention. They can also help buffer the soil pH and promote healthy microbial activity.
Q: What are the risks of using too much lime?
A: Overuse of lime can raise the soil pH too high, making some nutrients less available to plants. It can also cause other problems, such as nutrient imbalances and poor plant growth.
Q: How do I know if my soil is compacted?
A: Compacted soil is dense and lacks air spaces, making it difficult for roots to grow and for water to drain. Signs of compacted soil include poor water drainage, stunted plant growth, and difficulty inserting a trowel into the soil. You can improve compacted soil by adding organic matter and aerating the soil.
Q: Can I grow different types of plants in the same bed?
A: Yes, you can grow different types of plants in the same bed, but you’ll need to consider their pH requirements. If the plants have different pH preferences, you may need to amend the soil to accommodate the needs of all the plants or separate them and create different pH zones.
Q: How can I improve my soil’s drainage?
A: Improving drainage is crucial for plant health. You can improve drainage by adding organic matter, such as compost, to the soil. You can also create raised beds or amend the soil with materials like perlite or vermiculite.
Final Verdict
Checking your soil’s pH is a fundamental aspect of successful gardening. By understanding the pH level, you can unlock the secrets to thriving plants and bountiful harvests. Armed with the right tools and knowledge, you can ensure your plants receive the optimal nutrient availability they need. Regular soil testing, combined with appropriate amendments, is key to a flourishing garden.
Recommended Products