Orchids, with their exotic blooms and elegant forms, often seem like the domain of expert gardeners. However, with a little understanding, you can cultivate these stunning plants indoors and enjoy their beauty for years to come. The secret lies in understanding their specific needs and providing the right environment. This guide will provide you with the essential knowledge on how to care for an orchid plant inside, transforming you from a novice to a confident orchid enthusiast.
Orchids, unlike many houseplants, are epiphytes in their natural habitat, meaning they grow on other plants, such as trees, rather than in the soil. This unique characteristic influences their watering, potting, and light requirements. By mimicking their natural environment, you can unlock the secrets to successful orchid cultivation. Learn how to provide the right conditions, and you’ll be rewarded with breathtaking flowers.
Understanding Orchid Basics
Before diving into the specifics of how to care for an orchid plant inside, it’s crucial to grasp some fundamental concepts about these fascinating plants. Orchids belong to the family Orchidaceae, one of the largest families of flowering plants. They are incredibly diverse, with thousands of species and countless hybrids, each with its own unique characteristics. Understanding these basics is key to successful orchid care.
Epiphytic Nature
As mentioned earlier, most orchids are epiphytes. This means they naturally grow on other plants, using their roots to cling to the host, primarily for support, and not for absorbing nutrients directly. In their natural environment, orchids thrive in humid, well-ventilated conditions. This epiphytic nature dictates how we approach watering, potting, and the overall environment for indoor orchids.
The roots of epiphytic orchids are adapted to absorb moisture and nutrients from the air and rainwater. They also play a crucial role in photosynthesis. Their unique structure allows them to efficiently absorb water and nutrients while also providing the plant with the necessary oxygen. This understanding is key to replicating their ideal conditions indoors.
Common Orchid Types for Indoor Cultivation
While thousands of orchid species exist, some are better suited for indoor cultivation than others. These orchids are relatively easy to care for and are readily available. Popular choices include:
- Phalaenopsis (Moth Orchid): These are the most popular orchids for beginners, known for their long-lasting blooms and relatively easy care requirements. They thrive in moderate light and require consistent watering.
- Dendrobium: Dendrobiums come in various colors and shapes. They enjoy bright, indirect light and require specific temperature fluctuations to encourage flowering.
- Cymbidium: Cymbidiums are known for their elegant, arching sprays of flowers and are often grown in cooler environments. They need bright light and consistent watering during their growing season.
- Oncidium (Dancing Lady Orchid): These orchids are characterized by their vibrant, spotted flowers that resemble dancing ladies. They prefer bright, indirect light and well-draining potting media.
- Paphiopedilum (Lady Slipper Orchid): These orchids feature unique, pouch-like flowers and prefer low to moderate light. They require consistent moisture and well-draining potting mix.
Answering the Question: ‘what Do Orchids Need to Thrive?’
Orchids have specific needs, and understanding these is critical to their health. They need the right amount of light, water, and humidity. They also require a well-draining potting mix and proper air circulation. By providing these essential elements, you can create a thriving environment for your orchid.
Light Requirements for Orchids
Proper lighting is one of the most critical factors in determining how to care for an orchid plant inside. Orchids, unlike many other houseplants, have specific light needs that vary depending on the species. Insufficient light can prevent flowering, while too much light can scorch the leaves.
Understanding Light Levels
Orchids thrive in varying light intensities. Generally, orchids are categorized based on their light preferences:
- Low Light: Some orchids, like Phalaenopsis, prefer low to moderate light. They do well in east-facing windows or shaded south-facing windows.
- Moderate Light: Dendrobiums and Oncidiums appreciate moderate light. A bright, indirect light source is ideal, such as a north-facing window or a south-facing window with a sheer curtain.
- Bright Light: Cymbidiums require bright light to bloom. A south-facing window with some shading during the hottest part of the day is generally suitable.
Identifying Insufficient and Excessive Light
Observe your orchid for signs of light-related stress. These signs can tell you how to adjust the lighting accordingly. These are key indicators:
- Insufficient Light: Dark green leaves, lack of flowering, and weak growth.
- Excessive Light: Yellowing or reddish leaves, scorched leaf tips, and stunted growth.
If you notice any of these symptoms, adjust the location of your orchid accordingly. Move it to a brighter or shadier spot as needed. Using a sheer curtain can also help to diffuse direct sunlight.
Using Artificial Light
If you lack sufficient natural light, artificial light can be a lifesaver. Fluorescent or LED grow lights are excellent options for orchids. Place the light source 6-12 inches away from the plant, and provide 12-14 hours of light per day. Be mindful of the light intensity and adjust the distance as needed to prevent leaf burn. Monitor your orchid closely to determine if it’s getting enough light.
Watering Your Orchids Correctly
Watering is a crucial aspect of how to care for an orchid plant inside. Overwatering is one of the most common mistakes that orchid owners make. Orchids are epiphytes, and their roots need to dry out between waterings. The frequency of watering depends on the orchid species, the potting medium, the pot size, and the environmental conditions.
Watering Frequency and Techniques
The best way to determine when to water your orchid is by checking the potting medium. The general rule of thumb is to water when the top inch or two of the potting mix is dry. Here are some techniques:
- Water Thoroughly: When you water, do it thoroughly, allowing the water to drain completely from the pot.
- Avoid Standing Water: Never let your orchid sit in standing water, as this can lead to root rot.
- Watering Methods: You can water from the top, allowing water to run through the potting mix, or you can water from the bottom by placing the pot in a saucer of water for 15-30 minutes.
Water Quality and Temperature
The quality of your water matters. Orchids are sensitive to the chemicals found in tap water, such as chlorine and fluoride. The best options are:
- Rainwater: The ideal choice, as it’s naturally soft and free of chemicals.
- Filtered Water: Water filtered through a water filter can remove many harmful substances.
- Tap Water: If you use tap water, let it sit out for 24 hours to allow chlorine to dissipate.
Always use room-temperature water. Cold water can shock the roots, while hot water can damage them.
Signs of Overwatering and Underwatering
Recognizing the signs of overwatering and underwatering is key to successful orchid care. These are key indicators: (See Also: How to Plant Purple Hull Peas Seeds: A Complete Guide)
- Overwatering: Yellowing leaves, mushy roots, and a musty smell.
- Underwatering: Wrinkled leaves, dry potting mix, and stunted growth.
Adjust your watering schedule based on these observations. If you suspect overwatering, allow the potting mix to dry out completely. If you suspect underwatering, increase the frequency of your watering.
Choosing the Right Potting Medium and Pot
The potting medium and pot play a vital role in how to care for an orchid plant inside. The right potting mix provides proper drainage and aeration, while the pot allows for adequate airflow around the roots. Unlike soil-based plants, orchids need a special potting mix.
Potting Mediums
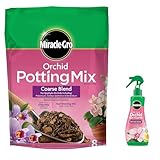
Orchids thrive in well-draining potting mixes that mimic their natural environment. Common choices include:
- Orchid Bark: A popular choice, providing excellent drainage and aeration.
- Sphagnum Moss: Retains moisture well, suitable for orchids that prefer consistent moisture.
- Perlite: Improves drainage and aeration.
- Coconut Husk Chips: A sustainable alternative to bark, offering good drainage.
- Potting Mixes: Many pre-mixed orchid potting mixes are available.
The best potting mix depends on your orchid species and your watering habits. A good mix will provide a balance of drainage, aeration, and moisture retention.
Pot Selection
The type of pot you use is also important. Considerations include:
- Drainage Holes: Essential for preventing root rot.
- Pot Material: Plastic pots are lightweight and retain moisture, while clay pots are porous and allow for better airflow.
- Pot Size: Choose a pot that is slightly larger than the root system.
Clear plastic pots are also advantageous, as they allow you to monitor root health and moisture levels. Repotting is generally needed every 1-2 years.
Humidity and Air Circulation for Orchids
Humidity and air circulation are essential elements in how to care for an orchid plant inside. Orchids thrive in humid environments, similar to their natural habitats. Proper air circulation prevents fungal diseases and promotes healthy growth.
Maintaining Humidity
Most orchids prefer a humidity level of 40-60%. Here’s how to increase humidity:
- Humidity Trays: Place your orchid pot on a tray filled with pebbles and water. As the water evaporates, it increases the humidity around the plant.
- Humidifiers: A humidifier can raise the humidity levels in the room.
- Grouping Plants: Grouping plants together increases humidity.
- Misting: Misting your orchid’s leaves can temporarily increase humidity, but avoid excessive misting, as it can lead to fungal diseases.
Monitor humidity levels with a hygrometer. Adjust your methods as needed to maintain the ideal humidity range.
Ensuring Air Circulation
Good air circulation is crucial for preventing fungal diseases. Here’s how to improve air circulation:
- Good Spacing: Space your orchids apart to allow for airflow.
- Fans: A small fan can help circulate air around the plants.
- Ventilation: Ensure adequate ventilation in the room.
Avoid placing your orchids in areas with stagnant air. Adequate air circulation is key to preventing problems.
Fertilizing Your Orchids
Fertilizing is an important aspect of how to care for an orchid plant inside. Orchids, like all plants, need nutrients to grow and bloom. However, they are sensitive to over-fertilization, so it’s important to follow proper fertilization practices.
Fertilizer Types and Application
Orchids benefit from a balanced fertilizer formulated specifically for orchids. Look for fertilizers with a balanced N-P-K ratio (Nitrogen, Phosphorus, Potassium), such as 20-20-20 or 10-10-10. These are key tips:
- Dilute Fertilizer: Always dilute the fertilizer to half or quarter strength.
- Frequency: Fertilize regularly during the growing season (spring and summer), typically every 2-4 weeks.
- Flush the Potting Mix: Once a month, flush the potting mix with plain water to remove any accumulated salts.
- Types of Fertilizers: Use liquid fertilizers, or slow-release fertilizers.
Signs of Over-Fertilization and Under-Fertilization
Observe your orchid for signs of over-fertilization and under-fertilization. These observations will help you adjust your fertilizer schedule. These are key indicators:
- Over-Fertilization: White crusty deposits on the potting mix, leaf tip burn, and stunted growth.
- Under-Fertilization: Pale leaves, slow growth, and lack of flowering.
Adjust your fertilizer schedule based on these observations. If you suspect over-fertilization, flush the potting mix with plain water. If you suspect under-fertilization, increase the frequency or strength of your fertilizer application.
Repotting Your Orchids
Repotting is a necessary part of how to care for an orchid plant inside. Over time, the potting mix breaks down and loses its ability to drain and aerate the roots. Repotting provides fresh potting mix and allows you to inspect the roots for any problems. (See Also: How to Plant an Herb Garden in a Planter: A Beginner’s Guide)
When to Repot
The frequency of repotting depends on the orchid species and the potting medium. Generally, repot every 1-2 years or when any of the following occur:
- Potting Mix Breakdown: The potting mix has broken down and no longer drains well.
- Root Bound: The roots have filled the pot and are circling the pot.
- Root Rot: You notice signs of root rot.
Repotting is best done after the orchid has finished blooming. Spring is generally the best time for repotting, as this is when the orchid is actively growing.
Repotting Process
Here’s a step-by-step guide to repotting:
- Gather Supplies: Fresh potting mix, a clean pot, and pruning shears.
- Remove the Orchid: Gently remove the orchid from its old pot.
- Inspect the Roots: Trim away any dead or rotten roots.
- Pot the Orchid: Place the orchid in the new pot and fill in the spaces with fresh potting mix.
- Water Lightly: Water the orchid lightly after repotting.
Be gentle when handling the roots. Ensure that the orchid is firmly planted in the pot. Then monitor the plant for any signs of stress after repotting.
Pest and Disease Management
Pest and disease management is a critical aspect of how to care for an orchid plant inside. Orchids can be susceptible to various pests and diseases. Early detection and prompt treatment are essential to prevent the spread of infestations and diseases.
Common Pests
Common orchid pests include:
- Scale: Small, brown, or tan bumps that attach to leaves and stems.
- Mealybugs: White, cottony masses that feed on plant sap.
- Spider Mites: Tiny pests that create webs on the leaves.
- Aphids: Small, soft-bodied insects that suck plant sap.
Inspect your orchids regularly for these pests. Early detection is key to controlling infestations.
Disease Prevention and Treatment
Common orchid diseases include:
- Root Rot: Caused by overwatering and poor drainage.
- Fungal Infections: Result from excessive humidity and poor air circulation.
- Bacterial Infections: Often caused by contaminated tools or water.
Preventative measures include:
- Proper Watering: Avoid overwatering and ensure good drainage.
- Air Circulation: Provide adequate air circulation.
- Sterilize Tools: Sterilize pruning shears and other tools.
Treatments vary depending on the pest or disease. Insecticidal soap, horticultural oil, and fungicides are commonly used. Remove any affected leaves or parts of the plant. Isolate any infected plants to prevent the spread of disease.
Encouraging Orchid Blooms
Encouraging orchid blooms is often the ultimate goal of how to care for an orchid plant inside. Orchids are prized for their beautiful and exotic flowers. Several factors can influence flowering, including light, temperature, and proper care.
Factors Influencing Flowering
Here’s what impacts blooming:
- Light: Provide the correct amount of light for your orchid species.
- Temperature: Many orchids require a temperature drop at night to initiate flowering.
- Watering: Avoid overwatering.
- Fertilizing: Use a balanced fertilizer.
- Potting: Repot as needed.
By providing the right conditions, you can encourage your orchid to bloom. Understand the specific requirements of your orchid species.
Post-Bloom Care
Once your orchid has finished blooming, provide proper care. After the flowers fade, follow these steps:
- Cut the Spike: Cut the flower spike back to the base.
- Reduce Watering: Reduce watering slightly.
- Continue Fertilizing: Continue fertilizing during the growing season.
- Provide Proper Conditions: Maintain the right light, temperature, and humidity.
With proper care, your orchid will rebloom in the following season.
Troubleshooting Common Orchid Problems
Even with the best care, you may encounter problems when learning how to care for an orchid plant inside. Understanding common problems and their solutions can help you quickly address any issues and keep your orchids healthy. (See Also: Expert Guide: How to Prune Copper Leaf Plant for Lush Growth)
Leaf Problems
Leaf problems can indicate various issues. Common leaf problems include:
- Yellowing Leaves: Overwatering, underwatering, or insufficient light.
- Brown Spots: Fungal or bacterial infections.
- Wrinkled Leaves: Underwatering or root problems.
- Leaf Tip Burn: Excessive fertilizer or too much light.
Identify the cause of the problem and adjust your care accordingly. For example, if you notice yellowing leaves, check your watering schedule and light levels. Address the root of the problem to restore the plant to health.
Root Problems
Root problems are often the most serious. Common root problems include:
- Root Rot: Overwatering and poor drainage.
- Dry, Shriveled Roots: Underwatering.
- Lack of New Root Growth: Potting mix issues or poor conditions.
Examine the roots. If you suspect root rot, repot the orchid in fresh potting mix and adjust your watering practices. If the roots are dry, increase your watering frequency. Addressing root issues early is crucial.
Other Common Issues
Other common issues include:
- Failure to Bloom: Insufficient light, improper temperature, or lack of fertilization.
- Pest Infestations: Scale, mealybugs, spider mites, or aphids.
- Fungal Diseases: Poor air circulation or excessive humidity.
Identify the cause of the problem and take appropriate action. Adjust your care practices, treat pests or diseases, and ensure the right conditions for your orchids.
Advanced Orchid Care Tips
Once you’ve mastered the basics of how to care for an orchid plant inside, you can explore advanced techniques to further enhance your orchid-growing skills and enjoy even more spectacular blooms.
Understanding Orchid Hybrids
Orchid hybrids are created by crossing different orchid species. They often combine the best traits of both parent plants, such as flower color, size, and ease of care. Researching the specific needs of your orchid hybrid can help you provide optimal care.
- Research Your Hybrid: Identify the parent species of your hybrid.
- Adapt to its Needs: Determine its preferred light, watering, and temperature requirements.
- Experiment: Observe how your hybrid responds to different care practices.
Understanding orchid hybrids can open up a wider range of possibilities for your orchid collection. It helps you customize your care routine.
Propagating Orchids
Propagating orchids allows you to create new plants from existing ones. This can be a rewarding experience for experienced orchid growers. Propagation methods include:
- Division: Dividing clumps of orchids with multiple growths.
- Keiki Production: Encouraging the growth of keikis (baby plants) on the flower spikes.
- Seed Propagation: A complex process best left to experts.
Propagating orchids takes time and patience, but it can expand your orchid collection. You will need to research the best method for your orchid species.
Creating an Orchid-Friendly Environment
Creating an ideal environment enhances your orchid’s health. You can create an orchid-friendly environment by:
- Using Humidifiers: Increasing humidity levels.
- Installing Grow Lights: Providing sufficient light.
- Choosing Proper Potting Mixes: Selecting the right potting mix for your orchid species.
- Air Circulation: Ensuring good air circulation.
By creating an orchid-friendly environment, you can maximize your chances of success. It will help your orchids thrive.
Conclusion
Learning how to care for an orchid plant inside is a rewarding journey that brings beauty and joy to your home. By understanding their unique needs, from light and watering to potting and fertilization, you can create a thriving environment where these exotic blooms flourish. Remember to observe your orchids regularly, adjust your care practices as needed, and enjoy the stunning flowers they produce. With patience and dedication, you can become an orchid expert and enjoy these beauties for years to come.
Recommended Products

![[Upgraded] DUSPRO Orchid Potting Mix for Repotting with Forest Moss, Pine Bark, Perlite & Pumice, Orchid Bark Potting Mix, Orchid Repotting Soil, Drainage Indoor Potting, Orchid Pot Not Included,1 QRT](https://m.media-amazon.com/images/I/51hlqopu3sL._SL160_.jpg)