Tired of your beautiful plants sitting on the floor? Want to elevate your indoor jungle and add a touch of style to your home decor? Building your own plant stand is a rewarding project that allows you to customize the design to perfectly fit your plants and your personal aesthetic. It’s a fantastic way to showcase your greenery while adding functional beauty to any room.
This comprehensive guide will walk you through every step of the process, from selecting the right materials and tools to the final assembly. We’ll cover various plant stand designs, from simple, minimalist options to more elaborate and decorative styles. You’ll learn the techniques and tips needed to create a plant stand that is both beautiful and built to last.
So, gather your tools and get ready to transform your space with a custom-built plant stand! Whether you’re a seasoned DIY enthusiast or a complete beginner, this guide will empower you to create a stunning piece of furniture that complements your plants and enhances your home’s ambiance. Let’s get started learning how to build plant stand!
Choosing Your Plant Stand Design
The first step in learning how to build plant stand is to decide on the design. The design you choose will dictate the materials, tools, and construction techniques required. Consider the size and weight of your plants, the available space, and your personal style preferences. Do you want a simple, single-tier stand, or something more elaborate with multiple levels? Think about the overall aesthetic you’re aiming for – modern, rustic, minimalist, or something else entirely.
Consider the placement of the plant stand. Is it for indoor or outdoor use? This will influence your material choices. For outdoor stands, you’ll need weather-resistant materials. Also, think about the size of your plants. A small succulent might need a dainty stand, while a large fiddle-leaf fig requires something more robust. Finally, consider your skill level. Some designs are easier to build than others, especially if you are new to DIY projects.
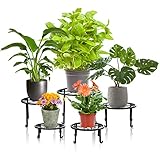
Single-Tier Plant Stands
Single-tier plant stands are the simplest to build and are a great starting point for beginners. They typically consist of a platform supported by legs. The design can be as basic as four legs and a square top, or you can add decorative elements like angled legs or a circular top. These stands are ideal for smaller plants or individual pots. The simplicity of these stands also allows them to blend in seamlessly with various decor styles.
You can adjust the height of the stand to suit your needs and preferences. Consider the height of your plant and the overall aesthetic you want to achieve. Choose the dimensions of the top platform based on the size of your plant pot. This type of stand is often the easiest and most cost-effective option.
Multi-Tier Plant Stands
Multi-tier plant stands offer more display space and can accommodate multiple plants of varying sizes. These designs often involve shelves or platforms stacked on top of each other, supported by a frame. They can be freestanding or wall-mounted. Multi-tier stands are excellent for creating a lush, layered look.
They are particularly useful if you have a collection of plants or want to create a mini-garden indoors. When designing a multi-tier stand, ensure that each shelf can support the weight of the plants and pots you intend to place on it. Consider the spacing between shelves to accommodate plants of different heights. You can also vary the shapes and sizes of the shelves to add visual interest.
Hanging Plant Stands
Hanging plant stands are a great way to add greenery without taking up floor or shelf space. They can be suspended from the ceiling, a porch, or a wall-mounted bracket. These stands often use macrame, rope, or metal chains to hold the plant pots. Hanging stands are perfect for trailing plants and add a bohemian or relaxed vibe to a space.
When building or purchasing a hanging plant stand, always ensure that the support mechanism is strong enough to bear the weight of the plant and pot. Consider the location and ensure there is adequate clearance for the plant to grow without obstruction. Choose materials that are both aesthetically pleasing and durable to withstand the elements, especially if used outdoors.
Corner Plant Stands
Corner plant stands are designed to fit snugly into corners, maximizing space utilization. These stands often have a triangular or L-shaped design, allowing you to display plants in otherwise unused areas. They are a practical solution for smaller spaces or rooms with limited floor space. Corner stands can also add visual interest to a room by drawing attention to an often-overlooked area.
Consider the angle of the corner when designing or purchasing a corner plant stand. Ensure that the stand fits properly and doesn’t protrude too far into the room. You can choose from various materials and styles, from simple wooden shelves to more ornate designs. Think about the overall aesthetic of the space and choose a stand that complements the existing decor.
Gathering Your Materials
Once you’ve decided on a design, it’s time to gather your materials. The materials you choose will impact the look, durability, and cost of your plant stand. Consider factors like weather resistance, weight capacity, and ease of working with the materials. Here’s a breakdown of common materials and their pros and cons:
Wood
Wood is a popular choice for plant stands due to its versatility and natural aesthetic. You can choose from various types of wood, each with its own characteristics. Wood is easily customizable, allowing you to cut, shape, and finish it to your liking. It is also readily available and relatively affordable.
- Pine: Softwood, affordable, easy to work with, but less durable and prone to dents.
- Cedar: Naturally weather-resistant, beautiful grain, ideal for outdoor use, but more expensive.
- Oak: Hardwood, durable, strong, and long-lasting, but more challenging to work with.
- Plywood: Versatile, comes in various thicknesses, can be painted or stained, but edges may need finishing.
Metal
Metal plant stands offer a modern and sleek aesthetic. They are often very durable and can support significant weight. Metal is also resistant to weather and pests, making it suitable for both indoor and outdoor use. However, working with metal requires specialized tools and skills, such as welding or metal bending.
- Steel: Strong and durable, can be welded or bolted, but prone to rust if not treated.
- Aluminum: Lightweight, rust-resistant, easy to work with, but less strong than steel.
- Wrought Iron: Decorative, strong, and durable, but can be heavy and require regular maintenance.
Other Materials
Besides wood and metal, other materials can be used for plant stands, adding unique textures and styles. These materials often require specific construction techniques and may have different levels of durability. (See Also: How to Plant Planter Boxes: A Complete Guide to Success)
- Rope/Macrame: Used for hanging plant stands, adds a bohemian touch, requires strong knots and supports.
- Concrete: Creates a modern and industrial look, durable, but heavy and requires molds and specialized techniques.
- Plastic: Lightweight, affordable, and weather-resistant, but may not be as aesthetically pleasing.
Essential Tools for Building a Plant Stand
Having the right tools is crucial for a successful plant stand project. The tools you need will depend on the design and materials you choose. Here’s a list of essential and optional tools:
Essential Tools
- Measuring Tape: Accurate measurements are essential for a well-built plant stand.
- Pencil: For marking measurements and cutting lines.
- Saw (Hand Saw or Circular Saw): For cutting wood to the desired lengths.
- Drill & Drill Bits: For creating pilot holes and driving screws.
- Screwdriver or Drill with Screwdriver Bit: For driving screws to assemble the stand.
- Sandpaper: For smoothing rough edges and surfaces.
- Safety Glasses: To protect your eyes from debris.
Optional Tools
- Clamps: To hold pieces together while gluing or screwing.
- Level: To ensure the stand is level and stable.
- Miter Saw: For making precise angle cuts (especially useful for angled legs).
- Wood Glue: For added strength and stability.
- Paintbrush or Stain Applicator: For finishing the wood.
- Protective Gloves: To protect your hands.
Step-by-Step Instructions: Building a Simple Wooden Plant Stand
This section provides step-by-step instructions for building a simple, rectangular wooden plant stand. This design is suitable for beginners and can be easily customized to fit your needs. Remember to always prioritize safety and wear appropriate protective gear.
Step 1: Planning and Measurement
Before you begin, carefully plan your plant stand. Measure the diameter of your plant pot and determine the desired height of the stand. Draw a simple sketch of the design, including dimensions for the legs, top platform, and any additional supports. This will help you visualize the finished product and ensure you have all the necessary materials.
Calculate the lengths of wood you’ll need based on your design. For example, for a simple stand with four legs and a rectangular top, you’ll need the length of the legs and the dimensions of the top platform. Make sure to account for any overlap or joinery methods you plan to use. Accurate measurements are critical to the success of your project.
Step 2: Cutting the Wood
Using your measurements, cut the wood pieces to the required lengths. Use a hand saw or circular saw for this step. If you’re using a hand saw, ensure a straight cut by using a guide or a straight edge. For a circular saw, use a clamp to secure the wood and ensure a clean cut.
Pay close attention to the angles of your cuts, especially if you’re making angled legs. If you have a miter saw, it will make this process much easier. After cutting, lightly sand all the cut edges to remove any splinters or rough spots. This will also help with a smoother finish during the painting or staining process.
Step 3: Assembling the Legs
Attach the legs to the top platform. You can use screws, wood glue, or a combination of both. If using screws, pre-drill pilot holes to prevent the wood from splitting. Apply wood glue to the joining surfaces for added strength, then secure the legs with screws.
Ensure that the legs are square and aligned before tightening the screws. Use a level to check that the top platform is level. Clamps can be helpful to hold the pieces in place while the glue dries and the screws are tightened. Wipe away any excess glue with a damp cloth before it dries.
Step 4: Adding the Top Platform
Once the legs are assembled, attach the top platform. Center the platform on top of the legs and secure it with screws. Pre-drill pilot holes to prevent splitting. Make sure the platform is flush with the legs or as per your design.
If you’re using a solid platform, you can simply screw it to the legs from the top or use angled brackets for a cleaner look. For a slatted platform, attach the slats to the legs, ensuring even spacing between them. Double-check all measurements and ensure the platform is securely attached to the legs before moving on to the finishing stage.
Step 5: Finishing and Finishing Touches
Sand the entire plant stand to remove any rough spots or imperfections. Apply a finish of your choice, such as paint, stain, or a clear sealant. Follow the manufacturer’s instructions for the finish you choose. Allow the finish to dry completely before placing your plant on the stand.
Consider adding protective pads to the bottom of the legs to prevent scratches on your floor. You can also add decorative elements, such as trim or decorative screws, to enhance the appearance of your plant stand. Once the finish is dry, place your plant on the stand and enjoy your new creation.
Troubleshooting Common Issues
Building a plant stand may present some challenges. Here are some common issues and how to resolve them:
Uneven Legs
If your plant stand wobbles, the legs may be uneven. Use a level to check the legs and make adjustments. Measure the distance from the top platform to the floor for each leg and trim any legs that are too long. You can also add shims under shorter legs to level the stand.
Another option is to adjust the angle of the legs. This is easier to do before you’ve finished the assembly. Make sure that the level is accurate and that your work surface is also level. If the stand is for outdoor use, ensure that the ground is level.
Splitting Wood
Splitting wood often occurs when driving screws without pre-drilling pilot holes. Always pre-drill pilot holes that are slightly smaller than the screws you are using. If the wood has already split, you can try using wood glue and clamps to repair the crack. (See Also: Planting Winter Gem Boxwood: How Far Apart to Space Them?)
Consider using screws designed for hardwood if you are working with dense wood. Be careful not to overtighten the screws. If the wood is prone to splitting, consider using a different type of wood or a different construction method, such as pocket-hole joinery.
Wobbly Joints
Wobbly joints can result from loose screws or inadequate glue. Ensure that screws are tightened securely and that you use enough wood glue. For added strength, consider using corner brackets or reinforcing the joints with additional pieces of wood.
Check the alignment of the pieces before tightening the screws. If the joints are still wobbly, you may need to disassemble the stand and rebuild it, paying closer attention to the alignment and the application of glue. Consider using clamps while the glue dries.
Safety Tips for Building a Plant Stand
Safety should always be your top priority when building a plant stand. Follow these safety tips to prevent injuries:
Eye Protection
Always wear safety glasses or goggles to protect your eyes from flying debris. This is especially important when sawing, drilling, or sanding wood. Make sure your safety glasses fit properly and provide adequate coverage.
If you wear prescription glasses, consider wearing safety glasses that fit over them. Regularly inspect your safety glasses for any damage and replace them if necessary. Choose safety glasses that meet relevant safety standards.
Hand Protection
Wear work gloves to protect your hands from splinters, cuts, and abrasions. Choose gloves that fit well and allow you to maintain a good grip on your tools. Consider using cut-resistant gloves when working with sharp tools.
Inspect your gloves regularly for any damage. Replace them if they are torn or worn. Always be mindful of your hands when working with sharp tools, and avoid placing your hands in the path of a moving saw blade or drill bit.
Proper Ventilation
Work in a well-ventilated area, especially when using paints, stains, or wood finishes. These products can release harmful fumes. If working indoors, open windows and doors to ensure adequate airflow.
Consider using a respirator or a dust mask to protect yourself from inhaling dust and fumes. Read and follow the manufacturer’s instructions for the products you are using. If you experience any symptoms such as dizziness or headaches, stop working immediately and move to a well-ventilated area.
Tool Safety
Always follow the manufacturer’s instructions for using power tools. Never operate a power tool if you are tired or under the influence of drugs or alcohol. Keep your work area clean and free of clutter.
Unplug power tools when not in use or when changing blades or bits. Use the correct blade or bit for the material you are cutting or drilling. Always keep your hands and fingers away from moving parts. If you are unfamiliar with a power tool, seek guidance from someone with experience or watch instructional videos before using it.
Finishing Your Plant Stand
The finishing process not only enhances the appearance of your plant stand but also protects it from the elements and wear and tear. The choice of finish depends on the desired look and the type of wood used. Here’s a look at some popular finishing options:
Paint
Painting is a versatile option that allows you to customize the color of your plant stand to match your decor. You can use various types of paint, including latex paint, acrylic paint, and enamel paint. Before painting, sand the wood to create a smooth surface.
Apply a primer to improve paint adhesion and provide a uniform base. Apply multiple thin coats of paint, allowing each coat to dry completely before applying the next. Consider using a paint sprayer for a smoother finish. Choose a paint that is suitable for indoor or outdoor use, depending on where you will place your plant stand.
Stain
Staining enhances the natural beauty of the wood grain. Stains come in various colors and can be used to create a rich, warm look. Before staining, sand the wood and remove any dust. Apply the stain evenly, following the manufacturer’s instructions. (See Also: Unlocking Growth: How Does Calcium Affect Plant Growth?)
Wipe away any excess stain with a clean cloth. Allow the stain to dry completely before applying a sealant or topcoat. Choose a stain that is suitable for the type of wood you are using. Consider applying multiple coats of stain for a deeper color. Protect the stained surface with a clear sealant for added durability.
Varnish and Sealants
Varnish and sealants provide a protective layer that shields the wood from moisture, scratches, and UV damage. They come in various finishes, including glossy, semi-gloss, and matte. Sand the wood before applying varnish or sealant.
Apply multiple thin coats, allowing each coat to dry completely before applying the next. Sand lightly between coats for a smoother finish. Choose a varnish or sealant that is suitable for the intended use of the plant stand, such as a marine-grade varnish for outdoor use. Consider using a clear sealant to preserve the natural color of the wood.
Maintaining Your Plant Stand
Regular maintenance will help keep your plant stand looking its best and extend its lifespan. Here are some tips for maintaining your plant stand:
Cleaning
Regularly dust and wipe down your plant stand with a damp cloth to remove dirt and debris. Avoid using harsh chemicals or abrasive cleaners that can damage the finish. For stubborn stains, use a mild soap and water solution.
If the plant stand is outdoors, clean it more frequently to remove dirt, mildew, and other environmental contaminants. Protect the plant stand from direct sunlight and rain to prevent fading and deterioration. Consider applying a protective sealant or wax to the finish to make cleaning easier.
Protecting From Moisture
Protect your plant stand from excessive moisture, which can cause the wood to warp or rot. Use saucers or trays under plant pots to catch water runoff. Wipe up any spills immediately.
If the plant stand is outdoors, consider using a waterproof sealant to protect the wood from rain and snow. Avoid placing the plant stand in areas where it is likely to be exposed to standing water. Regularly inspect the plant stand for any signs of moisture damage, such as swelling or discoloration.
Repairs and Refinishing
Address any minor repairs promptly to prevent them from becoming major problems. Tighten loose screws and replace any damaged parts. If the finish is scratched or worn, consider refinishing the plant stand.
Sand down the old finish and apply a new coat of paint, stain, or varnish. For more extensive damage, you may need to consult a professional. Regular maintenance and prompt repairs will help ensure that your plant stand remains a beautiful and functional part of your home for years to come.
Frequently Asked Questions (paa)
Here are answers to some of the most common questions about building plant stands:
What Kind of Wood Is Best for a Plant Stand?
The best type of wood for a plant stand depends on your needs. For outdoor use, cedar and redwood are excellent choices due to their natural weather resistance. Pine is a budget-friendly option, while oak and other hardwoods offer durability and a premium look. Plywood is a versatile option for various designs.
How Do You Make a Plant Stand Sturdy?
To make a plant stand sturdy, use strong materials and secure joints. Pre-drill pilot holes before driving screws to prevent splitting. Apply wood glue to the joints for added strength. Consider using corner brackets or reinforcing the joints with additional wood pieces. Ensure the legs are properly attached and that the stand is level.
How Much Weight Can a Plant Stand Hold?
The weight capacity of a plant stand depends on the materials used, the design, and the construction. A simple wooden stand can typically hold a moderate amount of weight, while a stand made of metal or reinforced wood can hold considerably more. Always consider the weight of your plants and pots when designing or purchasing a plant stand.
How Do You Finish a Plant Stand?
Finishing a plant stand involves sanding the wood, applying a primer (if painting), and then applying a finish such as paint, stain, varnish, or sealant. Sanding the wood creates a smooth surface for the finish to adhere to. The finish protects the wood from moisture, scratches, and UV damage. Follow the manufacturer’s instructions for the finish you choose.
Recommended Products