So, you’re looking to build a storage shed door? Great! You’ve come to the right place. Building your own shed door can seem daunting, but with the right guidance, it’s a manageable project that can save you money and give you a sense of accomplishment. Plus, you get a custom-built door that perfectly fits your shed’s dimensions and style.
This guide will walk you through every step of the process, from planning and gathering materials to the final installation. We’ll cover different door types, material choices, and essential tools. We will also address common problems and offer solutions. Ready to roll up your sleeves and get started? Let’s dive in and learn how to build a storage shed door!
Planning Your Storage Shed Door
Before you even think about picking up a saw, careful planning is crucial. A well-planned project saves time, money, and frustration. Let’s cover the key aspects of planning your storage shed door.
1. Determine the Door Type
The type of door you choose will depend on your shed’s size, your personal preference, and the available space. Here are some common options:
- Single Door: This is the simplest and often the most cost-effective option, suitable for smaller sheds.
- Double Doors (Dutch Doors): Offer wider access and can add a charming aesthetic. Dutch doors can be very practical!
- Sliding Door: Ideal if you have limited space in front of your shed.
- Overhead Door: Commonly used for garages, but might be overkill for a storage shed.
2. Measure and Calculate
Accurate measurements are non-negotiable. Measure the opening of your shed frame where the door will be installed. Take these measurements:
- Width: Measure the distance from the inside of one stud to the inside of the other.
- Height: Measure from the top of the opening to the floor.
Remember to account for the thickness of the door frame and any desired overlap. For example, if you want your door to overlap the opening by 1 inch on each side, add 2 inches to the width measurement.
People Also Ask: How much should a shed door overlap the opening?
A good rule of thumb is to have the door overlap the opening by at least 1 inch on all sides. This provides a good seal and prevents water from entering the shed.
3. Choose Your Materials
The materials you select will impact the door’s durability, appearance, and cost. Here are some common choices:
- Wood: A classic choice, offering a natural look and ease of customization. Popular wood types include pine, cedar, and redwood. Consider pressure-treated lumber for ground contact.
- Plywood: A cost-effective option, often used for the door’s panel. Exterior-grade plywood is recommended for weather resistance.
- Metal: Steel or aluminum doors are durable and low-maintenance, but can be more expensive.
- Composite Materials: Offer good weather resistance and low maintenance but can be more expensive than wood.
4. Create a Material List
Based on your chosen door type and materials, create a detailed material list. This should include:
- Lumber for the door frame (e.g., 2x4s)
- Plywood or other panel material
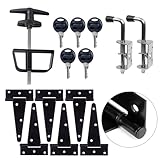
- Hinges
- Door handle or latch
- Screws and nails (consider exterior-grade for weather resistance)
- Weatherstripping
- Primer and paint or stain (if desired)
Building a Simple Wooden Shed Door: Step-by-Step
Let’s walk through the process of building a straightforward wooden shed door. This guide assumes you have basic woodworking skills and access to essential tools. Always prioritize safety!
1. Gather Your Tools
Before you begin, gather the necessary tools. This will streamline the process and prevent interruptions. Here’s a list of essential tools:
- Measuring Tape: Accurate measurements are critical!
- Safety Glasses: Protect your eyes from debris.
- Work Gloves: For hand protection.
- Circular Saw or Hand Saw: For cutting lumber.
- Miter Saw (Optional): Makes accurate angled cuts easier.
- Drill/Driver: For drilling pilot holes and driving screws.
- Screwdriver: For installing hardware.
- Level: To ensure the door is plumb.
- Clamps: To hold pieces together while assembling.
- Sandpaper: For smoothing rough edges.
- Hammer: For nailing (if using nails).
- Paintbrush or Roller: For applying primer, paint, or stain.
2. Cut the Frame Pieces
Cut the lumber for your door frame. The frame usually consists of four pieces:
- Two Vertical Stiles: These are the side pieces. Their length should be the door height minus the thickness of the top and bottom rails.
- Two Horizontal Rails: These are the top and bottom pieces. Their length should be the door width minus twice the thickness of the stiles.
Use a circular saw or miter saw to make clean, straight cuts. Ensure the cuts are square (90 degrees) for proper alignment.
3. Assemble the Door Frame
Lay the frame pieces on a flat surface. Use clamps to hold the pieces together. Apply wood glue to the joints for added strength (optional, but recommended). Drive screws through the rails into the stiles to secure the frame. Alternatively, you can use nails, but screws generally provide a stronger joint. (See Also: How to Build a Shed Under Your Deck: A Complete Diy Guide)
People Also Ask: What’s the best way to join the corners of a door frame?
The best method depends on your skill and the desired strength. Screws, along with wood glue, offer a strong and reliable joint. You can also use mortise and tenon joints for a traditional and very strong connection, but this requires more advanced woodworking skills.
4. Attach the Door Panel
Cut the plywood or panel material to the exact size of the door frame. Center the panel within the frame. Secure the panel to the frame using screws or nails. Space the fasteners evenly around the perimeter of the panel. Consider using a small gap between the panel and the frame to allow for expansion and contraction due to weather changes.
5. Sand and Finish
Sand all surfaces of the door to remove any rough edges or splinters. Apply primer, paint, or stain according to the manufacturer’s instructions. Allow each coat to dry completely before applying the next. This will protect the wood from the elements and enhance the door’s appearance.
6. Install the Hinges
Position the door in the shed opening. Use shims to ensure the door is level and has even gaps around the frame. Mark the locations for the hinges on both the door and the shed frame. Attach the hinges to the door first, then to the shed frame. Ensure the hinges are aligned properly for smooth operation.
7. Install the Door Hardware
Install the door handle or latch. Follow the manufacturer’s instructions. Ensure the hardware functions smoothly and securely. Check the alignment of the latch and strike plate to ensure the door closes properly.
8. Add Weatherstripping
Apply weatherstripping around the door frame to create a weather-tight seal. This will prevent drafts and water from entering the shed. Choose weatherstripping that is appropriate for your door type and the climate in your area.
Building a Double Door
Building double doors for your shed requires a few adjustments to the steps outlined above. Here’s a breakdown:
1. Divide and Conquer
Measure the width of your shed opening. Divide that width by two. This will be the width of each door. Ensure each door has a small gap (e.g., 1/8 inch) between them to allow for expansion and contraction.
2. Build Two Doors
Follow the steps above to build two individual doors, using the calculated width for each. Ensure the doors are identical in size and construction.
3. Install the Doors
Install the doors using hinges, ensuring they are aligned correctly. You may need to add a center post or a stop to the shed frame for the doors to meet and latch properly.
4. Add Hardware
Install the necessary hardware, including a latch or bolt system to secure the doors when closed. Consider a drop rod to secure the doors from the top and bottom.
Building a Sliding Door
Sliding doors offer a space-saving alternative. Here’s how to approach a sliding door project:
1. Design and Planning
Decide on the sliding mechanism. You can use a track system or a roller system. Determine the size and weight of the door. The door needs to be wide enough to cover the opening when closed and slide far enough to allow access. Plan for the track or rollers’ mounting. (See Also: How to Paint a Metal Storage Shed: The Ultimate Guide (diy Success!))
2. Build the Door Panel
Construct a door panel from wood, plywood, or other materials. The door should be strong enough to withstand the elements and the sliding mechanism’s weight.
3. Install the Track or Rollers
Mount the track or rollers above the door opening. Ensure the track is level. Attach the rollers to the top of the door or use the appropriate hardware for the track system.
4. Hang the Door
Carefully lift the door and place the rollers onto the track. Test the sliding action. Adjust the track or rollers as needed for smooth operation.
5. Add Hardware
Install a handle or pull to operate the door. Consider a latch or bolt system to secure the door in the closed position.
Troubleshooting Common Problems
Even with careful planning, you might encounter some challenges. Here are some common problems and solutions:
- Door Doesn’t Close Properly: Check the hinges for alignment. Adjust the strike plate or latch. Add shims to the door frame to ensure a proper fit.
- Door Sticks: Sand down any rough edges. Check for warping in the wood. Ensure the hinges are properly lubricated.
- Water Leaks: Add or replace weatherstripping. Check for gaps around the door frame. Caulk any cracks or openings.
- Door Sags: Reinforce the door frame. Use heavier-duty hinges. Add a diagonal brace to the door itself.
Advanced Techniques and Considerations
Once you’ve mastered the basics, you can explore advanced techniques to enhance your shed door project.
- Mortise and Tenon Joints: For stronger door frames.
- Routed Panels: For decorative designs.
- Insulation: If you plan to use the shed for climate-controlled storage.
- Custom Hardware: For a unique look.
- Security Features: Consider adding a deadbolt lock or reinforced hinges for added security.
Safety First!
Woodworking can be dangerous, so safety should always be your top priority. Always wear safety glasses to protect your eyes. Use work gloves to protect your hands. Use the proper tools for the job and follow the manufacturer’s instructions. Be aware of your surroundings and avoid distractions. If you’re unsure about any step, consult a professional.
Maintaining Your Shed Door
Regular maintenance will extend the life of your shed door. Here are some tips:
- Inspect Regularly: Check for any signs of damage, such as cracks, warping, or loose hardware.
- Clean Regularly: Remove dirt and debris from the door and frame.
- Lubricate Hinges: Apply a lubricant to the hinges to ensure smooth operation.
- Repaint or Restain: Refinish the door as needed to protect it from the elements.
- Check Weatherstripping: Replace weatherstripping if it is damaged or worn.
Frequently Asked Questions (faq)
Here are some of the most common questions people ask about building shed doors:
Q: What type of wood is best for a shed door?
A: Pressure-treated lumber is an excellent choice for ground contact. Cedar and redwood are naturally weather-resistant. Pine is a more affordable option.
Q: How thick should a shed door be?
A: A door thickness of 1.5 to 2 inches is generally sufficient for a shed door.
Q: Can I use pre-hung doors for a shed? (See Also: How Much Skin Do We Shed in a Day? The Surprising Truth!)
A: Yes, pre-hung doors can save time and effort, especially if you’re not comfortable building a door from scratch. However, you’ll need to ensure the pre-hung door fits your shed opening and is appropriate for exterior use.
Q: How do I prevent my shed door from warping?
A: Use quality materials, ensure proper construction, and apply a good finish. Consider adding a diagonal brace to the door frame for extra support.
Q: What are the best hinges for a shed door?
A: Choose hinges that are rated for outdoor use and can handle the weight of the door. Heavy-duty hinges are recommended, especially for larger doors. Consider using three hinges per door.
Q: How do I calculate the size of a shed door?
A: Measure the shed opening’s width and height. Subtract the desired overlap from the width. The door height is typically the same as the opening’s height.
Q: What type of paint should I use on a shed door?
A: Use exterior-grade paint that is specifically designed for wood. Consider using a primer before applying the paint.
Q: How can I improve the security of my shed door?
A: Install a deadbolt lock, use heavy-duty hinges, and consider adding a security bar or a hasp and padlock.
Q: Where can I buy materials for my shed door?
A: You can find materials at your local hardware store or home improvement center.
Final Verdict
Building a storage shed door is a rewarding project that can enhance the functionality and appearance of your shed. By following these steps and taking the time to plan, you can create a durable and attractive door that meets your specific needs. Remember to prioritize safety and enjoy the process. With a little effort, you’ll have a custom-built door to protect your belongings.
Recommended Products