So, you’re dreaming of a garden shed – a place to store your tools, potting soil, and maybe even a cozy nook for enjoying your garden. Fantastic! But before you can start envisioning that perfect space, you need a solid foundation. The base for your garden shed is arguably the most crucial step in the entire construction process. A poorly constructed base can lead to all sorts of problems down the line: uneven floors, water damage, and even the premature deterioration of your shed.
Don’t worry, building a garden shed base isn’t as daunting as it sounds. We’ll walk you through the entire process, from planning and preparation to the final touches. This guide will help you understand the different base options, the materials you’ll need, and the step-by-step instructions to get the job done right. Ready to get started? Let’s build!
Choosing the Right Base for Your Garden Shed
The type of base you choose for your garden shed depends on several factors, including your budget, the size of your shed, the local climate, and the ground conditions. Let’s explore the most common options:
1. Concrete Slab
Concrete slabs are a popular choice for their durability and stability. They provide a level, solid surface that can withstand heavy loads and resist moisture. However, they’re also the most labor-intensive and expensive option. You’ll need to excavate the area, build forms, pour concrete, and allow it to cure. Also, concrete is prone to cracking, especially in areas with freeze-thaw cycles. This option is excellent if you want a long-lasting, low-maintenance base.
Pros:
- Extremely durable and long-lasting.
- Provides a level and stable surface.
- Resistant to moisture and pests.
- Can support heavy loads.
Cons:
- Most expensive option.
- Requires significant labor and expertise.
- Susceptible to cracking.
- Can be difficult to remove or relocate.
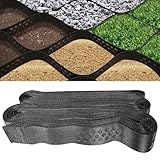
2. Gravel Base
A gravel base is a more affordable and DIY-friendly option. It involves creating a compacted layer of gravel that allows for drainage and prevents water from pooling under the shed. Gravel bases are less permanent than concrete, making them a good choice if you anticipate moving your shed in the future. They also provide excellent drainage, which helps prevent moisture buildup. However, gravel bases can shift over time, requiring periodic maintenance to keep them level.
Pros: (See Also: How to Heat a Shed Without Power: 10 Effective & Cozy Solutions!)
- More affordable than concrete.
- Relatively easy to install.
- Provides excellent drainage.
- Can be easily adjusted or expanded.
Cons:
- Requires periodic maintenance to maintain level.
- Not as stable as concrete.
- May not be suitable for very heavy sheds.
- Can be susceptible to weed growth.
3. Paver Base
Pavers offer a stylish and relatively easy-to-install alternative to concrete. They provide a level surface and come in various shapes, sizes, and materials, allowing you to customize the look of your shed base. Installation typically involves preparing a compacted base of gravel or crushed stone and then laying the pavers on top. While pavers are generally durable, they can shift over time, and they may not be ideal for extremely heavy sheds.
Pros:
- Aesthetically pleasing and customizable.
- Relatively easy to install.
- Provides a level surface.
- Durable and long-lasting.
Cons:
- Can be more expensive than gravel.
- May require periodic leveling.
- Not ideal for extremely heavy sheds.
4. Wooden Frame Base
A wooden frame base is a simple and cost-effective option, particularly suitable for smaller sheds or those built on slightly uneven ground. It involves constructing a wooden frame, typically using pressure-treated lumber, and then covering it with a solid floor, such as plywood or OSB. The frame raises the shed off the ground, helping to prevent moisture damage. However, wooden bases are susceptible to rot and insect infestation, especially if not properly treated and maintained. They also require careful leveling during installation.
Pros:
- Easiest to build.
- Most cost-effective.
- Can be adjusted to account for uneven ground.
Cons: (See Also: How to Erect a Garden Shed: A Step-by-Step Guide for Diyers)
- Susceptible to rot and insect infestation.
- Requires regular maintenance.
- May not be as durable as other options.
5. Plastic Shed Base
Plastic shed bases are a modern alternative, often made from recycled plastic. They are lightweight, easy to install, and provide excellent drainage. They typically consist of interlocking grids that are filled with gravel or crushed stone. Plastic bases are a good choice if you want a low-maintenance, eco-friendly option. However, they might not be suitable for very heavy sheds or areas with high winds.
Pros:
- Lightweight and easy to install.
- Provides excellent drainage.
- Made from recycled materials.
- Low maintenance.
Cons:
- May not be suitable for very heavy sheds.
- Can be affected by high winds.
- Aesthetically not as pleasing to some.
Materials You’ll Need
The materials you’ll need will vary depending on the type of base you choose. However, here’s a general list of items you’ll likely require:
- Measuring tape: For accurate measurements.
- Level: To ensure a level base.
- Shovel and pickaxe: For excavation (if required).
- Wheelbarrow: For transporting materials.
- Tamper: To compact the soil or gravel.
- Construction adhesive: For securing materials.
- Safety glasses and work gloves: For protection.
- Lumber (pressure-treated): For wooden frame bases.
- Gravel or crushed stone: For gravel and paver bases.
- Pavers: For paver bases.
- Concrete mix: For concrete slab bases.
- Forms and stakes: For concrete slab bases.
- Plywood or OSB: For wooden frame bases.
- Plastic shed base grids: For plastic shed bases.
- Weed barrier fabric: To prevent weed growth (optional).
Step-by-Step Guide to Building a Gravel Base
Let’s walk through the steps to build a gravel base, as it’s a popular and manageable option for DIYers.
- Planning and Site Preparation: First, choose the location for your shed and mark the perimeter. Ensure the area is clear of any obstructions like trees or underground utilities. Use stakes and string to define the exact dimensions of your shed base.
- Excavation: Dig out the area within the marked perimeter. The depth of the excavation will depend on the thickness of your gravel layers. Generally, you’ll want to excavate at least 4-6 inches. Remove any grass, roots, and debris.
- Leveling: Use a level to ensure the excavated area is even. Remove or add soil as needed to achieve a level surface.
- Weed Barrier (Optional): Lay down a weed barrier fabric over the compacted soil. This will help prevent weed growth from beneath your shed. Secure the fabric with landscape staples.
- Base Layer: Add a layer of coarse gravel or crushed stone (about 2-3 inches thick). This layer provides drainage and a solid foundation.
- Compaction: Use a hand tamper or a plate compactor to compact the base layer thoroughly. This is crucial for creating a stable base.
- Top Layer: Add a top layer of finer gravel or crushed stone (about 2-3 inches thick). This will provide a smoother surface for your shed.
- Final Leveling: Double-check the level of the gravel base. Add or remove gravel as needed to ensure it’s perfectly level.
- Installation: Place your shed on the finished gravel base, ensuring it is square and level.
Step-by-Step Guide to Building a Wooden Frame Base
- Planning and Site Preparation: Choose your shed location and mark the perimeter. Clear the area of any obstructions.
- Leveling: Assess the ground. If it’s uneven, you’ll need to level it by adding or removing soil.
- Frame Construction: Cut pressure-treated lumber to the desired dimensions of your shed base. Assemble the frame using screws or nails, ensuring the corners are square.
- Leveling the Frame: Place the frame on the prepared ground and use shims to level it. Ensure the frame is level in all directions.
- Securing the Frame: Secure the frame to the ground. This can be done by driving stakes into the ground through the frame or by using concrete anchors if you are placing the base on a concrete pad.
- Adding the Floor: Cut plywood or OSB to fit inside the frame. Attach the floor to the frame using screws.
- Finishing Touches: Apply a sealant to the edges of the plywood or OSB to protect it from moisture.
Frequently Asked Questions (people Also Ask)
How Much Does It Cost to Build a Shed Base?
The cost of building a shed base varies widely depending on the type of base, the size of the shed, and the cost of materials in your area. A gravel base is generally the most affordable option, costing a few hundred dollars. Concrete slabs and paver bases are more expensive, potentially running into the thousands of dollars, especially if you hire a professional. Wooden frame bases fall in between, costing a few hundred dollars depending on the materials used. It’s always best to get quotes from local suppliers and contractors to get an accurate estimate for your specific project.
What Is the Best Material for a Shed Base?
The “best” material depends on your specific needs and circumstances. Concrete offers the most durability and stability, making it ideal for heavy sheds and areas with harsh weather. Gravel is a cost-effective and DIY-friendly option that provides excellent drainage. Pavers offer a balance of aesthetics and functionality. Wooden frame bases are suitable for smaller sheds, while plastic bases are a modern choice. Consider your budget, the size and weight of your shed, the local climate, and your DIY skills when making your decision. (See Also: How to Build a Wood Shed Foundation: A Step-by-Step Guide)
How Thick Should a Gravel Base for a Shed Be?
A gravel base for a shed should typically be 4-6 inches thick. This allows for a 2-3 inch base layer of coarse gravel for drainage and a 2-3 inch top layer of finer gravel for a smooth surface. Proper compaction of each layer is crucial for stability.
Do I Need a Permit to Build a Shed?
Building permits are often required for sheds, especially if they exceed a certain size or if they are permanently attached to the ground. Check with your local building department to determine the specific requirements in your area. Failure to obtain the necessary permits can result in fines or other penalties.
How Do I Prevent Weeds From Growing Under My Shed?
To prevent weed growth under your shed, you can use a weed barrier fabric. Lay the fabric over the compacted soil before adding the gravel or other base material. Overlapping the edges of the fabric and securing it with landscape staples will further enhance its effectiveness. Regular maintenance, such as removing any weeds that do manage to grow, is also important.
How Do I Ensure Proper Drainage for My Shed Base?
Proper drainage is essential for preventing water damage and moisture buildup. A gravel base provides excellent drainage because water can easily flow through the gravel. When building a concrete or paver base, ensure the surrounding ground slopes away from the shed to allow water to run off. Also, consider installing a French drain around the perimeter of the shed to further improve drainage.
Can I Build a Shed Base on a Slope?
Yes, you can build a shed base on a slope, but it requires extra planning and effort. You’ll need to level the area by excavating the high side and building up the low side. A wooden frame base is often a good option for sloping sites because you can adjust the frame to accommodate the uneven ground. Make sure the base is level and stable, and that water can drain away from the shed.
How Do I Maintain My Shed Base?
The maintenance required for your shed base depends on the type of base. Gravel bases require periodic leveling and the removal of any weeds. Concrete and paver bases generally require less maintenance but may need occasional cleaning or repairs. Wooden frame bases require regular inspection for rot and insect damage, and you may need to apply a sealant or wood preservative. Maintaining your shed base will help ensure its longevity and protect your shed from damage.
Tips for a Successful Shed Base
- Measure twice, cut once: Accuracy is key when building your base.
- Compact thoroughly: Proper compaction is crucial for stability, especially for gravel bases.
- Level is the word: A level base is essential for a stable and functional shed.
- Drainage matters: Ensure proper drainage to prevent water damage.
- Check local regulations: Always check for permit requirements before starting your project.
- Consider the future: Think about potential future needs, such as moving the shed or adding a larger one.
- Safety first: Wear appropriate safety gear, including safety glasses and gloves.
- Don’t rush: Take your time and do the job right.
Final Verdict
Building a solid base for your garden shed is an investment that will pay off in the long run. By choosing the right base for your needs, following the step-by-step instructions, and taking your time, you can create a stable and durable foundation for your shed. Remember to prioritize proper drainage, levelness, and local building codes for a successful project. With a little effort, you’ll be enjoying your new garden shed in no time!
Recommended Products