So, you’re thinking about an electric fence? Smart move! They’re a fantastic way to secure your property, protect your livestock, or keep unwanted critters out of your garden. But, let’s be honest, the first question that pops into your head is probably: how much is an electric fence per foot going to cost me?
The price tag can vary quite a bit, depending on a whole bunch of factors. We’ll break down everything you need to know, from the basic components to the installation process, and help you get a handle on the costs involved. We’ll also cover the different types of fences and the specific needs they cater to. Ready to get started?
Alright, let’s dive right in. The cost of an electric fence isn’t a simple ‘per foot’ calculation. There are many things to consider. However, we can break down the major cost components to give you a clearer picture.
Understanding the Key Components and Their Costs
Before we even think about ‘per foot’ costs, let’s look at the individual components that make up an electric fence and their average prices. This will help you understand where your money is going.
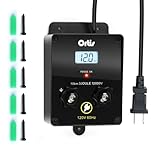
1. The Energizer (fence Charger)
The energizer is the heart of your electric fence. It’s the device that sends the electric pulse through the fence wires. The price of an energizer depends on its output voltage, joule rating (which determines its power), and the length of fence it’s designed to handle. You’ll find energizers for everything from small gardens to large farms.
- Low-impedance energizers: These are generally safer and are best for livestock.
- Joule rating: A higher joule rating means a more powerful energizer, suitable for longer fences and more challenging conditions.
Estimated Cost: $100 – $800+ (depending on power and features).
2. Fence Wire/conductor
This is the physical barrier that delivers the shock. There are several types of fence wire, each with its own pros and cons and price points.
- Steel Wire: Durable and cost-effective, but can rust over time.
- Aluminum Wire: Excellent conductivity, but can be more expensive.
- Polywire/Polyrope/Polytape: Flexible and easy to install, often used for temporary or portable fences. They are also highly visible.
Estimated Cost: $0.10 – $1.00+ per foot (depending on the type and material).
3. Fence Posts
These provide the physical support for your fence wire. The type of posts you choose will depend on the terrain, the type of fence, and the animals you’re trying to contain or keep out.
- Wood Posts: Traditional and strong, but require more maintenance.
- Metal T-Posts: Easy to install and relatively inexpensive.
- Fiberglass Posts: Durable and flexible, ideal for portable fences.
Estimated Cost: $2 – $30+ per post (depending on material, size, and quantity).
4. Insulators
Insulators are crucial. They prevent the electric current from short-circuiting by keeping the wire separated from the posts. The type of insulator you need depends on the type of post and wire you’re using.
Estimated Cost: $0.25 – $2+ per insulator.
5. Grounding System
A proper grounding system is essential for the electric fence to work effectively. It provides a return path for the electricity back to the energizer after the animal touches the fence. This typically involves grounding rods and connecting wires.
Estimated Cost: $20 – $100+ (for grounding rods and wire, depending on the size and number of rods needed). (See Also: How to Build a Corner Fence Post: A Step-by-Step Guide for Diyers)
6. Gates and Gate Hardware
You’ll need a gate to access your fenced area. This includes the gate itself, insulators, and any necessary hardware.
Estimated Cost: $30 – $200+ (depending on the type and size of the gate).
7. Accessories (optional)
These can include warning signs, fence testers, lightning protection, and remote monitoring systems. These add to the overall cost but can enhance the safety and functionality of your fence.
Estimated Cost: Variable, depending on the accessories.
Breaking Down Per-Foot Costs: A Realistic Estimate
Okay, now let’s try to get a handle on the ‘per foot’ cost. Remember, this is an estimate, and the final price will vary based on your specific needs and choices.
For a basic electric fence (e.g., for a small garden or a temporary fence):
- Energizer: $100 – $200 (or less for a very small area)
- Wire: $0.20 – $0.50 per foot
- Posts: $2 – $5 per post (spaced every 10-15 feet)
- Insulators: $0.25 – $0.50 per insulator (per post)
- Grounding: $20 – $50
- Gate: $30 – $100
Example Calculation: Let’s say you want to fence a 100-foot perimeter. Assuming the posts are spaced 10 feet apart, you’ll need approximately 10 posts. We’ll use the mid-range prices from the above estimations.
Estimated Costs for 100-foot Fence:
- Energizer: $150
- Wire: 100 ft x $0.35/ft = $35
- Posts: 10 posts x $3.50/post = $35
- Insulators: 10 insulators x $0.35/insulator = $3.50
- Grounding: $35
- Gate: $65
- Total: Approximately $323.50
Cost per foot: $323.50 / 100 ft = Approximately $3.24 per foot
For a more robust electric fence (e.g., for livestock or perimeter security):
- Energizer: $200 – $800+
- Wire: $0.50 – $1.00+ per foot
- Posts: $5 – $30+ per post (spaced every 10-20 feet)
- Insulators: $0.50 – $1.00+ per insulator (per post)
- Grounding: $50 – $100+
- Gate: $100 – $200+
Example Calculation: Let’s say you want to fence a 500-foot perimeter. Assuming the posts are spaced 15 feet apart, you’ll need approximately 33 posts. We’ll use the mid-range prices from the above estimations.
Estimated Costs for 500-foot Fence:
- Energizer: $500
- Wire: 500 ft x $0.75/ft = $375
- Posts: 33 posts x $10/post = $330
- Insulators: 33 insulators x $0.75/insulator = $24.75
- Grounding: $75
- Gate: $150
- Total: Approximately $1454.75
Cost per foot: $1454.75 / 500 ft = Approximately $2.91 per foot (See Also: How Deep to Dig a Fence Post? The Ultimate Guide for Perfect Fences!)
Important Considerations:
- Labor Costs (if applicable): If you hire a professional to install the fence, factor in labor costs, which can significantly increase the overall price.
- Terrain: Uneven or rocky terrain can make installation more difficult and costly.
- Fence Length: While the per-foot cost might seem higher for shorter fences, buying in bulk for larger projects can often reduce per-foot prices.
- Local Regulations: Check with your local authorities for any regulations regarding electric fences.
Factors Influencing Electric Fence Costs
As we’ve touched on, several factors will significantly impact the final cost of your electric fence.
1. Type of Animals/purpose
The type of animal you’re protecting or containing will dictate the type of fence and the materials needed. For example:
- Cattle: Often require robust high-tensile wire and a powerful energizer.
- Horses: May benefit from a combination of wire and polytape for increased visibility.
- Poultry: Often use poultry netting or polywire.
- Protecting from Predators: A more powerful energizer and a sturdy fence are essential.
2. Fence Length and Layout
The longer the fence, the more materials you’ll need, and the higher the overall cost. The layout of your fence (straight lines vs. complex curves) can also affect the number of posts and other materials needed.
3. Materials Used
The quality and type of materials you choose play a significant role. Higher-quality materials generally last longer but come at a higher price. For example, pressure-treated wood posts are more expensive than metal T-posts.
4. Installation Method (diy vs. Professional)
DIY Installation: Saves on labor costs but requires time, effort, and potentially some specialized tools. You’ll need to be comfortable with some basic construction tasks and electrical safety. You must follow all safety guidelines.
Professional Installation: Offers convenience and ensures the fence is installed correctly and safely. However, it adds to the overall cost. Get quotes from multiple contractors to compare prices.
5. Terrain and Soil Conditions
Rocky or uneven terrain can make installation more challenging and time-consuming, potentially increasing labor costs if you hire a professional. Soil conditions also affect the grounding system’s effectiveness.
6. Local Regulations and Codes
Some areas have specific regulations regarding electric fences, such as height restrictions, required warning signs, or restrictions on fence placement. These regulations can affect the materials and installation methods you can use.
How to Save Money on Your Electric Fence
Electric fences can be expensive, but there are ways to reduce your costs.
- DIY Installation: The biggest cost saver is often installing the fence yourself.
- Shop Around: Compare prices from different suppliers for materials.
- Buy in Bulk: Purchasing materials in bulk, especially for larger projects, can often lead to discounts.
- Choose Cost-Effective Materials: Consider using less expensive materials like T-posts and polywire, as long as they meet your needs.
- Plan Carefully: Accurate planning minimizes waste and the need to purchase extra materials.
- Consider Used Materials: Sometimes, you can find used posts or other components in good condition at a lower price.
Electric Fence Installation: A Basic Guide (diy)
If you’re considering a DIY project, here’s a simplified overview of the installation process. Always prioritize safety and consult the manufacturer’s instructions for specific guidance.
- Plan and Prepare:
- Determine the fence layout and perimeter.
- Mark the fence line.
- Gather all necessary materials and tools (energizer, wire, posts, insulators, grounding system, gate hardware, etc.).
- Install the Posts:
- Set the corner and gate posts first, ensuring they are sturdy and well-braced.
- Install line posts at the appropriate intervals, depending on the type of posts and the terrain. You can drive T-posts with a post driver or set wooden posts in concrete.
- Install Insulators:
- Attach insulators to the posts according to the type of wire you are using.
- String the Wire:
- Unroll the wire and attach it to the insulators, making sure it’s taut.
- For multi-wire fences, space the wires evenly.
- Install the Grounding System:
- Drive grounding rods into the ground, at least 3-6 feet deep, and space them 10 feet apart.
- Connect the grounding rods with insulated wire, and connect the wire to the energizer’s ground terminal.
- Connect the Energizer:
- Mount the energizer in a protected location.
- Connect the energizer’s fence terminal to the fence wire using an insulated lead-out wire.
- Connect the energizer’s ground terminal to the grounding system.
- Install the Gate:
- Install the gate hardware and ensure the gate opens and closes properly.
- Use a gate handle and insulator to avoid shocks when opening and closing the gate.
- Test and Maintain:
- Test the fence with a fence tester to ensure it’s working correctly.
- Regularly inspect the fence for damage and maintain vegetation control around the fence line.
People Also Ask (faq)
Here are some frequently asked questions about electric fences.
How Long Do Electric Fences Last?
The lifespan of an electric fence depends on the quality of the materials, the environmental conditions, and the maintenance. Properly installed and maintained fences can last for 15-30 years or more. Wire quality, post material, and the energizer’s durability are crucial factors. (See Also: How High Can You Build a Fence? A Complete Guide to Height Restrictions)
Are Electric Fences Safe for Pets and Children?
Electric fences are generally safe for pets and children, as the shock is designed to be a deterrent, not lethal. However, it’s essential to use a low-impedance energizer and to supervise children and pets around the fence, especially initially. Properly installed fences pose minimal risk.
What Is the Best Type of Electric Fence Wire?
The best type of wire depends on your specific needs. For high visibility and temporary fences, polywire or polytape are excellent choices. For livestock, high-tensile steel wire is often preferred due to its durability. For general use, galvanized steel wire is a good balance of cost and performance.
How Often Should I Check My Electric Fence?
You should inspect your electric fence regularly, at least once a week, and especially after storms or periods of high winds. Check the fence for broken wires, fallen trees, vegetation touching the wires, and any other damage. Test the fence voltage with a fence tester to ensure it’s operating correctly.
What Should I Do If My Electric Fence Is Not Working?
If your electric fence is not working, first, check the energizer for power. Then, inspect the fence line for breaks, shorts, or vegetation touching the wires. Check the grounding system for proper connections and grounding rod depth. Test the energizer’s output voltage with a fence tester. If the issue persists, consult the energizer’s manual or contact a qualified electrician or fence installer.
Can I Use an Electric Fence on a Slope?
Yes, you can use an electric fence on a slope. However, you may need to adjust the post spacing and the height of the wires to accommodate the terrain. You may also need to use additional bracing on corner posts to ensure stability. Proper installation is critical to maintain effectiveness.
Electric Fence vs. Other Fencing Options
When deciding on fencing, it’s helpful to compare electric fences with other popular options:
- Wood Fences:
- Pros: Attractive, durable, and provides a solid barrier.
- Cons: Expensive, requires maintenance, and can be climbed by some animals.
- Chain-Link Fences:
- Pros: Durable, relatively inexpensive, and allows for good visibility.
- Cons: Can be unsightly, and some animals may still climb or dig under them.
- Wire Fences (Non-Electric):
- Pros: Cost-effective, good for containing livestock.
- Cons: Animals can push through or damage them, and they offer limited protection against predators.
- Electric Fences:
- Pros: Highly effective at deterring animals, cost-effective (especially DIY), and relatively easy to install.
- Cons: Requires electricity, requires regular maintenance, and may not be suitable for all situations (e.g., small children).
Diy vs. Professional Installation: Which Is Right for You?
The decision to install your electric fence yourself or hire a professional depends on your budget, your experience with DIY projects, and the complexity of the fence. DIY installation can save you a significant amount of money but requires time, effort, and a good understanding of the process. Professional installation ensures a properly installed and safe fence but adds to the cost.
- DIY Advantages: Cost savings, learning new skills, and the satisfaction of doing the work yourself.
- DIY Disadvantages: Time-consuming, requires some technical knowledge, and potential for errors.
- Professional Advantages: Expertise, time-saving, and peace of mind.
- Professional Disadvantages: Higher cost.
Consider the following when making your decision:
- Your experience: Are you comfortable with basic construction and electrical work?
- Your time: Do you have the time to dedicate to the project?
- Your budget: Can you afford the materials and the cost of professional installation?
- The complexity of the fence: Is the fence simple or complex, with challenging terrain?
Conclusion
Understanding the True Cost: Electric Fence Pricing Explained
So, how much is an electric fence per foot? The answer, as we’ve seen, is not a simple one. The cost varies based on many factors. However, by understanding the components, considering your specific needs, and comparing different options, you can create a safe, secure, and cost-effective electric fence solution. Remember to always prioritize safety and consult the manufacturer’s instructions for any equipment you are using.
Determining the exact cost of an electric fence per foot requires a careful assessment of your specific needs and the chosen materials. While a basic fence may cost around $3.00 per foot, a more robust system can easily range from $2.90 to significantly higher. Always factor in labor costs, terrain, and any local regulations.
Recommended Products