So, you’re thinking about insulating your shed? Smart move! Whether you’re turning it into a workshop, home office, or just want to protect your belongings from the elements, insulation is key. But let’s be honest, the first question on your mind is probably: how much does it cost to insulate a shed?
The good news is, we’ve got you covered. This guide will break down all the factors influencing shed insulation costs, from materials to labor, and everything in between. We’ll explore different insulation types, their pros and cons, and give you a realistic idea of what to expect when budgeting for your project. We’ll also help you navigate the tricky waters of DIY vs. professional installation.
Get ready to become an insulation expert! Let’s dive in and find out how much it will cost to transform your shed into a comfortable and functional space.
Understanding the Costs: Factors Affecting Shed Insulation Prices
The total cost to insulate a shed can vary widely. Several factors play a significant role in determining the final price tag. Understanding these elements will help you create a realistic budget and make informed decisions.
1. Size of Your Shed
This is the most significant factor. Obviously, a larger shed requires more insulation material, which directly impacts the cost. Measure the square footage of your shed’s walls, roof, and floor to get an accurate estimate of the surface area you’ll be insulating. Don’t forget to account for any gables or unusual architectural features.
2. Type of Insulation Material
Different insulation materials come with varying price points. We’ll explore the common types in detail later, but here’s a quick overview:
- Roll or Batt Insulation: Generally the most affordable option, suitable for DIY projects.
- Spray Foam Insulation: Offers excellent performance but is typically more expensive and often requires professional installation.
- Rigid Foam Insulation: A good balance of cost and performance, often used for walls and roofs.
- Loose-Fill Insulation: Can be a cost-effective choice, especially for attics or hard-to-reach areas.
3. Labor Costs (if Applicable)
If you choose to hire a professional, labor costs will add to the overall expense. These costs vary based on your location, the complexity of the project, and the contractor’s rates. Get quotes from multiple contractors to compare prices.
4. Shed Condition and Preparation
If your shed requires repairs before insulation, such as fixing leaks or addressing structural issues, these costs will need to be factored in. Also, the existing condition of your shed can impact the insulation process. For example, if the studs aren’t evenly spaced, it might require extra work.
5. Local Market Conditions
Insulation material prices can fluctuate based on supply and demand, as well as your geographic location. It’s always a good idea to check local hardware stores and suppliers for current pricing.
6. R-Value Requirements
R-value measures an insulation’s resistance to heat flow. The higher the R-value, the better the insulation performance. Building codes often specify minimum R-value requirements for different parts of a structure. Higher R-value insulation generally costs more.
Common Shed Insulation Materials and Their Costs
Let’s take a closer look at the most popular insulation materials and their associated costs. Keep in mind that prices are approximate and can vary.
1. Roll or Batt Insulation
Description: Roll or batt insulation typically comes in pre-cut sections, often made of fiberglass, mineral wool, or cellulose. It’s relatively easy to install, making it a popular choice for DIY projects.
Pros:
- Affordable
- Easy to install
- Readily available at most hardware stores
Cons:
- Can be less effective than spray foam, especially if not installed perfectly.
- May require careful cutting and fitting to avoid gaps and air leaks.
- Fiberglass can be irritating to the skin and lungs.
Cost: (See Also: How to Anchor a Shed to a Concrete Slab: Secure Your Structure!)
- Fiberglass: $0.30 – $1.00 per square foot
- Mineral Wool: $0.50 – $1.50 per square foot
- Cellulose: $0.75 – $1.75 per square foot
Ideal for: Walls, floors, and roofs of sheds where the studs are regularly spaced.
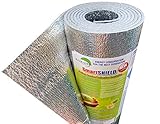
2. Spray Foam Insulation
Description: Spray foam insulation is applied as a liquid that expands to fill every nook and cranny, creating an airtight seal. It’s available in open-cell and closed-cell varieties. Professional installation is usually required.
Pros:
- Excellent insulation performance (high R-value)
- Creates an airtight seal, preventing air leaks
- Can be applied to irregular surfaces
- Reduces noise transmission
Cons:
- More expensive than other options
- Requires professional installation
- Can be messy
Cost:
- Open-cell spray foam: $0.50 – $1.00 per square foot (per inch of thickness)
- Closed-cell spray foam: $1.00 – $2.00 per square foot (per inch of thickness)
Ideal for: Sheds where maximum insulation performance and air sealing are priorities. Also great for irregularly shaped sheds.
3. Rigid Foam Insulation
Description: Rigid foam insulation comes in panels made of polystyrene, polyisocyanurate, or extruded polystyrene. It’s often used for walls, roofs, and floors. It can be purchased in various thicknesses and sizes.
Pros:
- Good insulation performance
- Relatively easy to install (can be DIY)
- Resistant to moisture
- Available in various thicknesses and R-values
Cons:
- Can be more expensive than roll insulation
- Requires careful cutting and fitting
- May need to be sealed with tape or caulk to prevent air leaks
Cost:
- Polystyrene: $0.50 – $1.00 per square foot
- Polyisocyanurate: $0.75 – $1.50 per square foot
- Extruded Polystyrene: $0.75 – $1.75 per square foot
Ideal for: Walls, roofs, and floors of sheds where a balance of cost and performance is desired.
4. Loose-Fill Insulation
Description: Loose-fill insulation, such as cellulose or fiberglass, is blown into cavities or spaces. This is a good choice for hard-to-reach areas or existing structures.
Pros:
- Can fill irregular spaces and around obstructions
- Good for attics and walls
- Can be a cost-effective option
Cons: (See Also: How Often Do Adult Leopard Geckos Shed? A Complete Guide)
- Requires specialized equipment (blower)
- Can settle over time, reducing its effectiveness
- Can be messy
Cost:
- Cellulose: $0.50 – $1.50 per square foot (installed)
- Fiberglass: $0.40 – $1.00 per square foot (installed)
Ideal for: Attics, walls, and other areas where it’s difficult to install other types of insulation.
Diy vs. Professional Installation: Weighing Your Options
One of the biggest decisions you’ll make is whether to tackle the insulation project yourself or hire a professional. Here’s a comparison to help you choose the best option for your shed:
Diy Installation
Pros:
- Lower upfront cost: You’ll save on labor expenses.
- Control over the project: You manage the timeline and materials.
- Sense of accomplishment: You get to see the fruits of your labor!
Cons:
- Time-consuming: Insulation installation can take several days, depending on the shed’s size.
- Potential for errors: Improper installation can reduce the insulation’s effectiveness and lead to air leaks.
- Requires tools and skills: You’ll need basic carpentry skills and tools, such as a utility knife, measuring tape, and safety gear.
- Safety concerns: Some insulation materials, like fiberglass, can be irritating to the skin and lungs.
Professional Installation
Pros:
- Expertise: Professionals have the experience and knowledge to install insulation correctly, ensuring optimal performance.
- Efficiency: They can complete the project quickly and efficiently.
- Warranty: Many contractors offer warranties on their workmanship.
- Safety: Professionals are trained to handle insulation materials safely.
Cons:
- Higher cost: You’ll need to pay for labor and materials.
- Less control over the project: You’ll need to rely on the contractor’s schedule and choices.
- Finding a reliable contractor: It can be challenging to find a reputable contractor with good reviews.
When to DIY:
- You’re comfortable with basic carpentry skills.
- You have the time and patience to complete the project.
- You’re working with roll or batt insulation and a simple shed design.
When to hire a professional:
- You’re not comfortable with DIY projects.
- You want the best possible insulation performance.
- You’re using spray foam insulation.
- Your shed has a complex design or requires significant preparation work.
Step-by-Step Guide to Insulating Your Shed (diy)
If you’ve decided to take on the project yourself, here’s a general guide to help you insulate your shed:
- Preparation:
- Measure the areas you’ll be insulating (walls, roof, floor).
- Determine the R-value required for your climate and the shed’s intended use.
- Purchase the necessary insulation materials, safety gear (gloves, mask, eye protection), and tools.
- Inspect the shed for any damage or leaks and make necessary repairs.
- Wall Insulation:
- Cut the insulation to fit between the studs, leaving a small gap for a snug fit.
- Install the insulation, ensuring it fits snugly against the studs and covers the entire cavity.
- If using roll insulation, staple it to the studs, using staples that are long enough to hold the insulation in place.
- If using rigid foam, cut it to size and fit it between the studs, sealing the edges with tape or caulk.
- Roof Insulation:
- If your roof has exposed rafters, install insulation between them in the same manner as the walls.
- If your roof has a solid deck, you can install rigid foam insulation on top of the deck before installing the roofing material.
- Ensure proper ventilation to prevent moisture buildup.
- Floor Insulation:
- If your shed has a crawl space, insulate the floor joists from below using roll or batt insulation.
- If your shed has a concrete slab, install rigid foam insulation on top of the slab before adding a finished floor.
- Air Sealing:
- Seal any gaps or cracks around windows, doors, and other openings with caulk or weatherstripping.
- Use spray foam to seal any remaining air leaks.
- Finishing:
- Cover the insulation with a suitable interior finish, such as drywall, plywood, or paneling.
- Ensure proper ventilation to prevent moisture buildup.
“people Also Ask” (paa) About Shed Insulation
Let’s address some common questions people have about shed insulation:
1. How Much Insulation Do I Need for My Shed?
The amount of insulation you need depends on your climate, the shed’s intended use, and the R-value requirements. As a general guideline, consider the following:
- Walls: R-13 to R-21
- Roof: R-30 to R-49
- Floor: R-13 to R-30
Consult local building codes for specific recommendations in your area.
2. Can I Use the Same Insulation for My Shed as My House?
Yes, you can often use the same insulation materials in your shed as you would in your house. However, the R-value requirements might differ depending on your climate and the shed’s intended use. (See Also: How to Build a Shed in the Backyard: A Step-by-Step Guide)
3. What Are the Best Insulation Materials for a Shed?
The best insulation material depends on your budget, the shed’s design, and your desired level of performance. Spray foam offers the highest performance, while roll or batt insulation is generally the most affordable. Rigid foam provides a good balance of cost and performance.
4. How Do I Prevent Moisture Problems in My Insulated Shed?
Moisture control is crucial for an insulated shed. Follow these tips:
- Ensure proper ventilation to prevent moisture buildup.
- Use a vapor barrier to prevent moisture from entering the insulation.
- Seal any gaps or cracks to prevent air leaks.
- Inspect your shed regularly for leaks and water damage.
5. Is It Worth Insulating a Shed?
Absolutely! Insulating your shed offers several benefits, including:
- Temperature regulation: Keeps the shed cooler in the summer and warmer in the winter.
- Energy savings: Reduces energy bills if you’re using the shed for heating or cooling.
- Protection of belongings: Protects your tools, equipment, and other items from the elements.
- Increased comfort: Makes the shed more comfortable to work or relax in.
6. Can I Insulate a Shed Myself?
Yes, you can often insulate a shed yourself, especially if you’re using roll or batt insulation. However, spray foam insulation typically requires professional installation.
7. How Long Does It Take to Insulate a Shed?
The time it takes to insulate a shed depends on the shed’s size, the type of insulation, and your experience. A small shed might take a day or two, while a larger shed could take several days or even longer.
8. Where Can I Buy Insulation for My Shed?
You can purchase insulation at most hardware stores, home improvement centers, and building supply stores. You can also order insulation online from various retailers.
9. What Is the Best Way to Insulate a Shed Floor?
The best way to insulate a shed floor depends on the floor type. For a shed with a crawl space, you can insulate the floor joists from below using roll or batt insulation. For a shed with a concrete slab, you can install rigid foam insulation on top of the slab before adding a finished floor.
10. What Are the Benefits of Insulating a Shed Roof?
Insulating a shed roof offers several benefits, including temperature regulation, energy savings, and protection of belongings. It also helps prevent moisture buildup and condensation, which can damage the roof and the shed’s contents.
Tips for Saving Money on Shed Insulation
Insulating your shed doesn’t have to break the bank. Here are some tips to help you save money on your project:
- Shop around for the best prices: Compare prices from different suppliers and retailers.
- Consider DIY installation: If you’re comfortable with basic carpentry skills, you can save on labor costs.
- Choose the right insulation material: Roll or batt insulation is generally the most affordable option.
- Buy in bulk: Purchasing insulation in larger quantities can often save you money.
- Take advantage of rebates and incentives: Check with your local utility company for potential rebates or incentives on energy-efficient improvements.
- Don’t over-insulate: Determine the appropriate R-value for your climate and shed’s intended use to avoid unnecessary expenses.
- Seal air leaks: Air sealing is crucial to maximize the effectiveness of your insulation. Use caulk, weatherstripping, and spray foam to seal any gaps or cracks.
Insulating a Shed: A Summary of Costs
To give you a clearer picture of the costs involved, here’s a table summarizing the approximate costs for insulating a typical 10×12 foot shed (120 square feet of wall space, roof, and floor), assuming standard stud spacing and no major repairs are needed. These are rough estimates and can vary based on location and specific material choices.
| Material | Approximate Cost per Square Foot | Estimated Total Cost (10×12 Shed) | DIY or Professional |
|---|---|---|---|
| Fiberglass Batt/Roll | $0.30 – $1.00 | $36 – $120 | DIY |
| Mineral Wool Batt/Roll | $0.50 – $1.50 | $60 – $180 | DIY |
| Cellulose Batt/Roll | $0.75 – $1.75 | $90 – $210 | DIY |
| Polystyrene Rigid Foam | $0.50 – $1.00 | $60 – $120 | DIY |
| Polyisocyanurate Rigid Foam | $0.75 – $1.50 | $90 – $180 | DIY |
| Extruded Polystyrene Rigid Foam | $0.75 – $1.75 | $90 – $210 | DIY |
| Spray Foam (Open Cell, Installed) | $0.50 – $1.00 per inch | $180 – $360 (for 3 inches) | Professional |
| Spray Foam (Closed Cell, Installed) | $1.00 – $2.00 per inch | $360 – $720 (for 3 inches) | Professional |
Note: These costs do not include labor if you DIY. They also don’t factor in potential costs for air sealing materials or any necessary repairs.
Final Verdict
Insulating your shed is a worthwhile investment that can significantly improve its comfort and functionality. The cost of insulation varies depending on the materials you choose, the size of your shed, and whether you opt for DIY or professional installation. By carefully considering these factors and following the tips outlined in this guide, you can create a comfortable and energy-efficient shed without breaking the bank.
Recommended Products