Peace lilies, with their elegant white blooms and lush green foliage, are a popular choice for adding a touch of serenity to any indoor space. But these graceful plants require specific care to thrive, often leaving plant enthusiasts wondering, “How do you care for a peace lily plant?” Their low-maintenance reputation can be misleading; understanding their needs is essential to ensure they flourish and reward you with their beautiful flowers.
This comprehensive guide will delve into every aspect of peace lily care, from the ideal light conditions and watering techniques to the best soil and fertilization practices. We’ll explore common problems, such as yellowing leaves and lack of blooms, and provide practical solutions to keep your peace lily healthy and vibrant. By following these expert tips, you can unlock the secrets to cultivating a thriving peace lily and enjoy its beauty for years to come.
Get ready to transform your peace lily from a struggling houseplant to a flourishing centerpiece. With our easy-to-follow advice, you’ll be well on your way to mastering the art of peace lily care and creating a tranquil oasis in your home.
Understanding the Peace Lily: A Quick Overview
Peace lilies (Spathiphyllum) are not true lilies; they belong to the Araceae family. Native to tropical rainforests, they thrive in the humid, shaded understories of these environments. This origin provides essential clues on how to care for a peace lily plant, as their needs reflect their natural habitat.
These plants are prized for their dark green, lance-shaped leaves and distinctive white or cream-colored flowers (spathes). The spathe is not a petal, but a modified leaf that surrounds the spadix, a spike-like structure bearing tiny flowers. Peace lilies are relatively easy to care for, making them an excellent choice for beginner plant parents, but understanding their specific needs is key to their success.
Common Peace Lily Varieties
Several peace lily varieties exist, each with slight variations in size and appearance. Knowing the specific variety you have can help tailor your care routine for optimal results.
- Spathiphyllum wallisii: The most common variety, often called the “White Sails” peace lily. It’s relatively compact and produces numerous flowers.
- Spathiphyllum ‘Mauna Loa’: A larger variety with broader leaves and impressive blooms, often considered one of the largest peace lilies.
- Spathiphyllum ‘Sensation’: Known for its very large, textured leaves, making it a striking statement plant. It is also one of the easiest to care for.
- Spathiphyllum ‘Domino’: Features variegated leaves with white or cream-colored markings, adding visual interest.
Light Requirements: Finding the Right Spot
One of the most crucial aspects of how to care for a peace lily plant is understanding its light preferences. Peace lilies thrive in bright, indirect light. Direct sunlight can scorch their leaves, leading to brown tips and overall damage. Conversely, too little light can hinder flowering and growth.
The ideal location offers a balance between sufficient light for photosynthesis and protection from harsh rays. Consider the following factors when choosing a spot for your peace lily:
Ideal Light Conditions
- Bright, Indirect Light: Place your peace lily near an east-facing window or a few feet away from a south- or west-facing window. Diffused light is key.
- Avoid Direct Sun: Protect your peace lily from direct sunlight, especially during peak hours (midday). Use sheer curtains to filter the light if necessary.
- Signs of Too Much Light: If the leaves are yellowing or have brown tips, the plant may be getting too much light.
- Signs of Too Little Light: If the plant is not flowering or the leaves are dark green and droopy, it may not be receiving enough light.
Assessing Your Home’s Lighting
Evaluate the natural light in your home to determine the best placement for your peace lily. Observe the amount of light each window receives throughout the day. Consider using a light meter to measure the intensity of the light in different areas of your home. This can help you make informed decisions about where to position your plant.
You can also use the plant itself as an indicator. If the leaves are pale or yellowing, move the plant to a shadier location. If the plant isn’t flowering, try moving it to a location with more light.
Watering: The Key to a Thriving Peace Lily
Watering is another critical aspect of how to care for a peace lily plant. Peace lilies are sensitive to both overwatering and underwatering. Finding the right balance is essential for their health and well-being. They are known to “dramatically” droop when they need water, making them a good indicator of their hydration needs. (See Also: How to Care for Sensitive Plant: A Comprehensive Guide)
Understanding their watering needs involves considering several factors, including the plant’s size, the pot’s material, the soil type, and the environmental conditions.
Watering Frequency
- Water When the Top Inch of Soil Dries Out: Use your finger to check the soil moisture.
- Water Thoroughly: Water until excess water drains from the drainage holes.
- Avoid Overwatering: Do not let the plant sit in standing water, as this can lead to root rot.
- Adjust Watering Based on Season: Water more frequently during the growing season (spring and summer) and less frequently during the dormant season (fall and winter).
Watering Techniques
The method you use to water your peace lily can also impact its health. Consider these techniques:
- Watering from the Top: Pour water slowly and evenly over the soil surface until water drains from the bottom.
- Bottom Watering: Place the pot in a saucer of water and allow the plant to absorb water through the drainage holes. Remove the pot from the saucer once the top of the soil is moist.
- Use Room Temperature Water: Avoid using cold water, as it can shock the plant.
Signs of Overwatering and Underwatering
Recognizing the signs of overwatering and underwatering is critical for proper care:
| Condition | Symptoms | Remedy |
|---|---|---|
| Overwatering | Yellowing leaves, drooping leaves, mushy stems, root rot | Reduce watering frequency, ensure good drainage, repot into fresh soil if root rot is severe. |
| Underwatering | Drooping leaves, dry soil, brown leaf tips | Water thoroughly, increase watering frequency. |
Soil and Repotting: Providing a Healthy Foundation
The soil your peace lily is planted in plays a vital role in its health and growth. The right soil provides essential nutrients, promotes proper drainage, and allows for adequate aeration for the roots. Repotting your peace lily periodically is also necessary to provide fresh soil and accommodate the plant’s growth. Proper soil is an essential factor in answering the question of how to care for a peace lily plant.
Using the right soil mix and repotting at the right time are crucial to ensure your plant thrives.
Ideal Soil Mix
Peace lilies prefer a well-draining soil mix that retains moisture without becoming waterlogged. A good soil mix will incorporate the following components:
- Potting Soil: Provides a base for the mix.
- Perlite: Improves drainage and aeration.
- Peat Moss or Coco Coir: Retains moisture.
- Optional: A small amount of compost or worm castings to provide nutrients.
A good ratio for a peace lily soil mix is typically 1 part potting soil, 1 part perlite, and 1 part peat moss or coco coir. You can find pre-mixed potting soil formulated for indoor plants, which is also a convenient option.
Repotting Your Peace Lily
Repotting your peace lily every one to two years is recommended, or when the plant outgrows its current pot. Repotting provides fresh soil and allows the roots to expand. The best time to repot is during the growing season (spring or summer).
- Choose a Slightly Larger Pot: Select a pot that is only one or two inches larger in diameter than the current pot.
- Prepare the New Pot: Add a layer of fresh soil to the bottom of the new pot.
- Remove the Plant: Gently remove the peace lily from its old pot.
- Loosen the Roots: Gently loosen any circling roots.
- Place the Plant in the New Pot: Center the plant in the new pot and fill in around the roots with fresh soil.
- Water Thoroughly: Water the plant thoroughly after repotting.
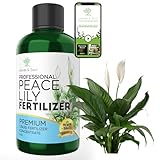
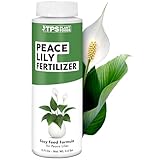
Fertilizing: Nourishing Your Peace Lily
Fertilizing is an important aspect of how to care for a peace lily plant. Regular fertilization provides essential nutrients that support healthy growth and abundant flowering. However, over-fertilizing can be detrimental, so it’s important to follow recommended guidelines.
Fertilizing your peace lily helps ensure it has the necessary nutrients to thrive. It’s a key part of the process of how to care for a peace lily plant. (See Also: Expert Guide: How to Plant Pine Trees for Thriving Forests)
Fertilizer Types
Choose a balanced, water-soluble fertilizer formulated for houseplants. Look for a fertilizer with an NPK (nitrogen, phosphorus, potassium) ratio of 10-10-10 or similar.
- Balanced Fertilizer: Provides a combination of essential nutrients for overall plant health.
- Slow-Release Fertilizer: Can be added to the soil and releases nutrients over time.
Fertilizing Schedule
Fertilize your peace lily during the growing season (spring and summer) when it is actively growing and flowering. Reduce or stop fertilizing during the dormant season (fall and winter).
- Fertilize Monthly: Dilute the fertilizer to half strength and apply it monthly during the growing season.
- Follow Package Instructions: Always follow the instructions on the fertilizer packaging.
- Avoid Over-Fertilizing: Over-fertilizing can lead to salt buildup in the soil, which can harm the plant.
Signs of Nutrient Deficiency
Pay attention to your peace lily’s appearance to identify any signs of nutrient deficiency:
- Yellowing Leaves: Can indicate a lack of nitrogen.
- Stunted Growth: May indicate a lack of several nutrients.
- Poor Flowering: Can be a sign of insufficient phosphorus.
Humidity and Temperature: Creating the Right Environment
Peace lilies thrive in humid environments. They are native to tropical rainforests, where the humidity levels are consistently high. Providing adequate humidity is crucial to their overall health and appearance. Temperature also plays a key role in ensuring your peace lily thrives; understanding the ideal range is a crucial part of how to care for a peace lily plant.
Replicating their natural environment can help your peace lily flourish. Maintaining the right temperature and humidity will help your peace lily thrive.
Humidity Requirements
Peace lilies prefer humidity levels between 50% and 60%. If the air in your home is dry, especially during the winter months, you’ll need to increase the humidity.
- Use a Humidifier: Place a humidifier near your peace lily to increase the humidity.
- Misting: Mist the leaves regularly with room temperature water.
- Pebble Tray: Place the pot on a tray filled with pebbles and water. As the water evaporates, it will increase the humidity around the plant.
Temperature Preferences
Peace lilies prefer temperatures between 65°F and 80°F (18°C and 27°C). Avoid placing your peace lily near drafts, heating vents, or air conditioning units.
- Avoid Extreme Temperatures: Protect your peace lily from sudden temperature fluctuations.
- Ideal Range: Maintain a consistent temperature within the preferred range.
Common Problems and Solutions
Even with the best care, peace lilies can sometimes encounter problems. Understanding these common issues and their solutions will help you keep your plant healthy and vibrant. Knowing these common problems is essential to answering the question of how to care for a peace lily plant.
By understanding and addressing these issues, you can ensure your peace lily remains a thriving and beautiful addition to your home.
Yellowing Leaves
Yellowing leaves are a common problem in peace lilies. Several factors can cause this: (See Also: How to Tell If Your Plant Has Root Rot: A Complete Guide)
- Overwatering: The most common cause. Reduce watering frequency and ensure proper drainage.
- Underwatering: Less frequent cause, but can also cause yellowing. Check the soil moisture and water thoroughly.
- Too Much Light: Move the plant to a shadier location.
- Nutrient Deficiency: Fertilize regularly during the growing season.
Brown Leaf Tips
Brown leaf tips can be caused by various factors, including:
- Low Humidity: Increase humidity levels.
- Dry Air: Avoid placing the plant near heating vents or air conditioning units.
- Fluoride or Chlorine in Water: Use filtered water or let tap water sit out for 24 hours before watering.
- Over-Fertilizing: Flush the soil with water to remove excess salts.
Lack of Flowering
If your peace lily isn’t flowering, consider these factors:
- Insufficient Light: Move the plant to a location with brighter, indirect light.
- Improper Watering: Ensure you are watering correctly, as inconsistent watering can hinder flowering.
- Lack of Nutrients: Fertilize regularly during the growing season.
- Dormant Period: Peace lilies may not flower during the winter months.
Pests and Diseases
Peace lilies are generally resistant to pests and diseases, but they can occasionally be affected.
- Spider Mites: Small pests that suck sap from the leaves. Treat with insecticidal soap or neem oil.
- Mealybugs: White, cottony pests that also suck sap. Remove them manually or treat with insecticidal soap.
- Root Rot: Caused by overwatering. Repot the plant with fresh soil and ensure proper drainage.
Propagation: Expanding Your Peace Lily Collection
Propagating your peace lily is a rewarding way to expand your collection or share these beautiful plants with others. The most common method of propagation for peace lilies is division. Understanding how to propagate is another aspect of how to care for a peace lily plant.
By following these steps, you can create new peace lily plants from your existing one.
Dividing Your Peace Lily
- Prepare Your Tools: Gather a clean knife or pruning shears and pots filled with fresh potting mix.
- Remove the Plant from the Pot: Gently remove the peace lily from its pot.
- Identify the Divisions: Look for natural divisions in the plant’s root ball, each with leaves and roots.
- Separate the Divisions: Carefully separate the divisions, ensuring each has a good portion of roots.
- Plant the Divisions: Plant each division in its own pot with fresh potting mix.
- Water and Care for the New Plants: Water the newly planted divisions and care for them as you would a mature peace lily.
Troubleshooting Common Questions
Many plant parents have similar questions about how to care for a peace lily plant. Here are some of the most common questions and their answers:
- Why are my peace lily leaves drooping? Drooping leaves usually indicate that the plant is thirsty. Water thoroughly when the top inch of soil is dry.
- How often should I water my peace lily? Water when the top inch of soil is dry, typically every 1-2 weeks, adjusting based on the season and environmental conditions.
- Why isn’t my peace lily flowering? Ensure your peace lily receives enough bright, indirect light, and fertilize regularly during the growing season.
- Can I use tap water for my peace lily? While tap water is generally acceptable, it is best to use filtered water or let tap water sit out for 24 hours to allow chlorine and fluoride to dissipate.
- What is the best fertilizer for peace lilies? Use a balanced, water-soluble fertilizer formulated for houseplants with an NPK ratio of 10-10-10 or similar, diluted to half strength.
Conclusion: Cultivating a Thriving Peace Lily
knowing how to care for a peace lily plant involves understanding its specific needs, from providing the right light and water to ensuring proper soil and fertilization. By following the guidelines outlined in this comprehensive guide, you can create an environment where your peace lily thrives, bringing beauty and tranquility to your home. Regular observation, appropriate adjustments, and a little bit of care will ensure your peace lily remains a stunning and rewarding houseplant for years to come.
Recommended Products