Are you dreaming of fresh, flavorful red onions straight from your garden? Planting red onion sets is a rewarding experience, providing you with a delicious and versatile crop. Unlike starting from seed, onion sets offer a convenient head start, allowing you to enjoy homegrown onions sooner. This guide will walk you through every step of the process, ensuring your success in cultivating these flavorful bulbs.
Red onions add a vibrant color and pungent flavor to salads, salsas, and countless other dishes. They are relatively easy to grow, making them a fantastic choice for both novice and experienced gardeners. By following the simple steps outlined below, you’ll be well on your way to harvesting a plentiful supply of these culinary staples. Let’s get started and grow some amazing red onions!
Choosing the Right Red Onion Sets
The foundation of a successful red onion harvest begins with selecting the right sets. Quality sets are crucial for healthy growth and a good yield. Choosing the right variety that suits your climate is also important. Several factors should be considered when selecting your onion sets.
Understanding Onion Sets
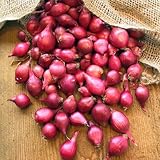
Onion sets are essentially small, dormant onion bulbs that have been grown from seed the previous year. They are typically about the size of a marble and are planted directly into the ground. They offer a significant advantage over starting from seed, as they have a head start and are less susceptible to certain pests and diseases. This makes them a more convenient and often quicker way to get a harvest.
Onion sets are typically sold in garden centers and nurseries during the spring. They are available in various varieties, each with its own unique characteristics regarding flavor, storage capabilities, and suitability for different climates. Make sure to purchase your sets from a reputable source to ensure they are healthy and disease-free. Inspecting the sets before purchase is also recommended.
Selecting Quality Onion Sets
When selecting your red onion sets, pay close attention to their appearance and condition. Choose firm, dry sets that are free from mold, rot, and any signs of sprouting. Sets that are already sprouting are likely to bolt (flower) prematurely, resulting in smaller bulbs and a reduced yield. Avoid sets that appear soft, mushy, or have an unpleasant odor.
The size of the sets can also influence the outcome. Generally, sets that are about 1/2 to 3/4 inch in diameter are ideal. Smaller sets may take longer to mature, while larger sets may be more prone to bolting. However, the exact size isn’t as critical as the overall health and firmness of the set.
Choosing the Right Variety
The best red onion variety for you will depend on your local climate, your planting time, and your intended use for the onions. Some varieties are better suited for long-term storage, while others are best eaten fresh. Consider the following popular red onion varieties:
- Red Burgundy: A popular choice, known for its mild flavor and good storage capabilities.
- Walla Walla Sweet Red: A sweet onion variety, ideal for fresh eating.
- Red Creole: A pungent variety that stores well and is often used in cooking.
- Southport Red Globe: A classic red onion, known for its round shape and strong flavor.
Researching the varieties available in your area and reading reviews from other gardeners can help you make an informed decision. Also, consider the day length requirements of the onion variety, as this impacts bulb development. Long-day onions are best for northern climates, while short-day onions are better suited for southern regions.
Preparing the Soil for Planting
Proper soil preparation is essential for healthy red onion growth. Onions prefer well-drained soil that is rich in organic matter. They are relatively heavy feeders, so amending the soil with compost or other organic materials is highly recommended. The soil’s pH level also plays a crucial role in nutrient availability.
Soil Testing and Amendment
Before planting, it’s a good idea to test your soil’s pH and nutrient levels. This can be done using a soil testing kit or by sending a sample to a local agricultural extension office. Onions prefer a slightly acidic to neutral soil pH, ideally between 6.0 and 7.0. Adjust the pH as needed by adding lime to raise it or sulfur to lower it.
In addition to pH, soil testing will reveal any nutrient deficiencies. Onions benefit from a balanced supply of nitrogen, phosphorus, and potassium. Based on your soil test results, you can amend the soil with appropriate fertilizers or organic amendments.
Soil Preparation Steps
Follow these steps to prepare your soil for planting red onion sets:
- Clear the area: Remove any weeds, grass, rocks, and debris from the planting area.
- Loosen the soil: Use a garden fork or tiller to loosen the soil to a depth of at least 8-12 inches. This will improve drainage and allow the onion roots to spread easily.
- Add organic matter: Incorporate a generous amount of compost, well-rotted manure, or other organic matter into the soil. This will improve soil structure, drainage, and fertility. Aim for about 2-4 inches of organic matter.
- Amend the soil (if needed): Based on your soil test results, add any necessary amendments, such as lime or sulfur, to adjust the pH.
- Level the soil: Rake the soil surface to create a level planting bed.
Proper soil preparation sets the stage for healthy onion growth. Taking the time to prepare the soil correctly will significantly increase your chances of a successful harvest. (See Also: Revive Frozen Plants: A Guide on How to Revive a Plant That Froze)
Planting Red Onion Sets: Step-by-Step Guide
Planting red onion sets is a straightforward process. Following these steps will help you plant your sets correctly and give them the best chance to thrive. Timing is also important, as onions prefer cool weather for establishing themselves.
Timing Your Planting
The ideal time to plant red onion sets depends on your climate and the variety you are growing. In general, plant onion sets in early spring, as soon as the ground can be worked. This allows the onions to establish a strong root system before the heat of summer arrives.
In areas with mild winters, you may be able to plant onion sets in the fall for an early spring harvest. However, be aware that fall planting can be riskier, as the onions may be damaged by extreme cold or freezing temperatures. Consult your local agricultural extension office or experienced gardeners in your area for specific planting recommendations.
Planting Procedure
Follow these steps to plant your red onion sets:
- Spacing: Space the onion sets 4-6 inches apart in rows that are 12-18 inches apart. This spacing allows for adequate air circulation and prevents overcrowding.
- Depth: Plant the onion sets with the pointed end facing up. Gently push the sets into the soil, leaving the tip just barely exposed. Do not bury the sets too deeply; otherwise, the bulbs may not form properly.
- Watering: After planting, water the onion sets thoroughly. This will help settle the soil and encourage root growth.
- Mulching: Apply a layer of organic mulch, such as straw or shredded leaves, around the onion sets. Mulch helps retain moisture, suppress weeds, and regulate soil temperature.
Planting red onion sets correctly is crucial for ensuring a good harvest. Taking the time to plant them properly will pay off with healthy, flavorful onions.
Addressing Common Planting Issues
Even with careful planting, you may encounter some common issues. Knowing how to address these issues will help you maintain your onion crop.
- Bolting: If your onions bolt (flower) prematurely, it can be due to stress, such as inconsistent watering, extreme temperature fluctuations, or planting sets that are already sprouting. Remove the flower stalk to redirect energy to bulb growth.
- Pests: Onion thrips and onion maggots can damage onion plants. Inspect your plants regularly for signs of infestation and take appropriate action.
- Weeds: Weeds compete with onions for nutrients and water. Mulching and hand-weeding can help control weeds.
By addressing these issues promptly, you can protect your onion crop and maximize your harvest.
Caring for Your Red Onions Throughout the Growing Season
Once your red onion sets are planted, ongoing care is essential for healthy growth and a bountiful harvest. Regular watering, fertilization, and weed control are crucial for maximizing your yield. Proper care also helps prevent pests and diseases.
Watering and Irrigation
Onions need consistent moisture throughout the growing season, especially during bulb formation. Water your onions deeply and regularly, providing about 1 inch of water per week, either from rainfall or irrigation. Avoid letting the soil dry out, but also avoid overwatering, which can lead to rot.
The best time to water is in the morning, which allows the foliage to dry before nightfall, reducing the risk of fungal diseases. Consider using a soaker hose or drip irrigation system to deliver water directly to the roots, minimizing water loss through evaporation and reducing the risk of foliar diseases.
Fertilizing Your Onions
Onions are heavy feeders and benefit from regular fertilization. Start fertilizing your onions a few weeks after planting and continue throughout the growing season. Use a balanced fertilizer, such as a 10-10-10 or 14-14-14, or an organic fertilizer like compost tea or fish emulsion.
Follow the fertilizer instructions on the product label. Avoid over-fertilizing, as this can lead to excessive foliage growth at the expense of bulb development. Monitor your plants for signs of nutrient deficiencies, such as yellowing leaves, and adjust your fertilization schedule accordingly.
Weed Control
Weeds can compete with onions for nutrients, water, and sunlight. Regular weed control is essential for healthy onion growth. Mulching around your onions with organic materials, such as straw or shredded leaves, can help suppress weeds. (See Also: Planting Iris Bulbs: How Deep Should I Plant Iris Bulbs?)
Hand-weeding is also an effective method for removing weeds. Be careful not to disturb the onion roots when weeding. If you use a hoe, be careful not to damage the onion plants. Regular weed control will ensure that your onions receive the resources they need to thrive.
Pest and Disease Management
Although onions are relatively pest-resistant, they can be susceptible to certain pests and diseases. Regular monitoring and prompt action are crucial for preventing and controlling problems. Common onion pests include onion thrips and onion maggots. Common onion diseases include downy mildew and onion white rot.
Inspect your onion plants regularly for signs of pests or diseases. If you notice any problems, take appropriate action, such as using insecticidal soap, neem oil, or other organic pest control methods. Proper air circulation and good sanitation practices can help prevent diseases. Removing and disposing of any infected plant material can help prevent the spread of disease.
Harvesting and Storing Your Red Onions
Knowing when and how to harvest your red onions is essential for maximizing their flavor and storage life. Proper harvesting and curing techniques will ensure that you can enjoy your homegrown onions for months to come.
Determining When to Harvest
The best time to harvest red onions is when the tops begin to turn yellow and fall over. This usually happens in late summer or early fall, depending on your climate and the onion variety. The bulbs should have reached their mature size, and the necks should be soft.
You can gently dig up a few onions to check their size and maturity. If the bulbs are the desired size and the necks are soft, it’s time to harvest. Avoid harvesting onions during wet weather, as this can increase the risk of rot.
Harvesting Your Onions
When harvesting your red onions, use a garden fork or shovel to gently loosen the soil around the bulbs. Carefully lift the onions from the ground, taking care not to damage the bulbs. Handle the onions gently to avoid bruising them. Remove any excess soil from the bulbs.
After harvesting, allow the onions to cure before storing them. Curing is the process of drying the onions to help them store better. This process helps the outer layers dry and toughen, which prevents rot and extends the storage life of the onions.
Curing Your Onions
To cure your onions, place them in a well-ventilated area that is protected from direct sunlight and rain. A garage, shed, or covered porch is ideal. Spread the onions out in a single layer, allowing for good air circulation. Allow the onions to cure for 2-4 weeks, or until the necks are dry and the outer skins are papery.
During the curing process, turn the onions occasionally to ensure even drying. Once the onions are cured, trim the roots and cut the tops to about 1 inch long. Properly cured onions will store for several months.
Storing Your Red Onions
Proper storage is essential for preserving the quality and flavor of your red onions. Store your cured onions in a cool, dry, and dark place. The ideal storage temperature is between 32 and 40 degrees Fahrenheit, with a relative humidity of 65-70%.
A root cellar or a cool, dark basement is ideal for storing onions. You can also store onions in mesh bags, pantyhose, or onion sacks. Avoid storing onions near fruits, such as apples or pears, as they release ethylene gas, which can cause onions to sprout. Regularly check your stored onions for signs of spoilage and discard any that show signs of rot.
Addressing Common Problems During the Growing Season
Even with careful planning and diligent care, you may encounter problems during the growing season. Understanding common issues and how to address them will help ensure a successful harvest. (See Also: Unlocking Growth: How to Get a Plant to Root Successfully)
Pests and Diseases
Several pests and diseases can affect red onions. Common pests include onion thrips, onion maggots, and cutworms. Common diseases include downy mildew, purple blotch, and onion white rot.
Onion Thrips: These tiny insects feed on onion leaves, causing silvery streaks and distorted growth. Control them with insecticidal soap or neem oil.Onion Maggots: These larvae feed on the roots and bulbs, causing the plants to wilt and die. Use row covers or apply beneficial nematodes to control them.Downy Mildew: This fungal disease causes yellowing leaves and a fuzzy gray mold. Improve air circulation and treat with a fungicide.Purple Blotch: This fungal disease causes purple lesions on the leaves. Remove infected leaves and treat with a fungicide.Onion White Rot: This fungal disease causes a white, cottony growth on the bulbs. Remove infected plants and avoid planting onions in the same area for several years.
Environmental Challenges
Environmental factors can also impact onion growth. Drought, excessive rain, and extreme temperatures can stress the plants and reduce yields.
Drought: Water your onions regularly, especially during dry periods.Excessive Rain: Ensure that your soil has good drainage to prevent waterlogging.Extreme Temperatures: Mulch your onions to help regulate soil temperature. Provide shade during extreme heat.
Nutrient Deficiencies
Nutrient deficiencies can also affect onion growth. Yellowing leaves and stunted growth can indicate a lack of nutrients.
Nitrogen Deficiency: Causes yellowing of the older leaves. Fertilize with a nitrogen-rich fertilizer.Phosphorus Deficiency: Causes stunted growth and purplish leaves. Amend the soil with phosphorus-rich fertilizer.Potassium Deficiency: Causes yellowing and browning of leaf tips. Fertilize with a potassium-rich fertilizer.
Troubleshooting for Better Results
Even with the best care, problems can arise. Here are some troubleshooting tips to help you overcome common challenges and improve your harvest.
Yellowing Leaves
Yellowing leaves can be a sign of several issues. Nutrient deficiencies, such as lack of nitrogen, can cause yellowing. Overwatering or underwatering can also cause yellowing. Pests, like onion thrips, can cause yellowing and silvery streaks. Diseases, like downy mildew, can also cause yellowing. Check your watering schedule, soil nutrients, and look for pests or diseases.
Bulb Rotting
Bulb rotting is often caused by excess moisture and fungal infections. Ensure proper drainage to prevent waterlogging. Avoid overwatering. Space plants adequately for good air circulation. Remove and discard any infected plants immediately to prevent the spread of disease.
Failure to Form Bulbs
Failure to form bulbs can be due to several factors. Planting sets too deeply can prevent bulb formation. Insufficient sunlight can hinder bulb development. Inadequate fertilization can limit growth. Bolting (premature flowering) also redirects energy away from bulb formation. Ensure the sets are planted correctly, provide adequate sunlight, and fertilize appropriately.
Pest Infestation
Pest infestations can be a significant problem. Regularly inspect your plants for signs of pests, such as onion thrips or onion maggots. Use insecticidal soap, neem oil, or other organic pest control methods. Row covers can also help prevent pests from reaching your plants.
Conclusion: Enjoying Your Homegrown Red Onions
Planting red onion sets is a rewarding experience that allows you to enjoy fresh, flavorful onions straight from your garden. By following the steps outlined in this guide, you can successfully cultivate these versatile bulbs and reap the benefits of a bountiful harvest. From choosing the right sets and preparing your soil to proper planting, caring, and harvesting techniques, each step plays a crucial role in your success.
With a little patience and effort, you’ll be able to savor the delicious taste of homegrown red onions in your favorite dishes. Whether you’re a seasoned gardener or just starting out, planting red onion sets is a worthwhile endeavor. So, get ready to plant, grow, and enjoy the fruits (or rather, bulbs) of your labor. Happy gardening!
Recommended Products