Is the thought of decorating your Christmas tree with tinsel filling you with a mix of nostalgic joy and a touch of trepidation? We get it! Tinsel can be magical, transforming a simple fir into a shimmering spectacle. But getting that perfect, cascading effect without ending up with a tangled mess or a sparse, uneven look can feel like a daunting task.
Fear not! We’re here to guide you through the art of tinsel application, turning potential frustration into festive fun. Forget the days of wrestling with sticky strands or seeing your tinsel clump in odd places. By following our expert tips and techniques, you’ll be able to achieve a beautifully adorned tree that will be the envy of Santa himself.
Mastering the Art: How to Put Tinsel on a Tree for Maximum Sparkle
Ah, tinsel! That quintessential Christmas decoration that evokes childhood memories and promises a dazzling holiday display. Whether you prefer the traditional, delicate strands or the chunkier, more modern varieties, applying tinsel effectively is key to achieving that coveted festive glow. It’s not just about draping; it’s about creating a visual symphony of light and sparkle that dances across your tree. Let’s dive into the best methods to ensure your tinsel shines, not tangles.
Choosing Your Tinsel: A World of Sparkle Awaits
Before we even think about application, it’s crucial to understand the different types of tinsel available. Each offers a unique aesthetic and requires slightly different handling.
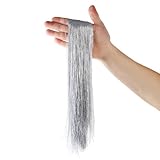
- Traditional Thin Tinsel (Needle Tinsel): This is the classic, fine strand tinsel that was popular for decades. It creates a delicate, shimmering effect and can be draped or sprinkled. It’s known for its ability to catch and reflect light beautifully, giving a very ‘sparkly’ appearance. However, it can be prone to tangling if not handled with care.
- Chunky Tinsel (Icicle Tinsel/Garland Tinsel): Wider and more substantial than traditional tinsel, this type often comes in longer strands or clusters. It offers a bolder statement and can mimic icicles or create a more dramatic, draped look. It’s generally easier to work with and less prone to tangling.
- Metallic Tinsel: This category encompasses various widths and styles, all focusing on a high-shine metallic finish. It can be made from plastic or foil and comes in a spectrum of colors, from classic silver and gold to vibrant reds, blues, and greens.
- Foil Tinsel: Often very lightweight and reflective, foil tinsel can be incredibly eye-catching. It might be more delicate and require a gentler touch during application.
- Glitter Tinsel: For those who want maximum sparkle, glitter tinsel is the way to go. It’s often a blend of tinsel and glitter, ensuring a very festive and eye-catching finish. Be warned, glitter can get everywhere!
Pro Tip: Consider the overall theme and style of your tree. If you have many delicate ornaments, thin tinsel might be the best complement. For a bolder, more contemporary look, chunky or metallic tinsel could be ideal.
Preparation Is Key: Setting the Stage for Success
Just like any decorating project, a little preparation goes a long way. Before you even open that bag of tinsel, take a few moments to get organized.
- Unpack Your Tree: If you’re using an artificial tree, ensure it’s fully assembled and fluffed. For a real tree, make sure it’s securely in its stand and any stray needles are cleared.
- Gather Your Supplies: Have your tinsel ready, along with any other decorations you plan to use. It’s also a good idea to have a step stool or ladder handy for reaching higher branches.
- Manage Your Tinsel: This is perhaps the most crucial preparatory step. Open your tinsel carefully. If it’s a tangled mess straight out of the package (which can happen!), gently try to untangle it. Sometimes, a quick shake or a few minutes of patient untangling can save you a lot of frustration later. For very stubborn tangles, you might consider separating strands or even cutting longer ones into more manageable lengths.
Why Prep Matters: A well-prepared tree and tinsel supply will make the entire decorating process smoother, more enjoyable, and ultimately, lead to a better-looking result. It prevents last-minute scrambling and allows you to focus on the creative aspect. (See Also: How Long Does It Take an Apple Tree to Produce Fruit?)
The Two Main Approaches to Tinsel Application
There are two primary schools of thought when it comes to applying tinsel: the ‘draping’ method and the ‘sprinkling’ method. Each has its own charm and works best with different types of tinsel and desired effects.
Method 1: The Draping Technique (for a Cascading Effect)
This is the classic method, perfect for creating that elegant, cascading look that tinsel is famous for. It works well with both thin and chunky tinsel, but is particularly effective with longer strands.
- Start from the Top: Begin at the very top of your tree, near the tree topper. You can secure the end of your tinsel strand by gently tucking it into a branch, or if you have a particularly long strand, you might tie a very loose knot around the tip of a branch.
- Work Your Way Down: Gently drape the tinsel strand from one branch to another, working your way down the tree. Think of it as creating a gentle, flowing waterfall of sparkle. Avoid pulling the tinsel too taut, as this can make it look stiff and unnatural. Allow it to hang loosely.
- Vary Your Drapes: Don’t be afraid to vary the length and depth of your drapes. Some strands can hang lower than others, creating visual interest. You can also weave the tinsel in and out of the branches, giving it more dimension.
- Spacing is Key: Aim for even spacing between your tinsel strands. Too much tinsel clustered together can look heavy, while too little can make the tree look sparse. Step back occasionally to assess the overall coverage.
- Layering for Depth: For a richer look, consider layering your tinsel. You can drape strands in different directions or overlap them slightly. This adds depth and complexity to the sparkle.
- Secure the Ends: Once you reach the bottom, gently tuck the end of the tinsel strand into a lower branch. If it’s a real tree, you might use a tiny piece of floral wire or a small ornament hook to secure it discreetly.
When to Use Draping: This method is ideal if you want a very traditional, elegant look. It’s also great for trees that are viewed from all sides, as it provides continuous sparkle.
Method 2: The Sprinkling Technique (for a ‘snowy’ Sparkle)
This method is perfect for achieving a more subtle, diffused sparkle, almost like a dusting of glitter or snow. It works exceptionally well with traditional thin tinsel and is great for filling in gaps or adding a touch of shimmer without overwhelming the tree.
- Start with a Small Section: Begin with a manageable section of your tree, perhaps a quarter or a third of it.
- Take a Small Handful of Tinsel: Grab a small amount of tinsel – don’t take too much at once, as this can lead to clumping.
- Gently ‘Sprinkle’ or ‘Flick’: Hold the tinsel above the branches and gently sprinkle or flick it onto the needles. The goal is to have individual strands or small clusters of strands land on various parts of the branches.
- Work in Sections: Move systematically around the tree, section by section. This ensures even coverage.
- Vary the Density: You can create areas of more intense sparkle and areas of lighter shimmer. This adds depth and visual interest.
- Use Your Fingers as Tools: Sometimes, gently running your fingers through the tinsel as you sprinkle can help break it up into smaller, more delicate pieces.
- Step Back and Assess: As with draping, it’s crucial to step back frequently to see how the tinsel is settling and if you need to add more in certain areas.
When to Use Sprinkling: This technique is fantastic for adding a subtle shimmer, filling in gaps between ornaments, or achieving a frosted, snowy effect. It’s also a good choice if you’re working with very fine tinsel that might tangle easily if draped too much.
Tips and Tricks for Perfect Tinsel Application
Regardless of the method you choose, a few extra tips can elevate your tinsel game from good to spectacular. (See Also: Mastering Flowcharts: How to Do Tree Diagrams Effectively)
- Work in Layers: Don’t try to do it all in one go. Apply a layer of tinsel, then add ornaments, then add another layer of tinsel if needed. This allows you to see how the tinsel interacts with your other decorations.
- Complement Your Ornaments: Consider the colors and styles of your ornaments. If you have many shiny ornaments, opt for a more subtle tinsel. If your ornaments are matte, a bolder tinsel can provide a beautiful contrast.
- Tinsel First, Then Ornaments (Sometimes): Many decorators find it easier to apply tinsel before hanging the bulk of their ornaments. This allows you to get the tinsel draped and positioned without having to work around delicate baubles. You can then strategically place ornaments to highlight or complement the tinsel.
- Don’t Overdo It: It’s a common mistake to think ‘more tinsel equals more sparkle’. Too much tinsel can actually overwhelm your tree and hide your beautiful ornaments. Aim for a balanced look.
- Consider the Lighting: Tinsel looks its best when illuminated. Position your tree near a light source or ensure your tree lights are on while you’re decorating to see the full effect.
- Dealing with Tangled Tinsel: If you encounter a particularly stubborn tangle, patience is your best friend. Sometimes, gently pulling apart sections or even using a pair of scissors to cut the tangle into smaller, manageable pieces is the quickest solution.
- Tinsel and Pets/Children: Be mindful if you have pets or small children. Some tinsel can be ingested and cause harm. Consider alternative decorations or ensure your tinsel is securely attached and out of reach if this is a concern.
- Experiment with Color: While silver and gold are timeless, don’t shy away from colored tinsel! Red, green, blue, or even multi-colored tinsel can add a unique and festive touch to your tree.
- Mixing Tinsel Types: For a truly dynamic look, you can even mix different types of tinsel. For example, you might use chunky tinsel for a base layer and then sprinkle thinner tinsel for added shimmer.
Common Tinsel Mistakes and How to Avoid Them
Even with the best intentions, some common pitfalls can arise when decorating with tinsel. Let’s address them:
| Mistake | Why it Happens | How to Avoid It |
|---|---|---|
| Clumping | Taking too much tinsel at once, or applying it too densely in one area. | Use smaller sections of tinsel. Sprinkle or drape gently. Step back often to check for even distribution. |
| Tangled Mess | Pulling too hard on the tinsel, not separating strands, or rough handling. | Untangle tinsel before starting. Be gentle. If it gets tangled, carefully try to separate or cut it. |
| Sparse Areas | Not enough tinsel applied, or uneven application. | Work in sections and step back frequently. Ensure even coverage by sprinkling or draping consistently. |
| Overwhelming the Tree | Using too much tinsel, which can hide ornaments. | Less is often more. Aim for balance. Tinsel should enhance, not dominate, your decorations. |
| Unnatural Look | Tinsel pulled too taut, or draped in rigid lines. | Allow tinsel to hang loosely. Vary the drape length and direction for a more organic feel. |
By being aware of these common issues, you can proactively avoid them and ensure a beautiful, sparkling tree.
Beyond the Tree: Tinsel in Your Holiday Decor
While the Christmas tree is the star, tinsel can add a touch of magic to other holiday decorations too! Consider these ideas:
- Wreaths: Weave thin strands of tinsel through your wreath for an extra festive shimmer.
- Garlands: Drape tinsel along with your existing garlands for added sparkle.
- Mantel Displays: Lightly sprinkle tinsel over your mantelpiece decorations for a touch of holiday magic.
- Gift Wrapping: Use small pieces of tinsel as an embellishment on gift bows or to add a festive flair to plain wrapping paper.
Safety Note: Always be cautious when using tinsel around pets and young children, as some types can be harmful if ingested. Ensure it’s securely attached and out of reach.
Real vs. Artificial Trees: Tinsel Considerations
Does the type of tree affect how you put tinsel on?
Real Trees:
Real trees have natural variations in their branches, which can make tinsel application look very organic. The needles themselves can help hold tinsel in place. However, be mindful of sap and potential needle drop. You might find it easier to attach tinsel by tucking it into branches or using discreet ornament hooks. Ensure your tinsel doesn’t interfere with watering the tree. (See Also: How to Draw a Plam Tree: How to Draw a Palm Tree: Easy…)
Artificial Trees:
Artificial trees offer a consistent structure. The plastic or PVC needles can sometimes be a bit slippery, so securing the tinsel well at the beginning and end of each strand is important. You have more control over placement, which can be beneficial for achieving a very precise look. Some artificial trees have specific hooks or slots that can help hold tinsel in place.
The Final Sparkle: Stepping Back and Admiring Your Work
Once you’ve finished applying your tinsel, take a moment. Turn off the overhead lights and let your tree lights shine. Step back, walk around it, and admire your handiwork. The goal is a tree that twinkles and glows, creating that magical holiday atmosphere you’ve been dreaming of. If you see any areas that need a little more sparkle or a slight adjustment, now is the time to make those final touches.
Conclusion
Putting tinsel on your Christmas tree doesn’t have to be a chore; it’s an opportunity to create a dazzling centerpiece for your holiday celebrations. By choosing the right tinsel, preparing your space, and employing either the draping or sprinkling technique, you can achieve a beautifully balanced and sparkling effect. Remember to work in layers, step back often to assess your progress, and don’t be afraid to experiment to make your tree uniquely yours. Happy decorating!
Recommended Products