Are you a budding gardener eager to witness the miracle of life unfold? The journey from a tiny seed to a vibrant plant is a truly rewarding experience, but patience is key. One of the most common questions for new gardeners is, ‘How long does it take for a plant to germinate?’ The answer, as with many things in gardening, isn’t a simple one.
Germination times vary dramatically depending on the plant species, environmental conditions, and seed quality. Understanding the factors that influence germination can significantly improve your success rate and allow you to plan your gardening endeavors effectively. This comprehensive guide will delve into the intricacies of seed germination, providing you with the knowledge needed to nurture your seeds into flourishing plants.
We’ll explore the various factors influencing germination, from the type of seed to the optimal growing conditions. You’ll learn how to create the ideal environment for your seeds to thrive, troubleshoot common problems, and ultimately, experience the joy of watching your garden come to life. Let’s get started on unlocking the secrets of successful seed germination!
Understanding Seed Germination: The Basics
Seed germination is the process by which a seed develops into a seedling. It’s a complex process involving several crucial steps. Understanding these steps provides valuable insights into what the seed needs to thrive.
The process begins when a seed absorbs water, a process known as imbibition. This triggers a series of metabolic activities within the seed. Enzymes are activated, breaking down stored food reserves like starch, proteins, and fats. These nutrients provide the energy and building blocks the embryo needs to grow.
The Stages of Germination
Germination can be broken down into several distinct stages:
- Imbibition: The seed absorbs water through its seed coat, causing it to swell.
- Activation of Enzymes: Water activates enzymes, which break down stored food reserves.
- Radicle Emergence: The radicle, which will become the root, emerges from the seed.
- Shoot Emergence: The plumule, which will become the shoot, emerges from the seed.
- Seedling Development: The seedling develops its first true leaves and begins photosynthesis.
What Is a Seed’s Anatomy?
Before diving deeper, it’s helpful to understand the basic anatomy of a seed. Seeds are remarkable packages of life, containing all the necessary components for a new plant.
- Seed Coat: The outer protective layer that shields the embryo from damage and prevents water loss.
- Embryo: The tiny, undeveloped plant inside the seed, consisting of the radicle (the embryonic root), the plumule (the embryonic shoot), and the cotyledons (seed leaves).
- Endosperm: The food reserve that nourishes the embryo during germination.
Factors Influencing Germination Time
Several factors play a crucial role in determining how long it takes for a plant to germinate. Understanding these factors is essential for successful seed starting.
Seed Type: Species Matters
One of the most significant factors is the type of seed. Different plant species have evolved with varying germination strategies. This influences the time it takes for a seed to sprout.
Some seeds, like lettuce and radishes, germinate quickly, often within a few days to a week. Others, like parsley and carrots, take longer, sometimes several weeks. Certain seeds, like some perennials, may even require a period of cold stratification, a chilling period, before they’ll germinate.
Here’s a table illustrating the average germination times for some common plants:
| Plant | Germination Time (Days) |
|---|---|
| Basil | 5-10 |
| Beans | 7-10 |
| Carrots | 14-21 |
| Lettuce | 7-10 |
| Marigolds | 5-7 |
| Peppers | 7-21 |
| Tomatoes | 7-14 |
Temperature: Finding the Sweet Spot
Temperature is a critical environmental factor influencing germination. Each seed species has an optimal temperature range for germination.
Generally, warm-season crops like tomatoes and peppers require warmer soil temperatures (70-85°F or 21-29°C) for optimal germination. Cool-season crops, such as lettuce and spinach, prefer cooler temperatures (55-65°F or 13-18°C).
Too cold, and the germination process slows down or stops. Too hot, and the seed may not germinate or could be damaged. Using a soil thermometer is helpful to monitor the temperature.
Moisture: The Importance of Hydration
Water is essential for seed germination. It’s the catalyst that initiates the metabolic processes within the seed. Without adequate moisture, the seed cannot swell and the embryo cannot activate. (See Also: Learn How Do I Plant Onion Sets for a Bountiful Harvest)
However, too much water can also be detrimental. Overwatering can lead to fungal diseases and rot, preventing germination. The soil should be consistently moist but not waterlogged. Proper drainage is crucial.
Oxygen: Breathing Room for Growth
Seeds, like all living organisms, need oxygen for respiration. Respiration provides the energy needed for germination. Seeds take in oxygen and release carbon dioxide during this process.
The soil should be well-aerated to allow oxygen to reach the seeds. Compacted soil can restrict oxygen flow, hindering germination. Avoid overwatering, which can displace oxygen in the soil.
Light: A Helping Hand (or Not)
While often associated with plant growth, light doesn’t always directly influence germination. Some seeds require light to germinate (photoblastic seeds), while others germinate best in darkness (scotoblastic seeds).
Lettuce seeds, for example, often need light to germinate, so they are often surface-sown. Many other seeds, like tomatoes and peppers, are not light-dependent and can be sown deeper in the soil. Always check the seed packet for specific instructions.
Seed Quality and Age: Freshness Matters
The quality and age of the seed significantly impact germination success. Fresh, high-quality seeds have a higher germination rate. Older seeds may have reduced viability.
Seed viability decreases over time due to various factors, including improper storage conditions. Always purchase seeds from reputable sources and store them properly in a cool, dry place. Conduct a germination test before sowing seeds that are a few years old to assess their viability.
Preparing for Germination: Setting the Stage for Success
Proper preparation is key to successful seed germination. Creating the right environment and providing the necessary care can greatly improve your chances of success.
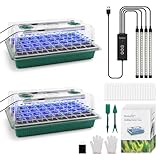
Choosing the Right Growing Medium
The growing medium provides the foundation for germination. It provides support, retains moisture, and allows for drainage. There are various options available, each with its advantages and disadvantages.
Seed starting mixes are specially formulated for germination. They are typically sterile, well-draining, and provide good aeration. Other options include peat moss, perlite, vermiculite, and coco coir. Avoid using garden soil directly, as it can harbor diseases and pests.
Sowing Seeds: The Right Way
The method of sowing seeds depends on the seed type and the plant’s needs. Refer to the seed packet for specific instructions on depth, spacing, and light requirements.
Generally, small seeds are surface-sown or lightly covered with a thin layer of soil. Larger seeds are sown deeper. Water the soil gently after sowing to ensure good contact between the seed and the soil. Avoid disturbing the seeds.
Providing the Right Environment
Creating the correct environment involves providing the right temperature, moisture, and light. Use a heat mat to maintain the ideal temperature for the seeds.
Cover the seed tray or container with a humidity dome or plastic wrap to retain moisture. Place the container in a location that receives adequate light. Monitor the soil moisture regularly and water when needed. (See Also: How Much Weed Do You Get Off 1 Plant? Yield Guide)
Watering Techniques: Gentle Hydration
Proper watering is crucial during germination. Overwatering can lead to rot, while underwatering can prevent germination. Use a gentle watering technique to avoid disturbing the seeds.
A spray bottle is ideal for providing gentle moisture. Water from the bottom by placing the container in a tray of water, allowing the soil to absorb the water from the bottom, is another technique. Avoid watering from above with a heavy stream, which can dislodge the seeds.
Troubleshooting Common Germination Problems
Even with careful planning, problems can arise during germination. Understanding these issues can help you diagnose and address them effectively.
Failure to Germinate: Why Didn’t They Sprout?
Several factors can cause seeds not to germinate. Identifying the cause is the first step in troubleshooting.
Common causes include: old or poor-quality seeds, incorrect temperature, insufficient moisture, overwatering, poor soil aeration, fungal diseases, and pests. Check the seed packet for specific requirements and adjust your approach accordingly.
Damping-Off: A Fungal Threat
Damping-off is a common fungal disease that affects seedlings, particularly young ones. It can quickly wipe out entire batches of seedlings.
The symptoms include the sudden collapse of seedlings at the soil line. The stems become soft and mushy. Damping-off is often caused by overwatering, poor air circulation, and using contaminated soil. Preventative measures include using sterile seed starting mix, providing good air circulation, and avoiding overwatering.
Leggy Seedlings: Stretched for Light
Leggy seedlings are seedlings that have grown tall and spindly with weak stems. This is often caused by insufficient light.
Seedlings stretch toward the light source, resulting in weak growth. Provide adequate light by using grow lights or placing the seedlings in a sunny location. Improve air circulation to strengthen the stems.
Accelerating Germination: Tips and Tricks
While patience is essential, there are ways to potentially speed up the germination process. These techniques are not always necessary, but they can be helpful in certain situations.
Seed Scarification: Breaking the Coat
Scarification involves breaking or softening the seed coat to allow water to penetrate more easily. This can be helpful for seeds with a hard seed coat.
Methods include gently rubbing the seeds with sandpaper, nicking the seed coat with a knife, or soaking the seeds in warm water. Be careful not to damage the embryo during scarification.
Seed Stratification: Mimicking Winter
Stratification involves exposing seeds to a period of cold and moist conditions. This mimics the natural winter conditions that some seeds need to germinate.
Place the seeds in a damp paper towel inside a plastic bag and refrigerate them for several weeks. Check the seed packet for specific stratification requirements. Some seeds require this treatment. (See Also: How to Plant Peony Bulbs in Pots: A Complete Guide)
Soaking Seeds: A Pre-Sowing Soak
Soaking seeds in water before sowing can help soften the seed coat and initiate the germination process. This is particularly useful for seeds with a thick seed coat.
Soak the seeds in warm water for several hours or overnight before sowing. Avoid soaking for too long, as this can damage the seeds. Check the seed packet for guidance.
Germination Aftercare: Nurturing Your Seedlings
Once your seeds have germinated, caring for the seedlings is crucial for their continued growth and development.
Light Requirements: Providing the Right Exposure
Seedlings need adequate light to photosynthesize and grow. Insufficient light can lead to leggy growth.
Place the seedlings in a sunny location or use grow lights. Gradually acclimate the seedlings to outdoor conditions (hardening off) before transplanting them into the garden.
Watering and Fertilizing: Keeping Them Healthy
Water the seedlings regularly, keeping the soil consistently moist but not waterlogged. Fertilize the seedlings with a diluted fertilizer solution to provide essential nutrients.
Follow the fertilizer instructions carefully, as over-fertilizing can damage the seedlings. Monitor the seedlings for signs of nutrient deficiencies or other problems.
Transplanting Seedlings: Moving to the Garden
Transplanting seedlings into the garden is a significant milestone. This is when the seedlings can truly thrive and grow into mature plants.
Harden off the seedlings before transplanting them outdoors. Choose a suitable location in the garden with the correct sunlight exposure and soil conditions. Dig a hole slightly larger than the seedling’s root ball and gently plant the seedling. Water well after transplanting.
The Joy of Gardening: Patience Rewarded
Watching seeds germinate and grow is a rewarding experience. It’s a reminder of the power of nature and the potential for life. The entire process requires patience, observation, and a willingness to learn.
By understanding the factors that influence germination and providing the right care, you can significantly increase your chances of success. Embrace the learning process, experiment with different techniques, and enjoy the journey.
Gardening is a journey of discovery. Every seed holds the promise of a beautiful plant. Enjoy the process and the rewards that come with it.
Recommended Products